How to upload receipts
After the customer places an order in the online store, if the customer chooses an external payment method such as ATM or bank transfer, the merchant can confirm whether the customer's order has been paid through the payment voucher uploaded by the customer.
After a customer places an order in the online store using an external payment method, the order is in a pending state.
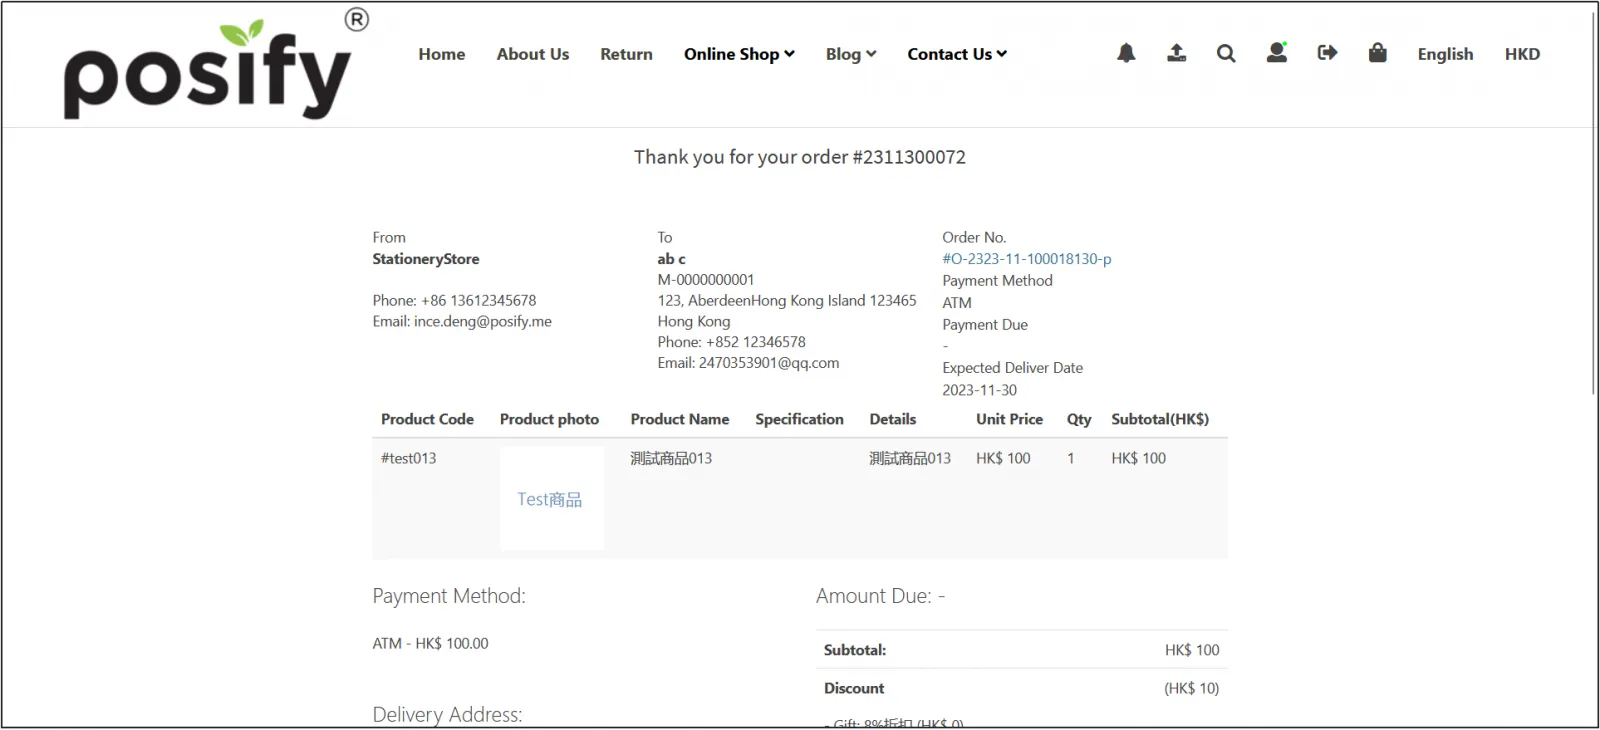
The customer transfers the money (transfer) of the order to the merchant, and takes a screenshot of the successful transfer (transfer) interfacere![]() turns to the online store, (if you do not log in as a member, you need to log in first)
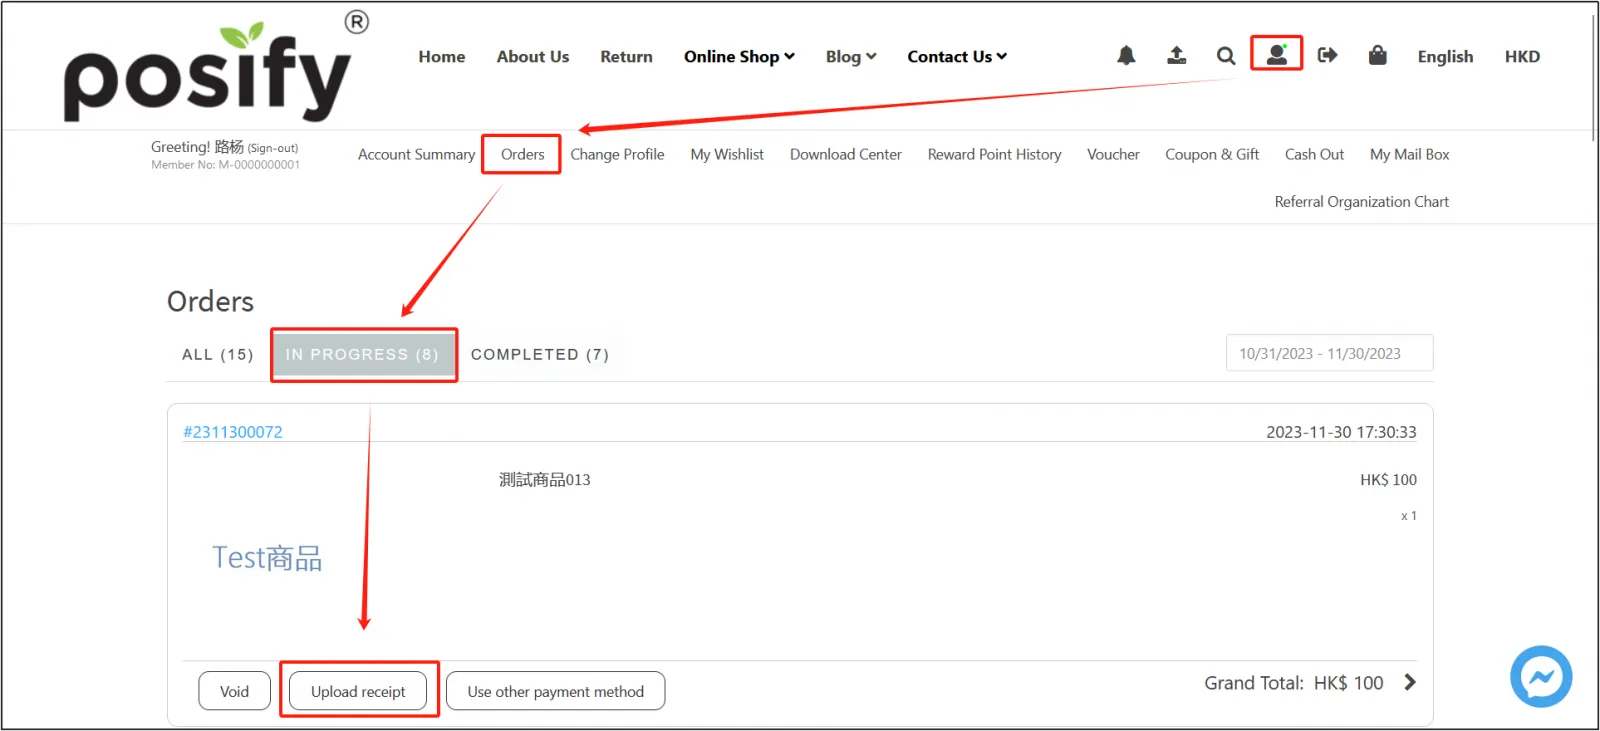
turns to the online store, (if you do not log in as a member, you need to log in first)![]() click the villain icon to enter the personal center
click the villain icon to enter the personal center![]() click My Orders
click My Orders![]() find the order to be paid just in [In progress]
find the order to be paid just in [In progress]![]() click [Upload Receipt].
click [Upload Receipt].
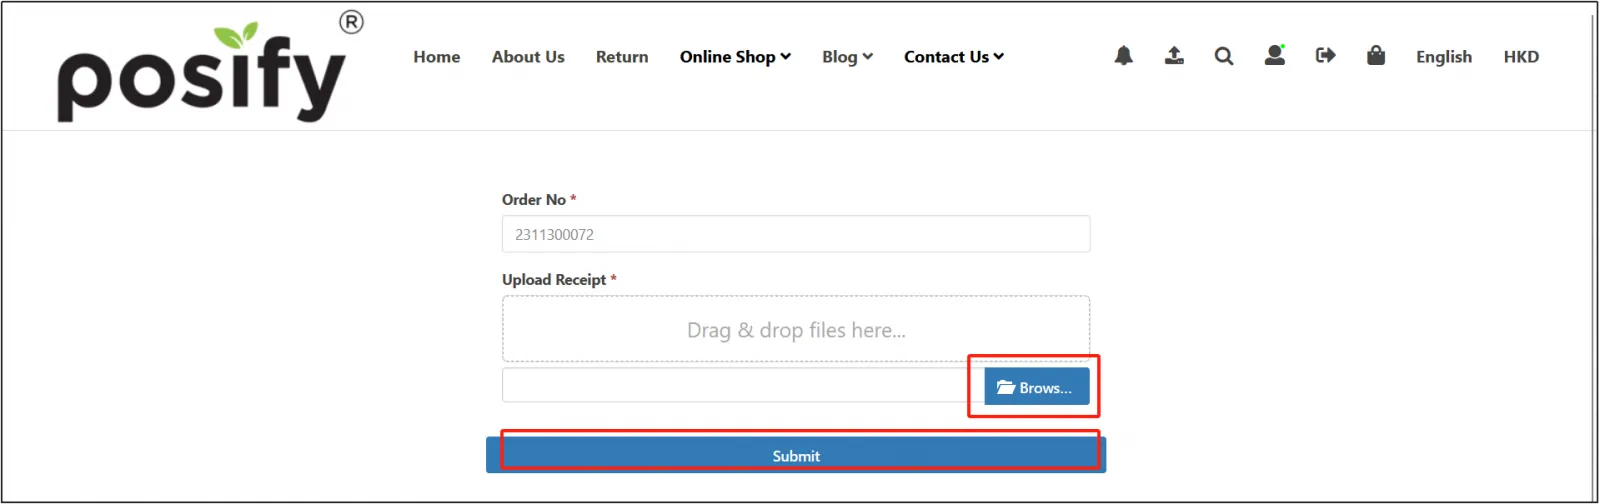
[Order Number] has been automatically filled in with the number of the order you just made, click [Select File...]![]() select the screenshot of the successful transfer (transfer) that you have saved
select the screenshot of the successful transfer (transfer) that you have saved![]() click [Submit].
click [Submit].
After the upload is successful, the merchant will light up [Attachments] in the [Show/Hide Column] in the CMS-Orders-Sales Overview.
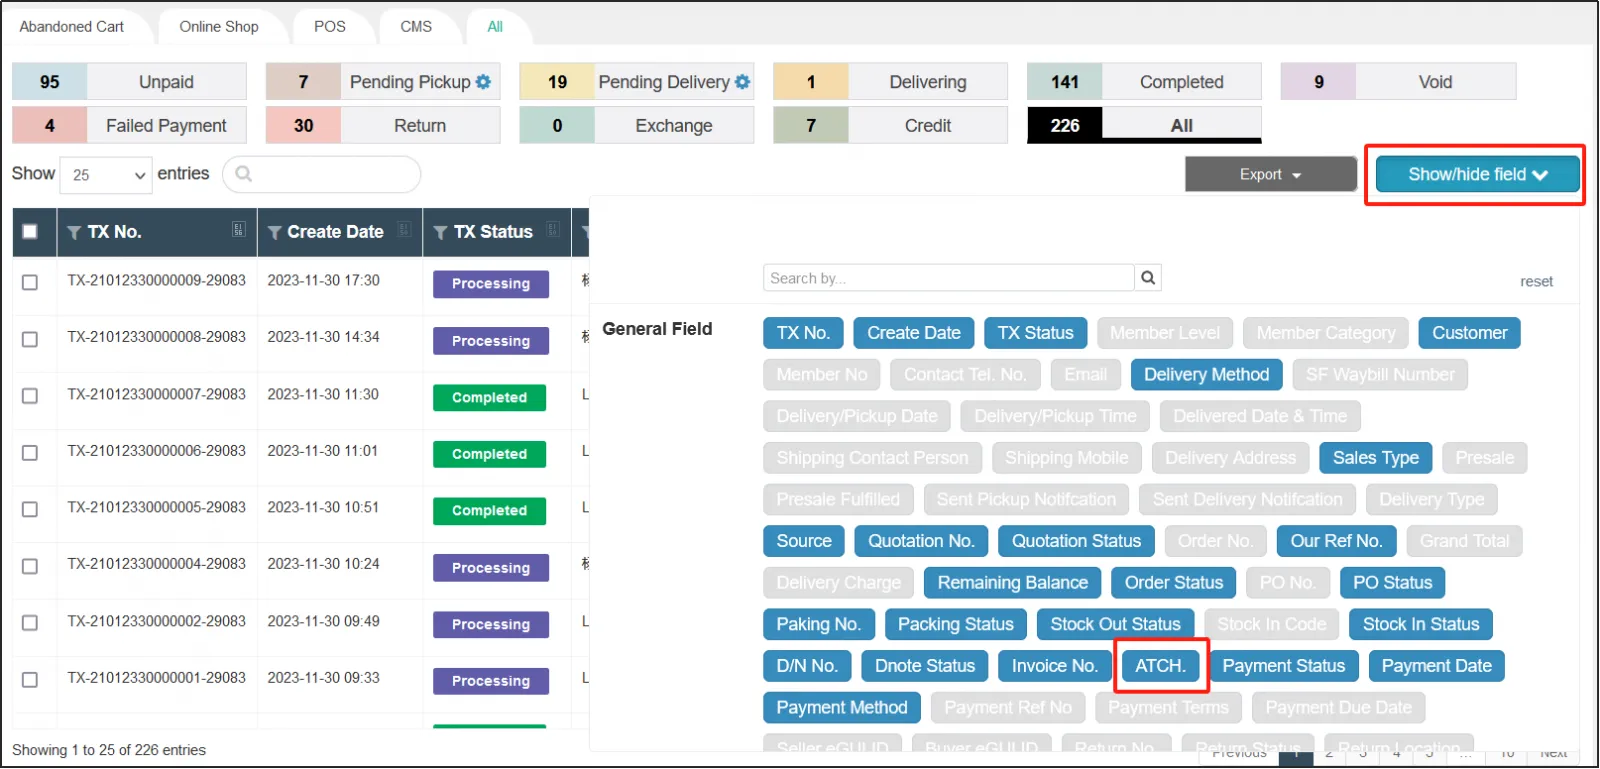
You can see the attachments uploaded by the customer under the [Attachments] column of the order, and click to view them.
![Tab[All]](https://cdn21.posify.me/docs/posifysgweb/files/images/playbook/Upload%20receipts/%E5%9B%BE%E7%89%8722.png?imageMogr2/format/webp)
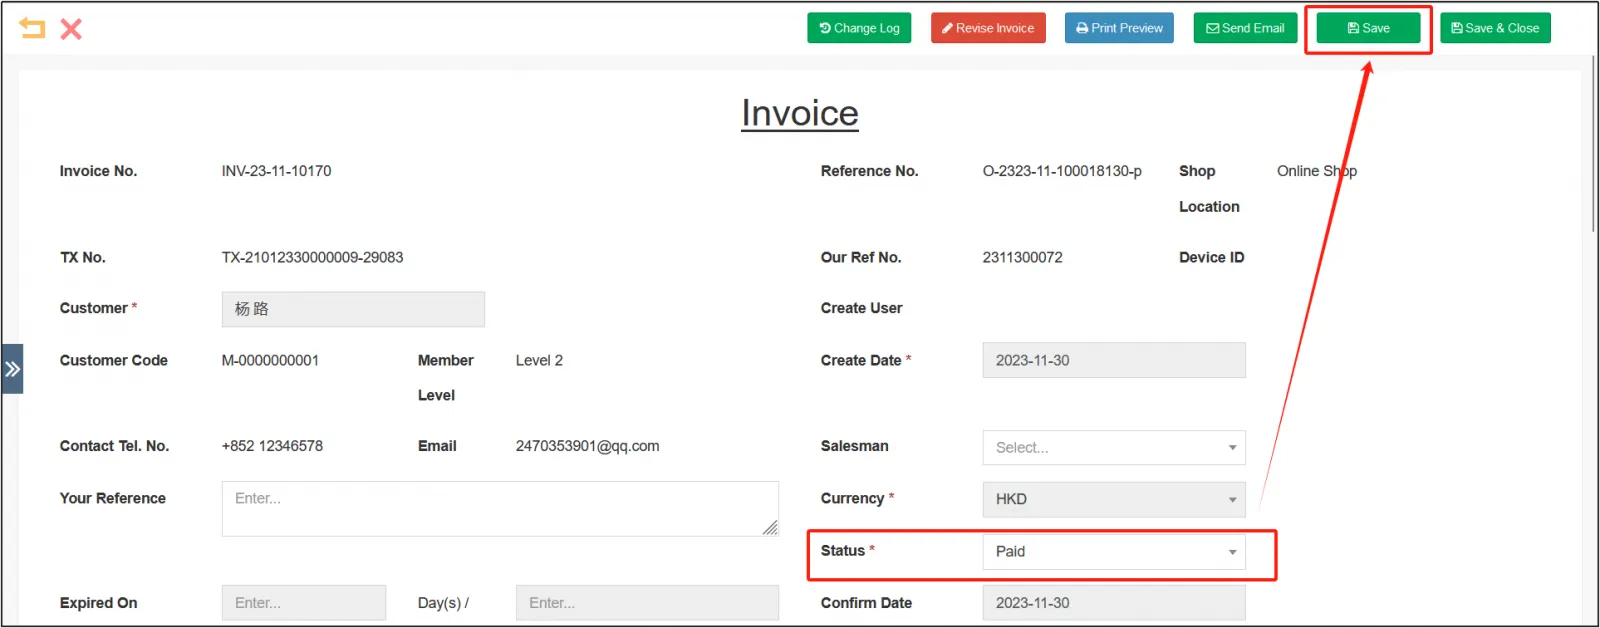
Alternatively, click the invoice for the order in the [Invoice Number] column to enter the invoice details page.
![Tab[All]](https://cdn21.posify.me/docs/posifysgweb/files/images/playbook/Upload%20receipts/%E5%9B%BE%E7%89%8723.png?imageMogr2/format/webp)
After opening the invoice details page, scroll down, and you can also view the photos or screenshots uploaded by the customer in the [Attachments] at the bottom.
![[Annex] column](https://cdn21.posify.me/docs/posifysgweb/files/images/playbook/Upload%20receipts/%E5%9B%BE%E7%89%8724.png?imageMogr2/format/webp)
Double-check that the information on the payment voucher is correct and that the payment has been received. After confirming that everything is correct, change the invoice status to Receivedclick [Save].
Upload receipt notifications
With upload notifications enabled, merchants can receive real-time notifications and verify receipts after customers upload receipts, arrange follow-up deliveries, and more.
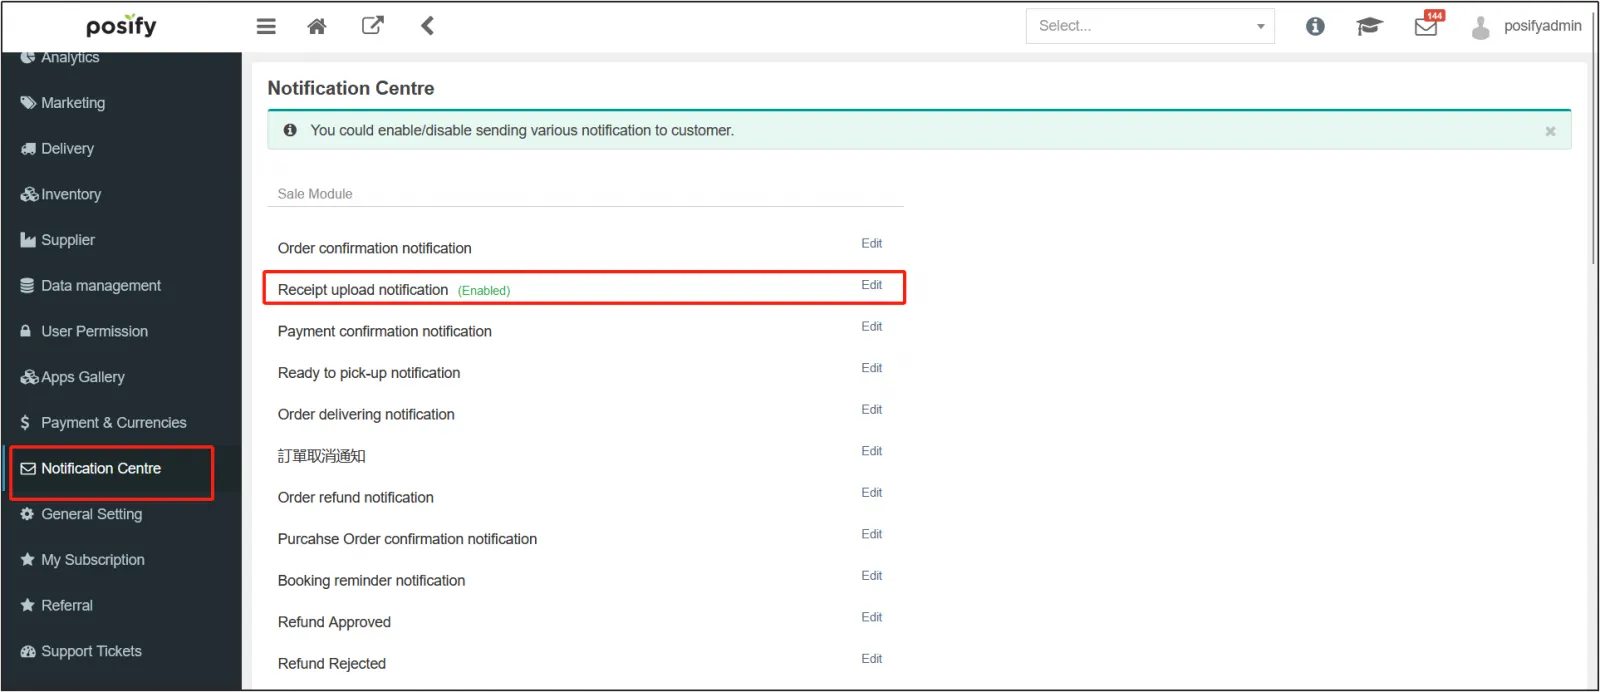
Open the CMS![]() click Notification Management
click Notification Management![]() find Receipt Upload Notification
find Receipt Upload Notification![]() click Edit on the right to set the Receipt Upload Notification.
click Edit on the right to set the Receipt Upload Notification.
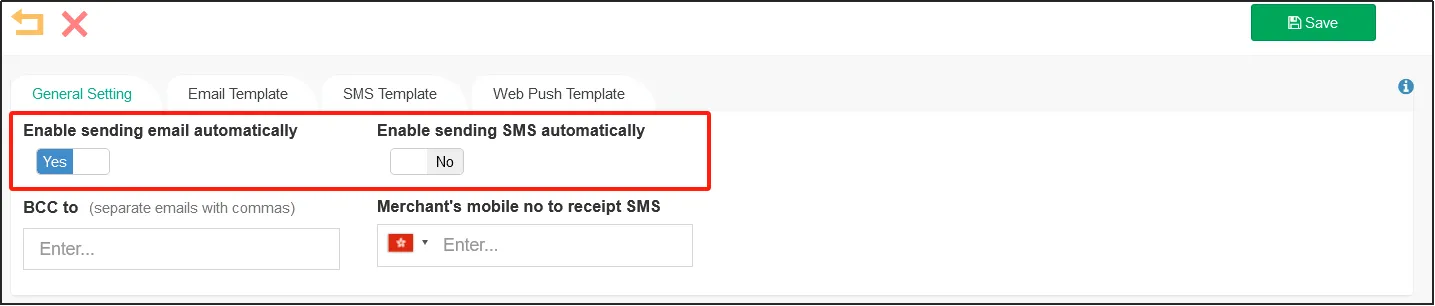
[Enable automatic email notifications] to activate receipt upload notifications and notify merchants by email, while [Enable automatic SMS notifications] is to notify you by SMS. Once enabled, you can enter the email address/mobile number where the merchant accepts email/SMS below.
After the settings are complete, click "Save" in the upper right corner.
Click the tab template on the back page to set the corresponding notification template.