How to set up a coupon
Merchants distribute coupons in various ways, and when a customer's order meets the conditions of the coupon, he or she can use the coupon to get a discount.
Open CMSClick to Marketing
Click on Coupon
Click on [Add] to add a new coupon

On the edit page, the tabs are generally filled in with the coupon information.
Promotional name: The name of the coupon is generally a brief summary of the conditions and benefits.
Content: Detailed description of the contents of the coupon.
Terms and Conditions: A detailed description of the terms and conditions of use.
Code: The number of the coupon.
Enable Promotion: The coupon will only be valid after activation, if not, the coupon will not be valid.
Expiry Date: This is the range of time that the coupon will be valid, including the start time and the end time. If [No End Time] is checked, the coupon will be valid for a long time.
Setting Store: You can set whether it will work in online store and physical store, and in which physical stores it will work.
Set Payment Method: The payment method to which the coupon applies.
Usable Times: The number of times a coupon (one coupon serial number/one coupon 2D code) can be used. If "1" is entered, the coupon can only be used once. If [Unlimited Use] is checked, a coupon can be used unlimitedly.
Set up a unique serial number: each coupon has a unique serial number (2D code) after activation, enter the number of unique serial numbers, for example, enter "1000" in the following picture, which is equivalent to generating 1,000 coupons, and the number of times it can be used is "1", that is, there are a total of 1,000 coupons in the offer, and each one can be used 1 time.

As shown in the picture below, if you do not enable [Set Exclusive Serial Number], you need to manually enter a coupon serial number, and there is only one serial number for that coupon. At this time, if you enter "100" for [Usable Times], it means that there is only one serial number for this offer, and this number can be used 100 times.

Will this promotion repeat at certain times? No: Once enabled, you can set the time of the week that the coupon can be used, to the nearest half hour. As shown in the image below, if you set the coupon as a Weekend Special, then you can select all day Saturday and Sunday. The coupon will then only be available for use on every Saturday and Sunday within the date range of the preceding [Valid Dates].

Click on the tab rules to set the conditions of the coupon as well as the offer.
Select a promotion example or click [Add Rule Layer] to get started.
The following are examples of various promotions.

Conditions can be chosen to be unconditional, triggered by a specific behavior, or triggered by a purchase condition.
Triggered by a specific behavior i.e. scanning the member's QR code.

If you choose to trigger a coupon with a purchase condition, first delineate a range of items by selecting items and excluding them.

Purchase conditions can be set in four different ways.
Within the range of products just selected, buy up to no less than the amount of X, buy up to no less than the quantity of X, buy up to the amount of X, buy up to the amount of X, and buy up to the amount of X.
Select one of them and enter X in the input box at the end.

Click [Add More Conditions] to add conditions to the layer, you need to fulfill all the conditions of the layer to trigger the layer offer. (The following picture shows the current layer 1)

There are seven types of offers, including fixed amount discounts, conditional discounts, percentage discounts, specified selling prices, free gifts/exchanges, bonus points/purchase money rewards, free coupons, and free shipping.

Select Fixed Amount Discount and enter the amount in the input box.
Enable [Set other currencies manually?] You can set the amount of discount for other currencies.

Select Conditional Discounts, fill in the discount and the discount limit. In the shopping cart, items that meet the conditions on the left are eligible for the set discount, but the total amount of the discount does not exceed the discount limit.
Note: Conditional discounts are only available on items that meet the conditions on the left. If an item is not in the range of the conditions on the left, it will not receive the discount regardless of how it is set up.

There are four types of discount ranges: all products, excluding selected items, selected items only, and itemized discounts.

All Products means that discounts are available on all items that fulfill the conditions on the left.
Excluding specified items means that after excluding the first few items in the price or shopping cart order, the remaining items will be eligible for the discount. As shown in the image below, this means that the remaining items will receive a discount if the three highest priced items are excluded from the list of items that meet the criteria on the left.

Include Only Specified Items means that only the xth through nth items, sorted by price or shopping cart order, are eligible for the discount. As shown in the image below, this means that of the items that meet the criteria on the left, the 1st through 3rd items are eligible for discounts, sorted by price from lowest to highest.

Assigning a discount item by item means specifying the first x items to receive a discount, and you can set the discount each item receives individually.

To select a percentage discount, choose the applicable customer range, the range of products to be offered, the discount calculation method, the discount and the discount ceiling.

The customer scope refers to which customers are eligible for the offer, e.g., certain types of members or visitors.
You can select either the entire range of products or the specified products. If you select the specified products, you need to define the range of products by [Selected Items] and [Excluded Items].

Discounts can be calculated either at retail price or at discounted price, retail price means that the percentage discount is calculated using the original price, while discounted price means that the discounted price is calculated using the original price. If the coupon has the highest priority, the original price will actually be used even if the discounted price is selected.
Finally, fill in the Percentage Discount and Discounted Mass Benefit Amount Limit.
You can set the specify price of each item in the shopping cart or the total price of the items in the shopping cart that satisfy the conditions on the left when the conditions on the left are satisfied.

By selecting a gift/exchange, the customer can receive a gift or discount on one or more items after the conditions on the left have been met. The product(s) to be gifted or redeemed do not need to be within the scope of the conditions on the left.
The diagram [Enjoy up to x items (maximum n)] means that you can get up to x free or discounted items by meeting the conditions on the left, and if you meet the conditions on the left several times, you can get free or discounted items repeatedly, but you can get up to n items in one order.
Note: n should be greater than x. n is the number of free or discounted items received, not the number of times a free or discounted item was received.
Delineate the scope of the giveaway or discounted item by selecting items and excluding items.
You can choose a fixed amount discount, a percentage discount, or a specified price. If the specified price is 0, it is a free gift.

Choose Extra Points/Purchase Money Bonus, you can choose to give customers extra fixed points, multiple points, fixed purchase money or multiple purchase money.
Fixed points or fixed shopping fees refer to x points or shopping fees directly given to customers after meeting the conditions on the left.
Multiple integral or multiple shopping bonus refers to multiplying the points or shopping bonus that customers could have obtained by x times after meeting the conditions on the left.

Choose to give away coupons, that is, after meeting the conditions on the left, give away coupons to customers.
Select the quantity and coupon to be gifted. If the coupon does not have an expiration date, you can enable [Unlimited] on the right side of [Coupon Validity]. If you need to set an expiration date, do not enable [Unlimited] and enter the validity period of the coupon (in days).
Note: If the expiration date set by the coupon itself is earlier than the expiration date set in the promotional activity, then the expiration date set by the coupon itself shall prevail.

Choose free shipping, which means that after meeting the conditions on the left, the customer's shipping fee is waived. The scope of free shipping can be all or individual regions.

Click [Add More Discounts] to add discounts.

Clicking on the [Add Rule Layer] in the lower right corner can achieve multi-level discounts. Pay attention to the setting of discounts from large to small. Generally speaking, the first layer of conditions is the most difficult to meet, and the discount intensity is also the greatest. When judging, judge from top to bottom. If the conditions of a certain layer are met, the discount of that layer will be obtained, without continuing to judge whether the conditions of subsequent layers can be met.

For example, if you set a product to buy three get one free or buy five get three free, you can set it as shown in the following figure. Firstly, check if you have purchased enough five pens. If available, give three pens as a gift. That's it. If you haven't bought enough five pens yet, continue to judge and see if you have bought enough three pens, and so on.


Click on the customer group tab to set the applicable customer group for this coupon.
If the coupon is applicable to all customers, simply select all customers from the included list.
If there are relatively few applicable customers, then you can choose the applicable customer group from the included list.
If there are many applicable customers and few not applicable customers, you can select all customers in the include list and then select the not applicable customers in the exclude list. This way, the actual applicable customer group will be all customers minus the not applicable customers.

Click on the coupon image on the tab Click on the [Browse...] in the bottom right corner to add a coupon image.

Click on the relevant products on the tab, and the products selected in the conditions or discounts in the rules will be displayed here (if all products/orders are selected, they will not be displayed).

Click [Save].

Attention: As the coupon cannot be modified after being saved, please check and confirm that the coupon information and settings filled in are correct before clicking [Save].
Click on the right side of the newly added coupon in the coupon list, open the editing page again.

If you choose not to [set exclusive serial number], then click [generate coupon] to proceed.

If [Set Exclusive Serial Number] is selected, you can choose to click [Generate Coupon] or [Upload Coupon Serial Number]. If you choose [Generate Coupon], the system will generate n random serial numbers (n is the number of exclusive serial numbers entered during creation).
If you choose [Upload Coupon Serial Number], you can customize your exclusive serial number by uploading it to Excel. The format example of Excel is as follows. Enter n exclusive serial numbers in order in the first column.

In the coupon interface, you can click to download the serial number Excel or QR code of the coupon for distribution to customers.

How customers use coupons
Using coupons in the Online Store
The customer enters the product details page in the Online Store add the product to their shopping cart and settle the payment.

Enter the serial number of the couponclick [Use].

The serial number of the coupon is displayed below, indicating successful use of the coupon.

After confirming other shopping information, click [Confirm Order] and make payment.
If you want to use coupons under a member's name, you can use your membership and select the coupons under their name.
Open POSAdd the items to be purchased to the shopping cart
Click on [Visitors] below.

Search for members by entering customer name, phone number, customer number, etc. in the input box, or by scanning the member QR code.Click on the member to open their information page.

Click on the [Coupon] below on the member information pageClick to select the coupon you want to use.

Click [Use Now].

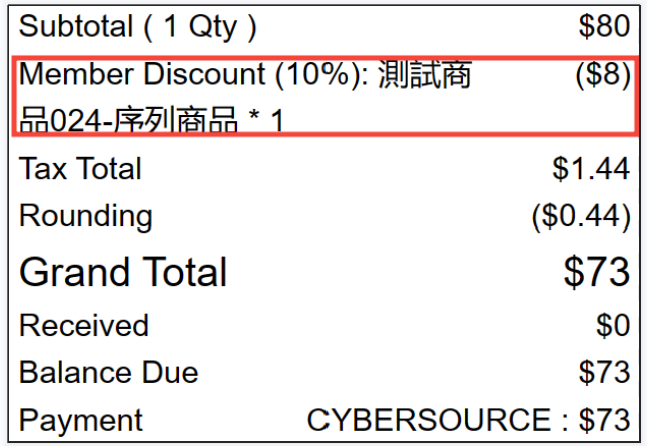
You can see that the discount coupon has been applied.

Make other settings and settle the account.
If the coupon is not under the member's name, you can click on [Discount] below.

Enter the coupon serial number in the input box, or click on the scan icon on the right to scan the QR code of the coupon, depending on whether the merchant uses the serial number or QR code when distributing coupons to customers.

Similarly, click [Use Now] to use the coupon.

How to deactivate/delete coupons
In the coupon list, click the button under the [enabled] column to change it to no to deactivate the coupon.

The deactivated coupons can be seen in the list under the deactivated tab.

Click on the right side of the coupon to delete to delete it.


