User Permission management
Permission refers to the setting so that the employees who use the system have controllable permissions.
Create a user
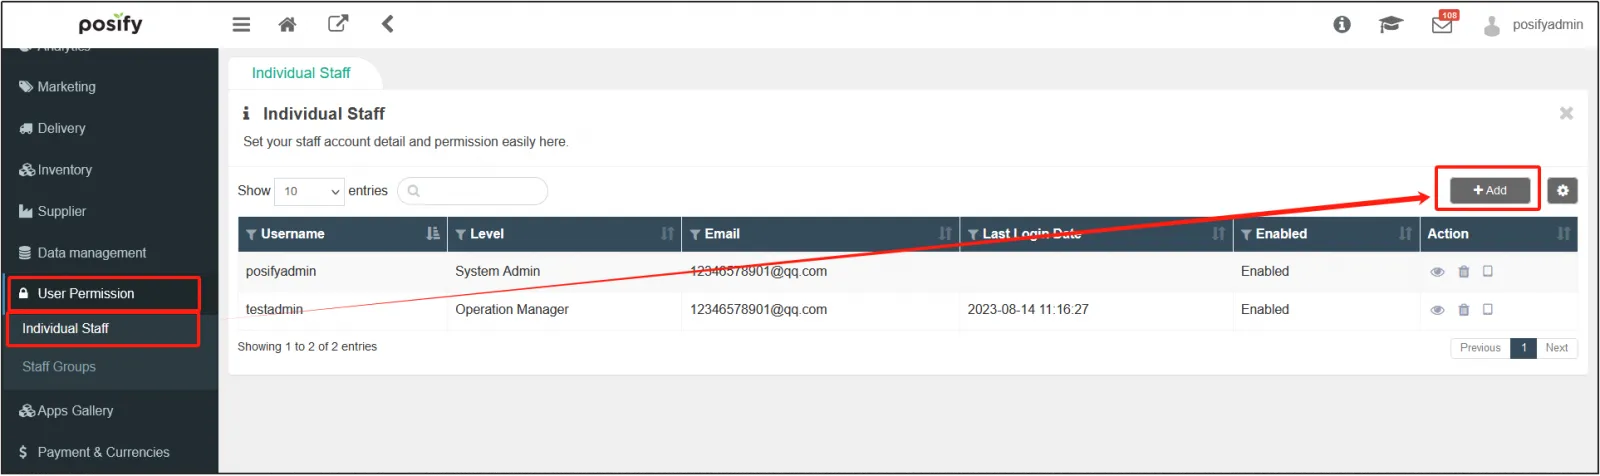
Open the CMS![]() Click User Permission
Click User Permission![]() Click Individual Staff
Click Individual Staff![]() Click [Add] to add a new user and set the settings.
Click [Add] to add a new user and set the settings.
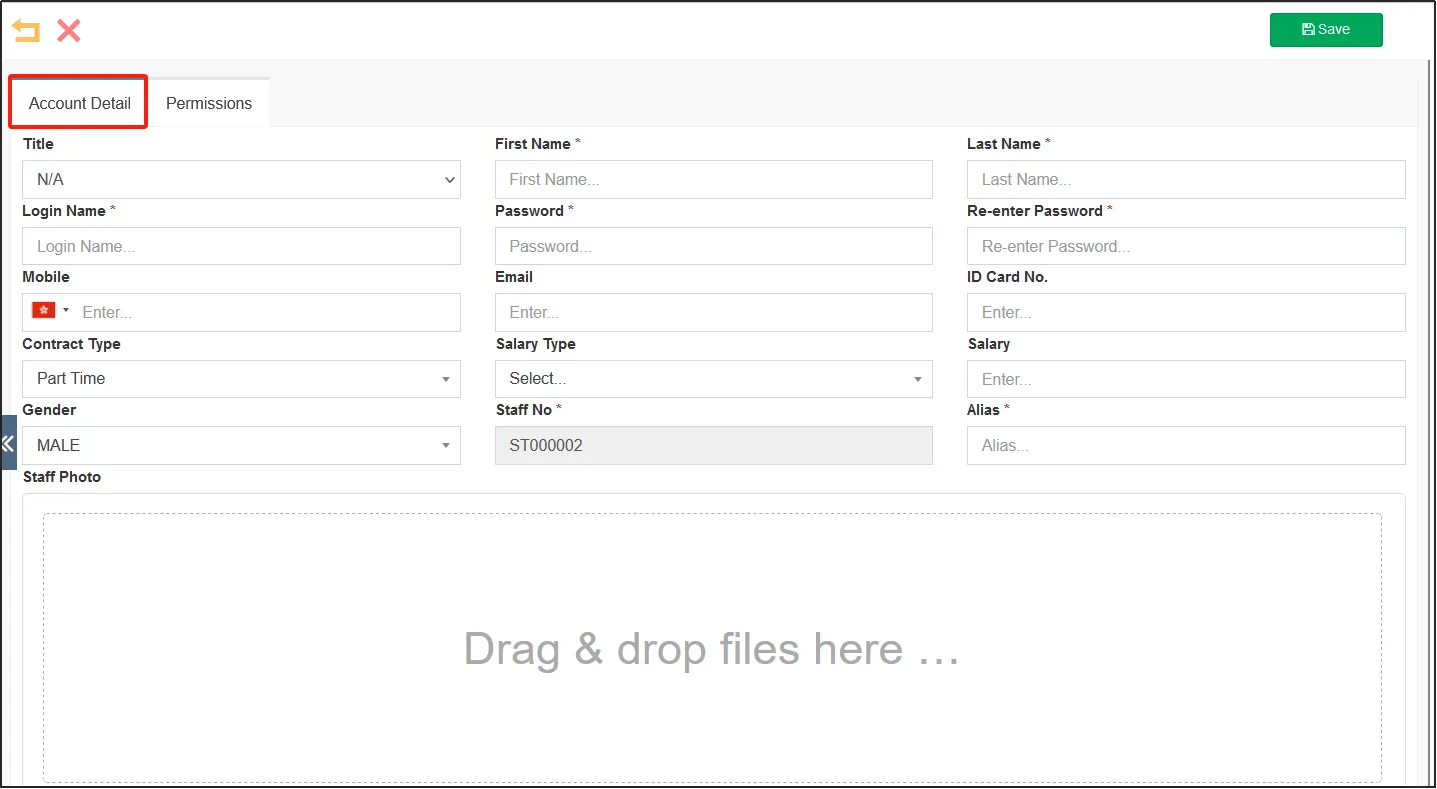
Enter the basic information of the employee in the Account Detail of the tab page, and fill in the information according to the actual situation, and the asterisk item is required. (Login Name: The username used to log in to the CMS and POS)
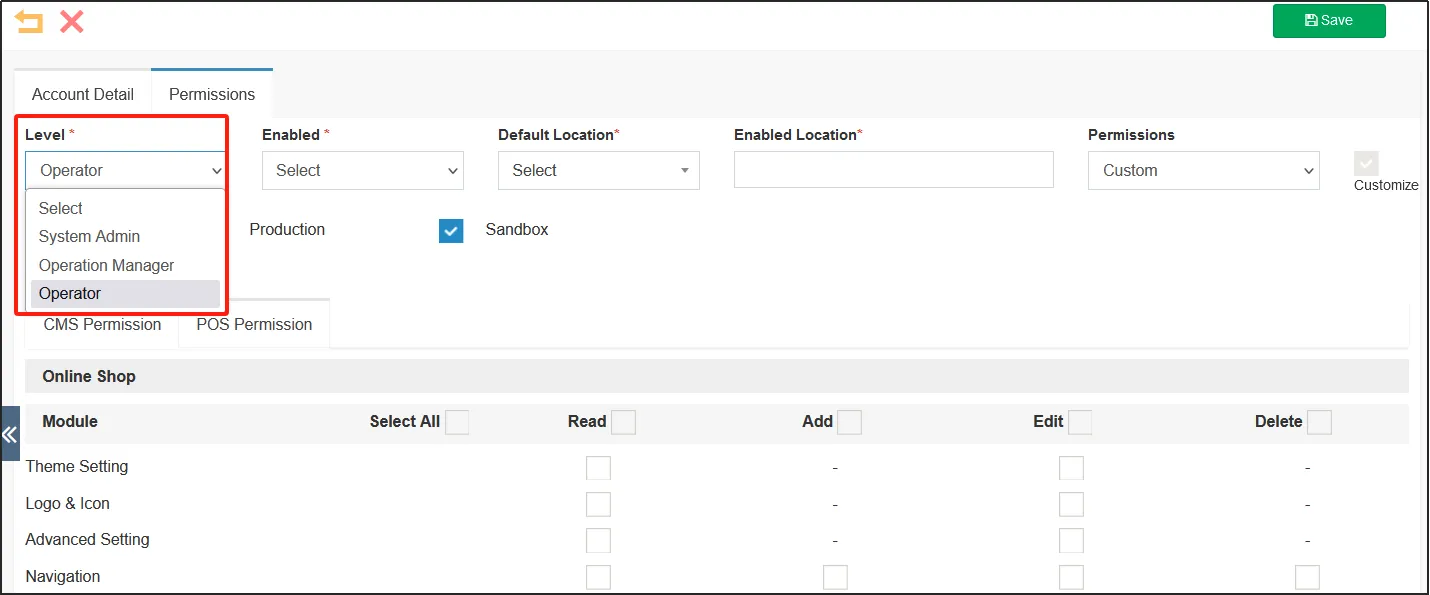
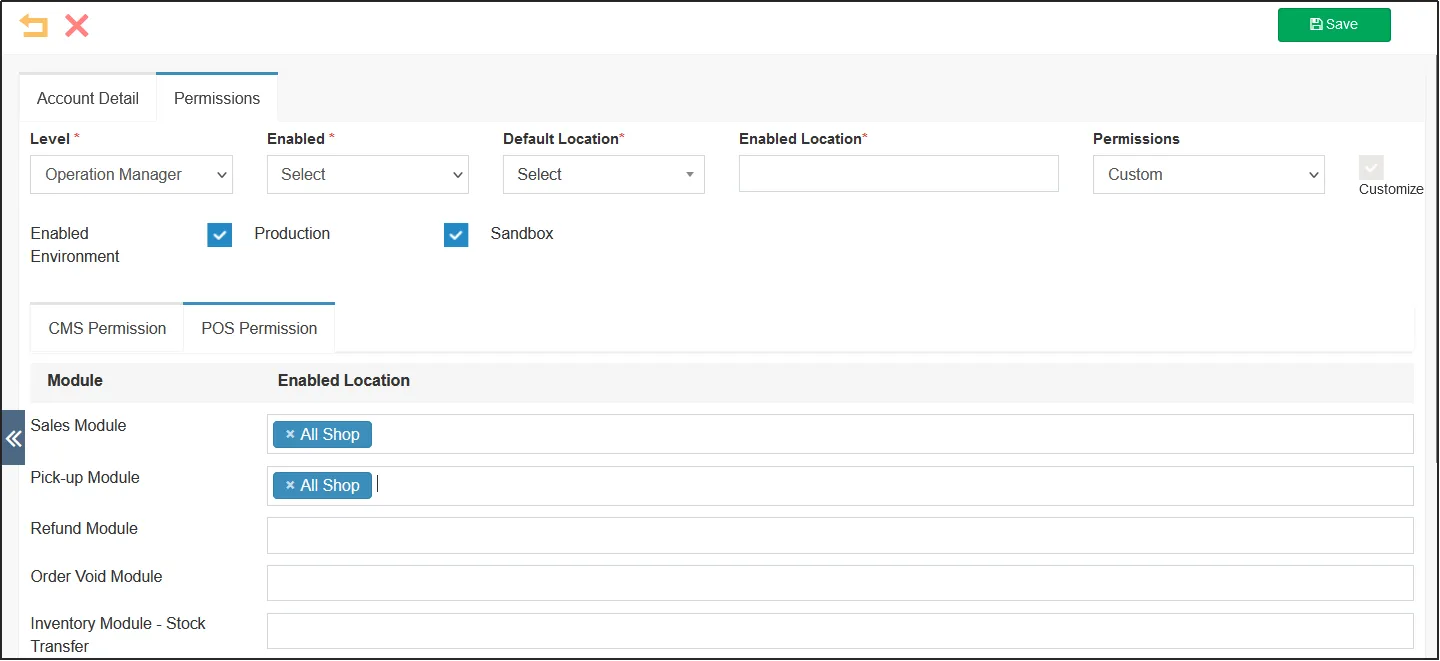
Click the Permissions tab![]() select the user's [level]. There are three levels to choose from: System Admin, Operation Manager, and Operator. If you select the permission level as User Admin, the user has all the permissions to use the system and does not need to select permissions.
select the user's [level]. There are three levels to choose from: System Admin, Operation Manager, and Operator. If you select the permission level as User Admin, the user has all the permissions to use the system and does not need to select permissions.
If you select Operation Manager or Operator, you need to check the permissions yourself. Generally speaking, if you choose a Operation Manager, you have the permission to manage the shop operation, and if you choose a Operator, you have the permission to operate the basic work of the store.
Select Enable in [Enable] to enable the user.
Default Location: refers to the default login location when the user logs in to the POS.
Enabled Locations: Refers to the locations that users can switch between in the POS.
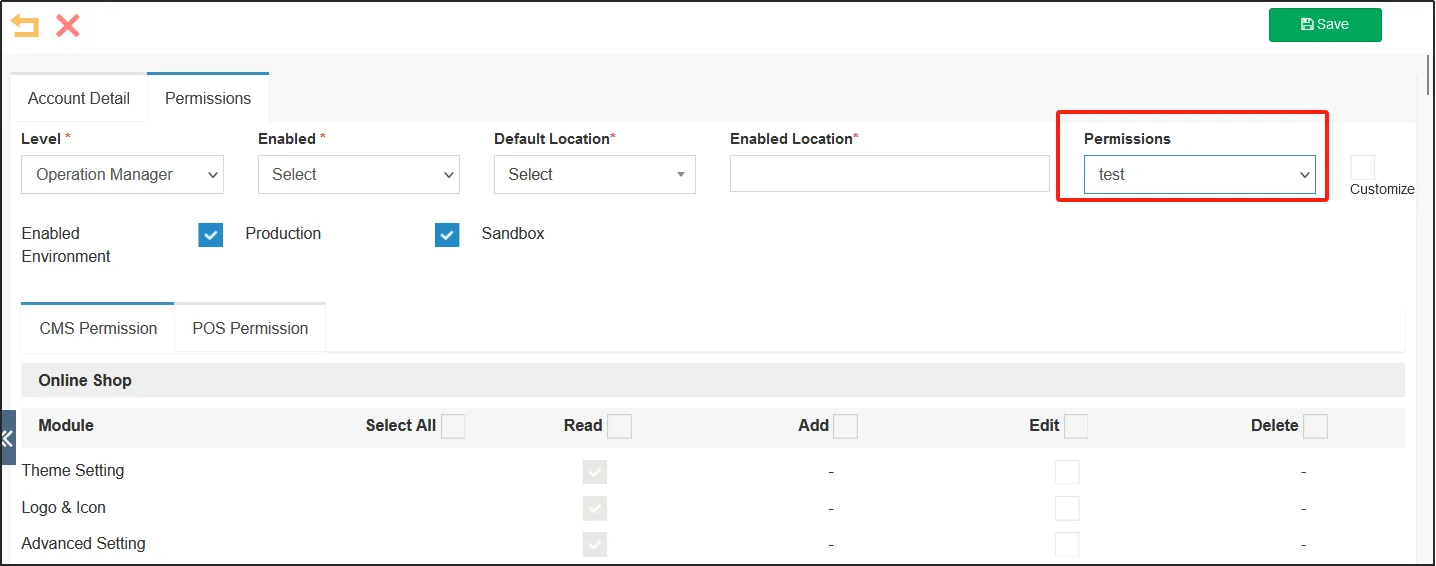
In [Permissions], you can select a custom group, or you can select Custom to set the user's permissions. Different permissions can be set for each different user.
Check the CMS Permission and POS Permission below.
Set the POS permissions according to the user's requirements, select the permissions, and click [Save] in the upper right corner of the edit screen.
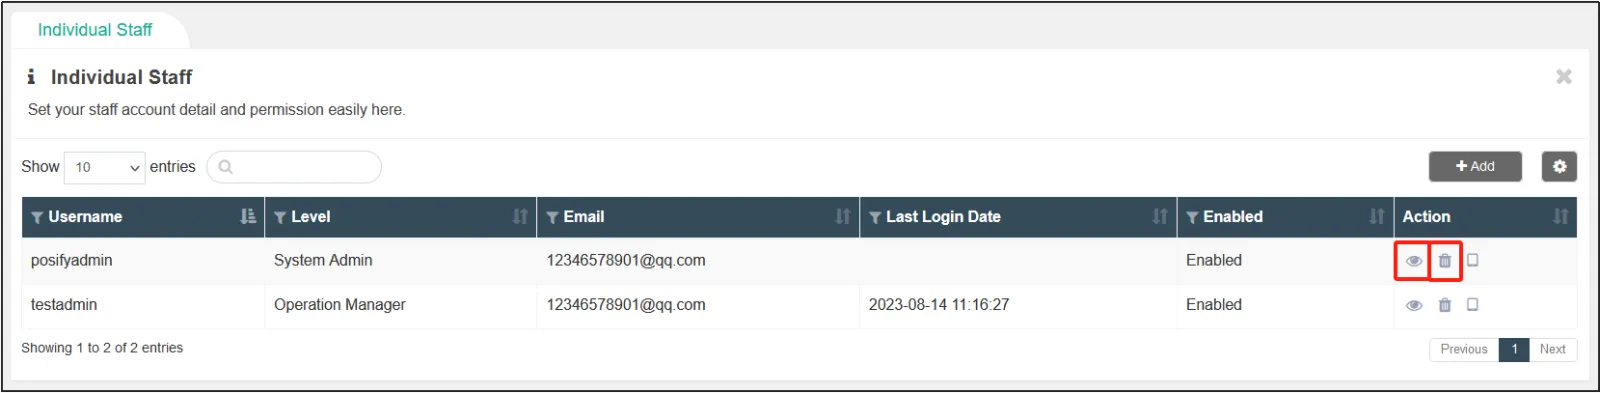
On the Individual Staff page, click the ![]() on the right of the user to re-edit the user, and click the
on the right of the user to re-edit the user, and click the ![]() to delete the user.
to delete the user.
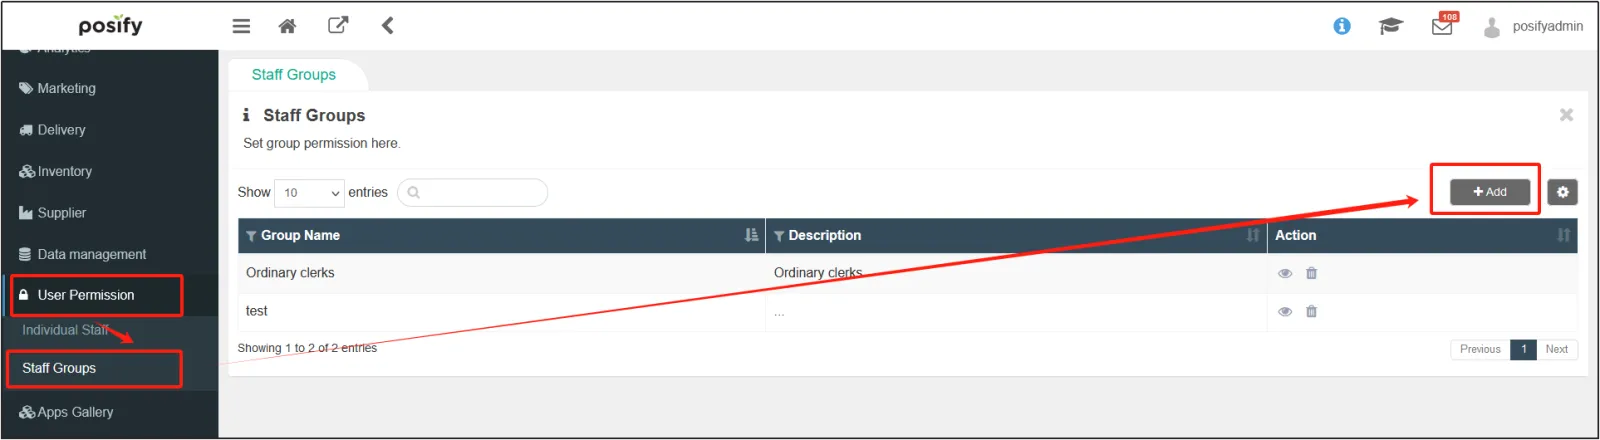
Set staff groups
Generally speaking, employees in the same position have the same work content and the same permissions, so you can set group permissions to set the permissions of employees in the same position in batches.
Open the CMS![]() Click User Permission
Click User Permission![]() Click Staff Groups
Click Staff Groups![]() Click[Add]to add a new group.
Click[Add]to add a new group.
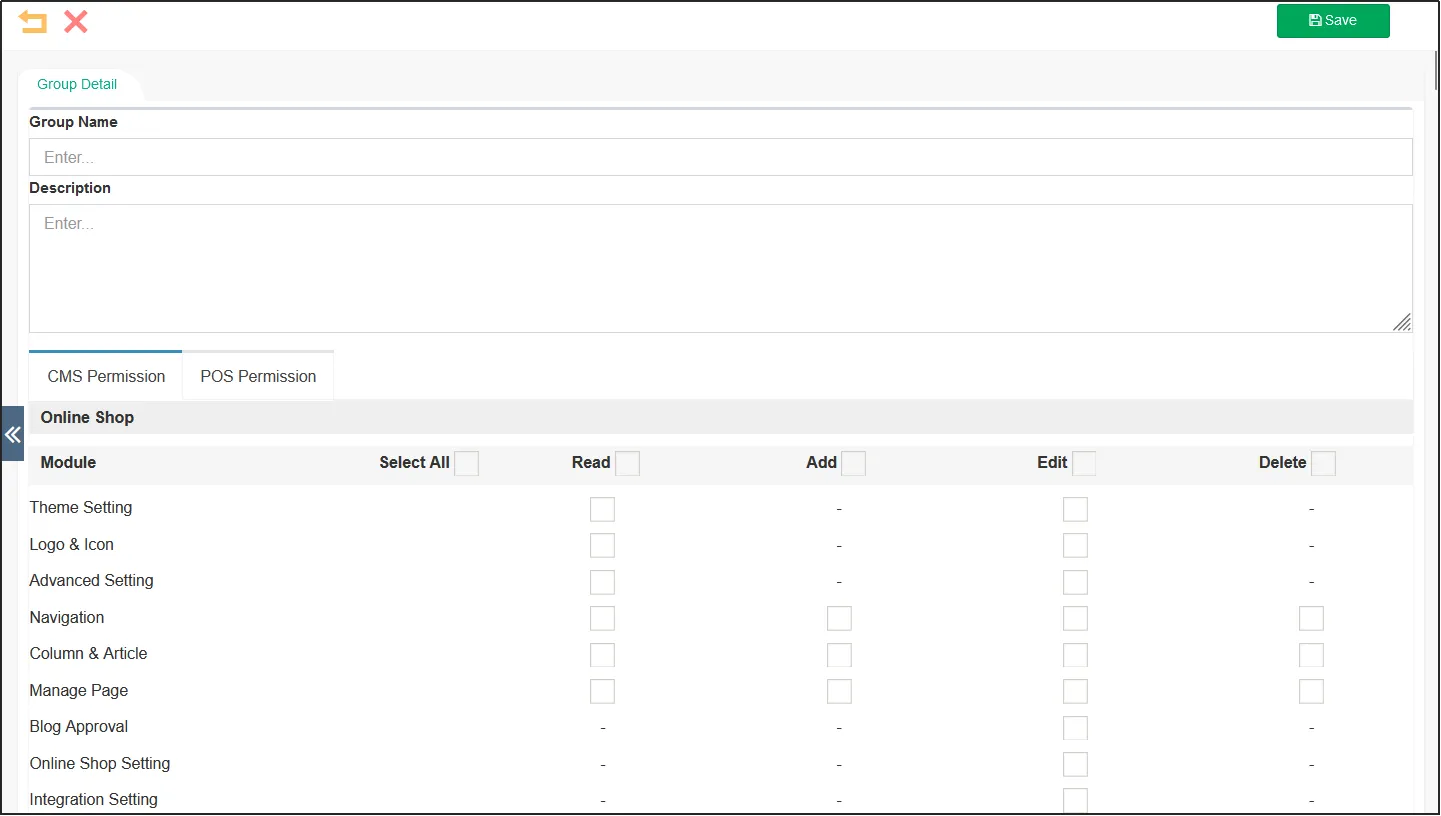
Enter [Group Name], [Description], and select the permissions for the group. When the check box is complete, click [Save] in the upper right corner.
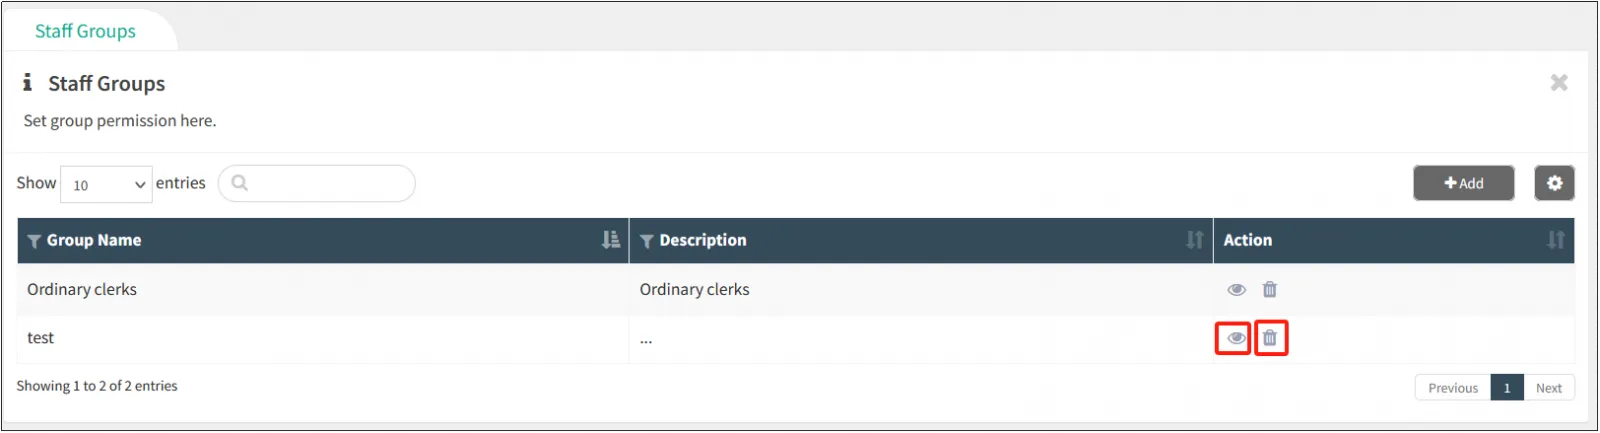
On the staff group screen, click the ![]() on the right side of the group to re-edit the group, and click the
on the right side of the group to re-edit the group, and click the ![]() to delete the group.
to delete the group.
Go back to User Permission - Individual Staff, open a user editing page, click the tab Permissions, select the group permissions you just set in the [Permissions] section, and then click [Save] in the upper right corner.


