Create a supplier
Open the CMS Click SupplierClick SupplierClick[Add].
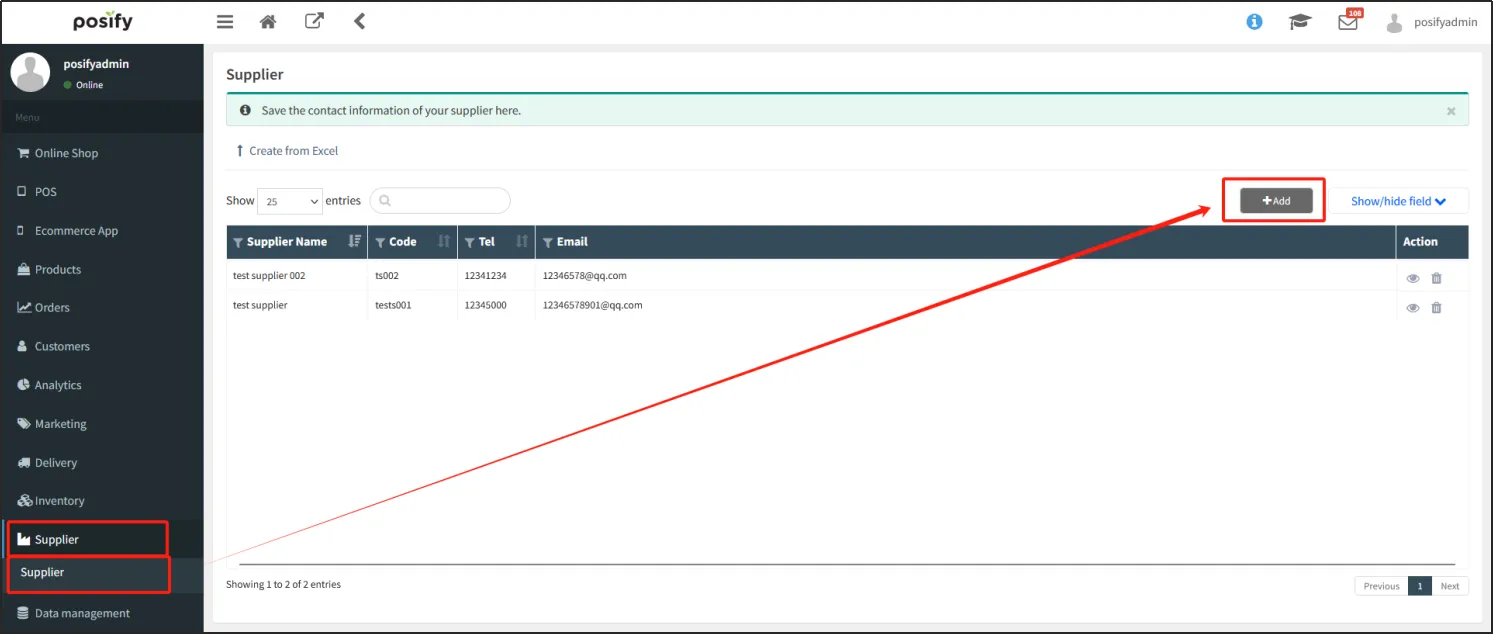
Enter the supplier information, including the supplier name, code, default currency, tel, email, etc. At the bottom, you can enter the contact information of the supplier, and if you need to add a contact, you can click [Add] to add a contact.
After filling in the information, click [Save] in the upper right corner.
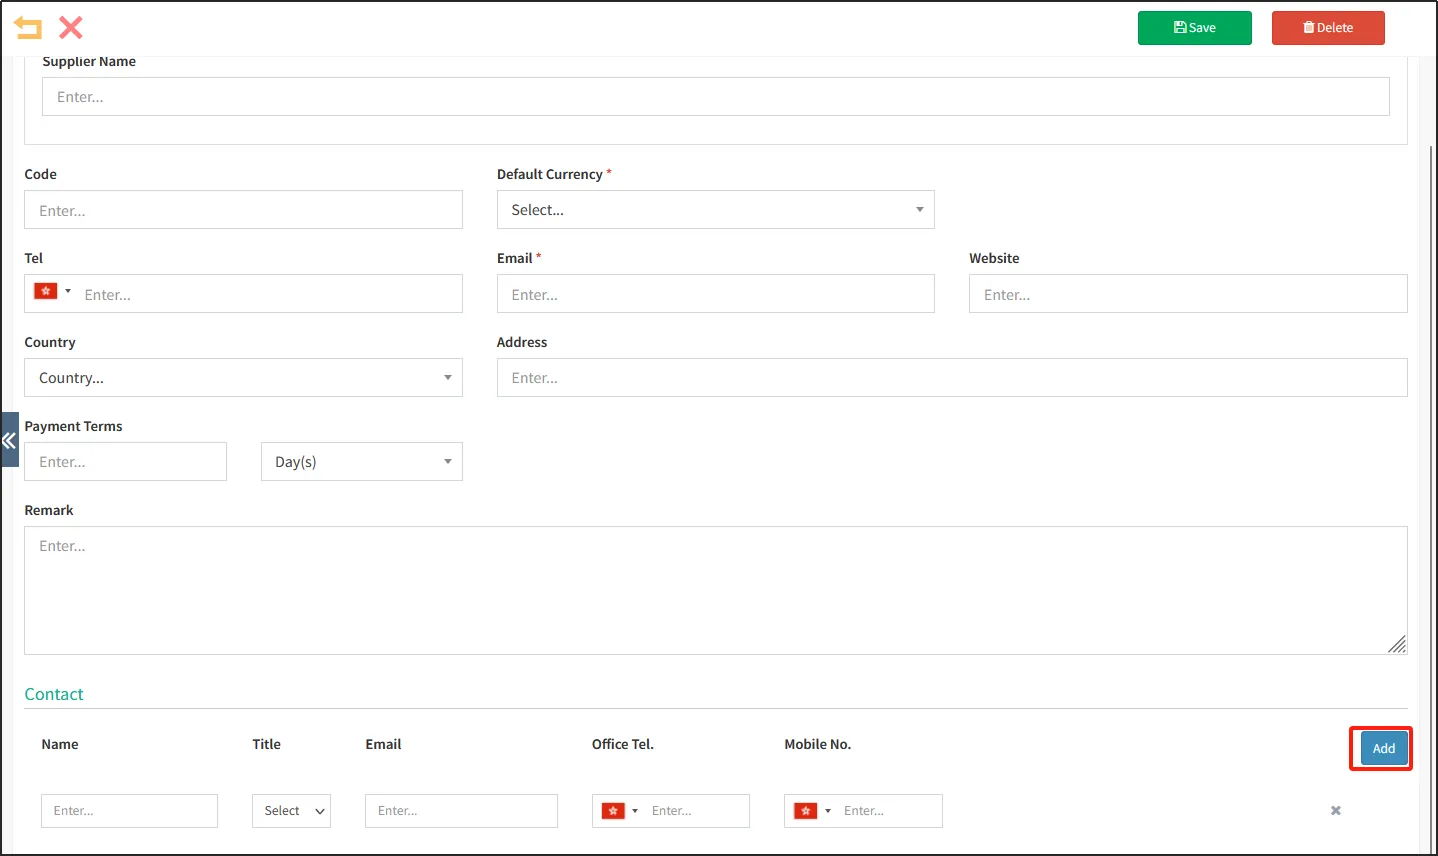
Open the CMSClick SupplierClick SupplierClick [Create from Excel]。
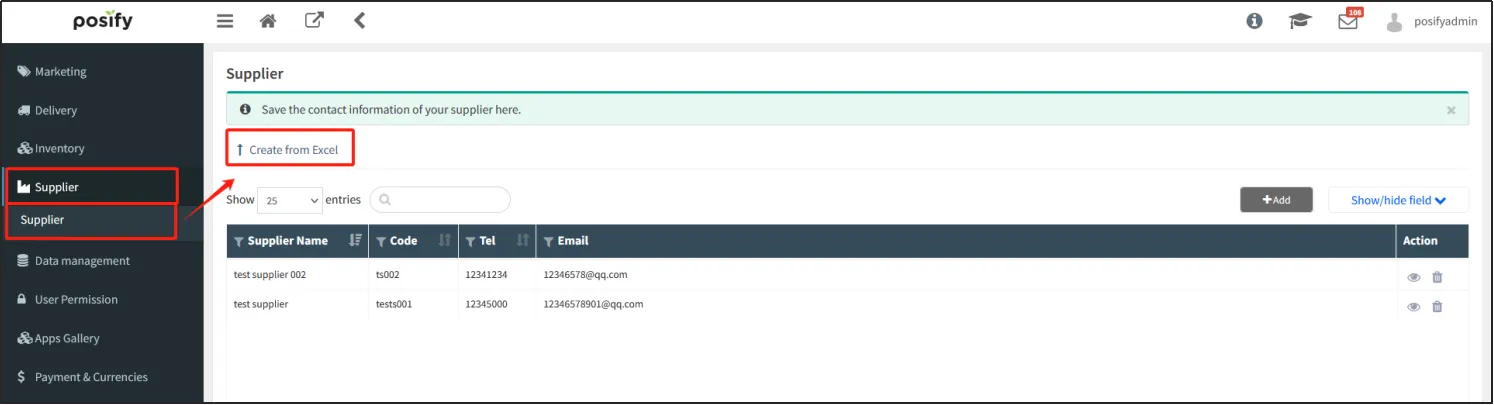
Click [new template]。
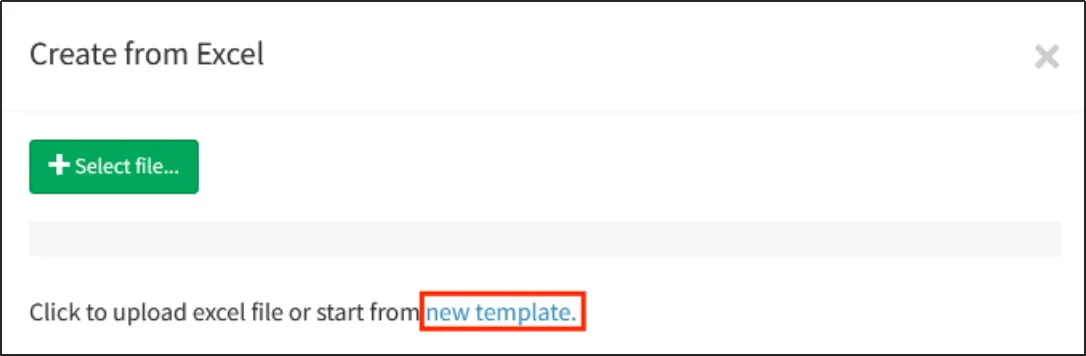
After exporting the Excel template, click to open the template and enter the supplier information, including the supplier name, code, tel, etc. Tel need to be preceded by an area code and a space (e.g. Hong Kong: +852).
Enter contact information: The contact title can only be entered: Mr, Ms, Miss or Mrs. Fill in the format of the contact's office phone number: area code - mobile phone number (EG Hong Kong: +852-XXXXXXXXX), and the mobile phone number of the contact person is the same as above.

After editing the Excel content, go back to the CMS provider page and click "Create from Excel" to select the edited file and upload it.
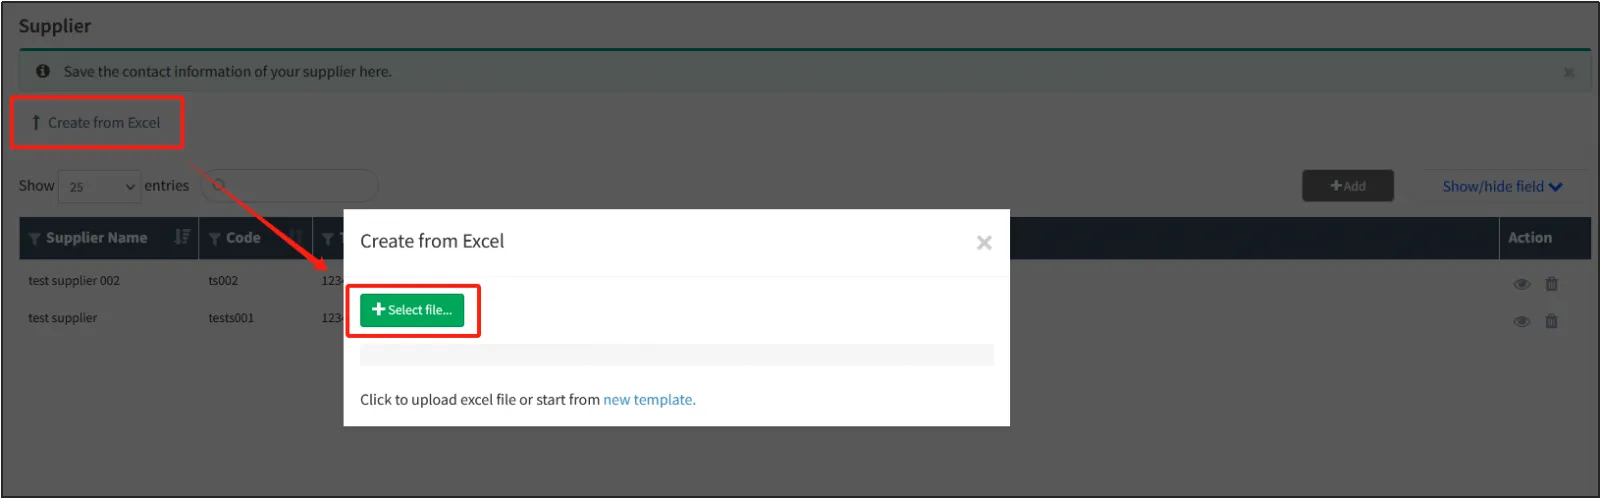
When you need to create multiple suppliers, it is recommended to use Excel import, which is more convenient.
Set up the supplier's products
Before you start setting up your supplier-supplied products, check out the Products module playbook to learn how to create your products and set up suppliers for your products only after you have created all your products.
Open the CMSClick SupplierClick SupplierFind the supplier you want to set up to offer the product and click on  on the right.
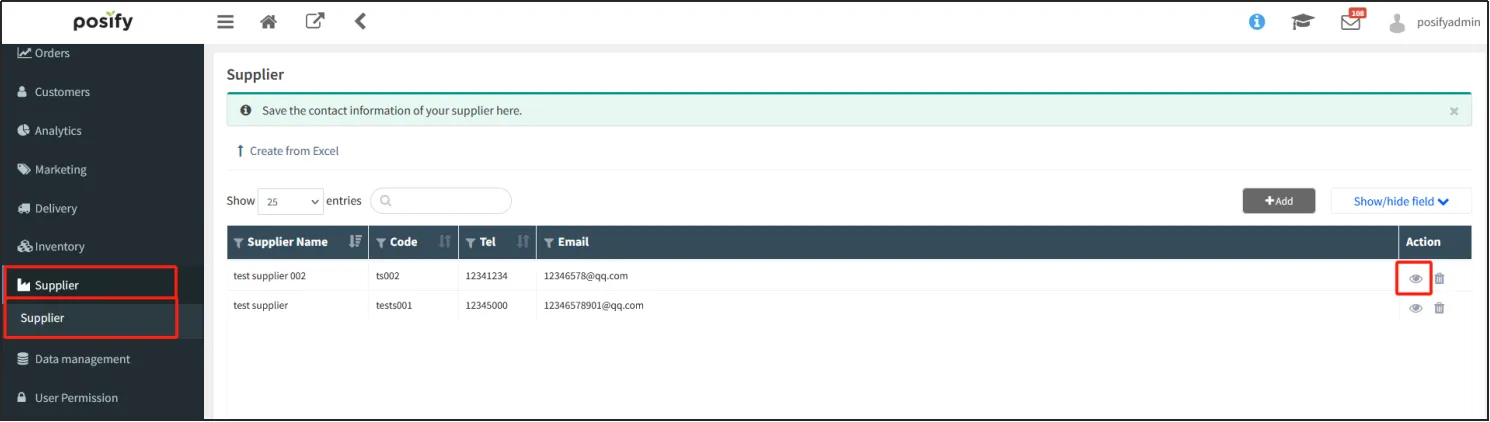
Open the Supplier Edit pageClick the tab Supplied Product ListClick[Add]Click the item code input box to add a new line.
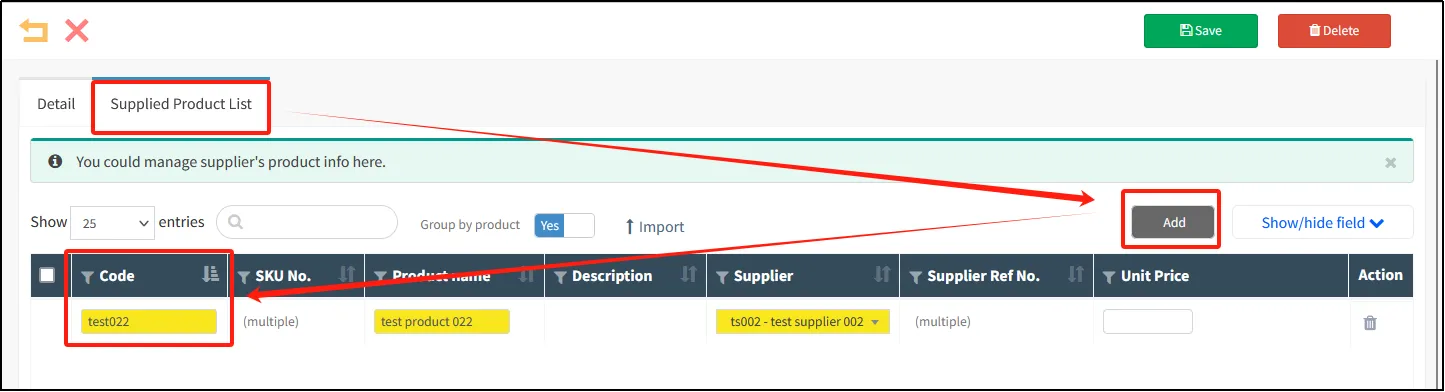
The product selection page pops up, select the products supplied by the supplierclick [OK].
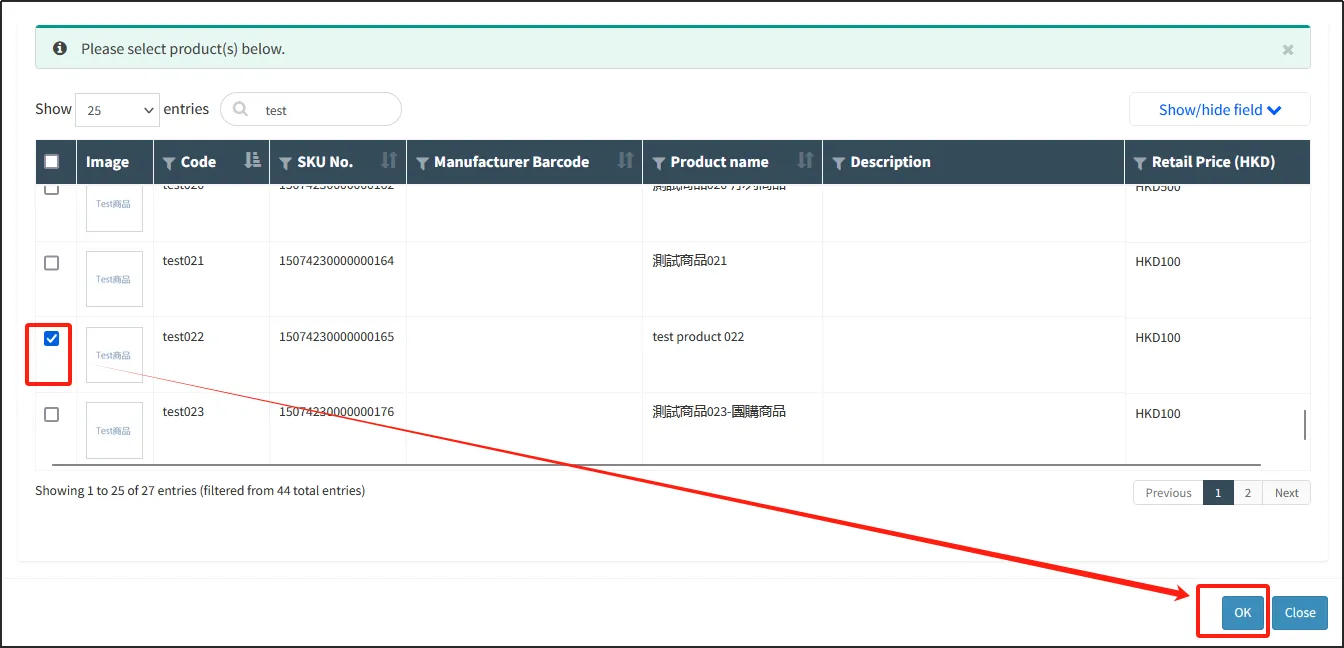
You can see that the yellow highlight is the newly added product, and enter the unit price, which is the purchase price of the product purchased from the supplier. When purchasing the product, the system automatically displays the purchase price of the product, and then click [Save] after confirmation.
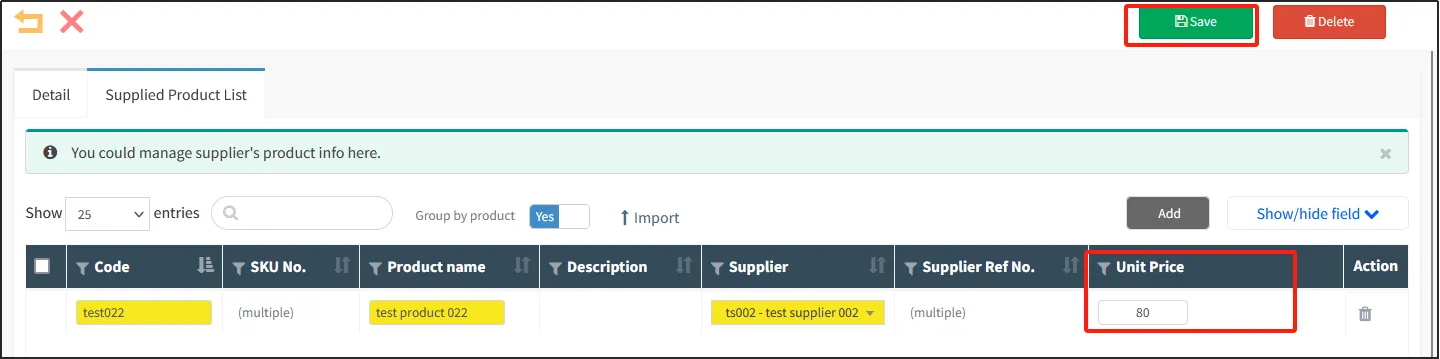
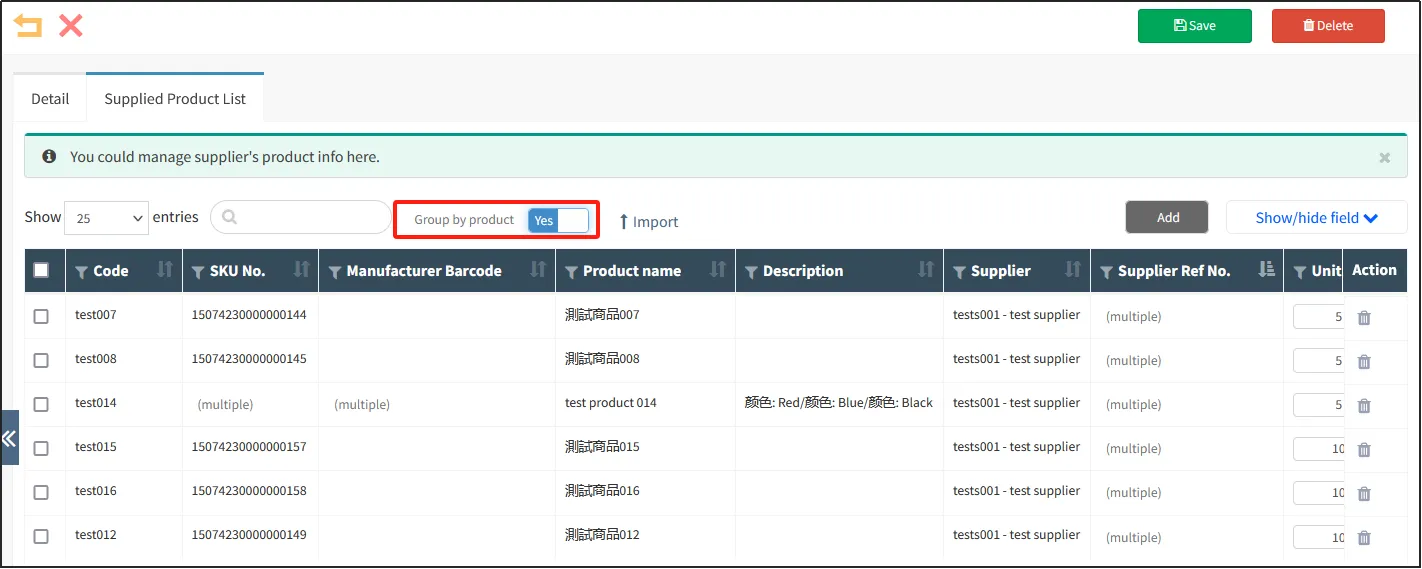
Group by product: If you manage by product, multiple SKUs of the same product will not be displayed separately.
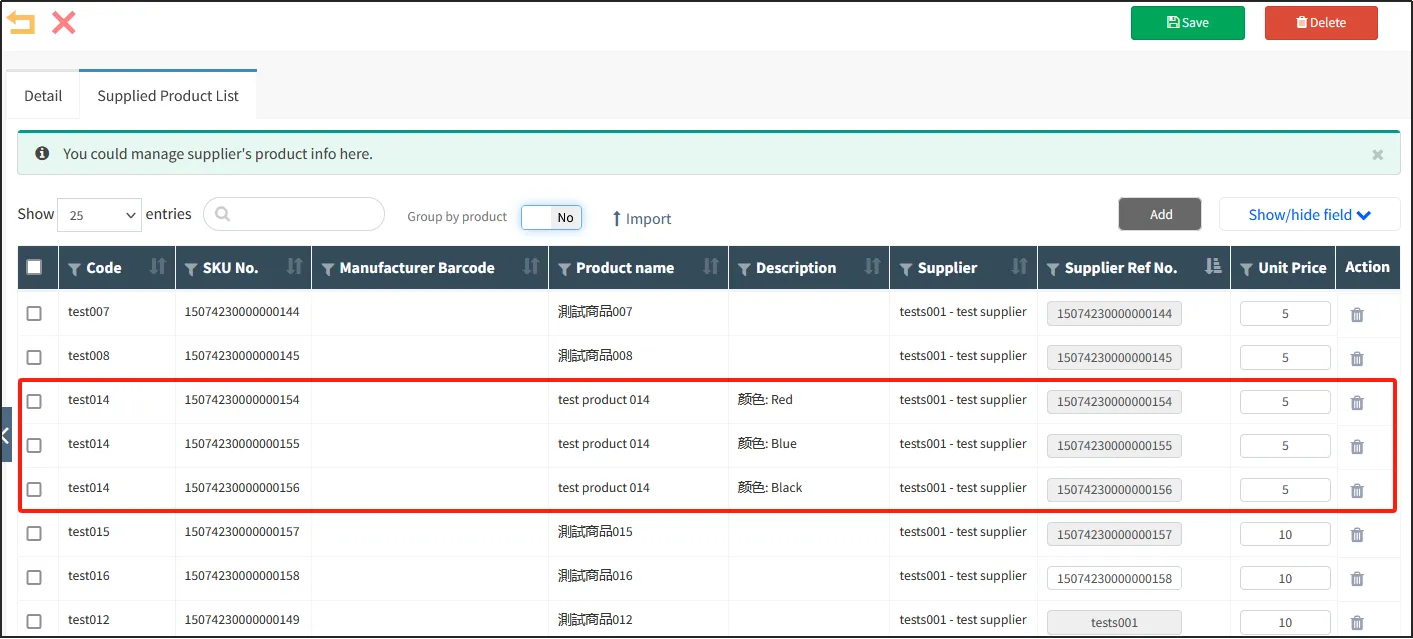
Only this row is displayed, and multiple SKUs of the same product are displayed separately if the product management is not displayed.
Set up supplied products via Excel
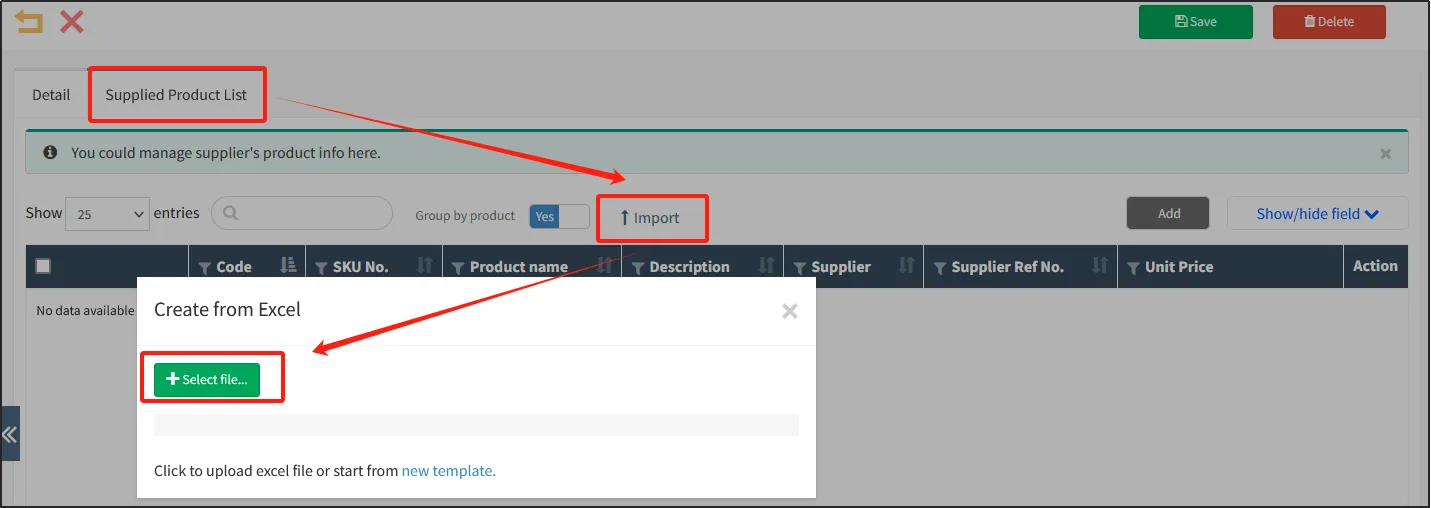
On the Supplier Edit page, under page [Supplied Product List]click [Import] click [new template].
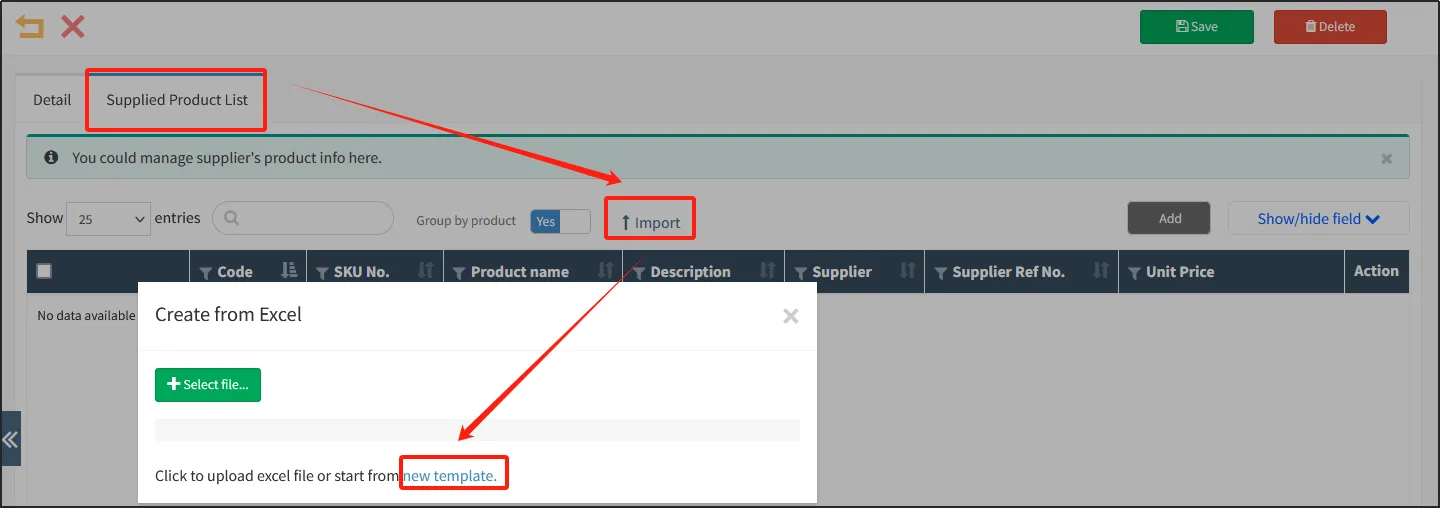
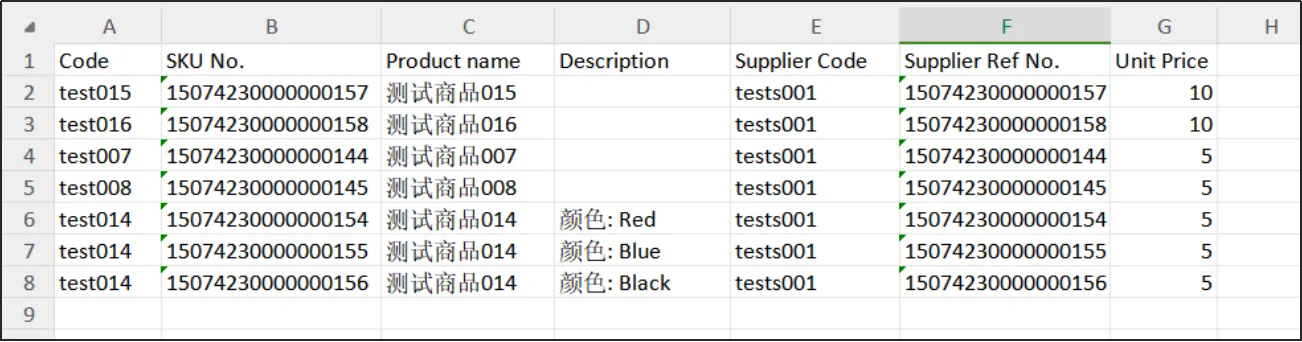
Open the exported Excel template and enter the relevant information of the product according to the Excel template.
Code: Enter the product number of the supplier.
SKU No./Manufacturer Barcode/custom SKU No.: You only need to fill in one of these three information.
Product Name: The name of the product being supplied.
Description: If the product supplied by the supplier is an attribute product, then you can fill in the attribute in this field. For example, if the product has an attribute color: red, then fill in the color: red. If a SKU has multiple attributes, e.g. Color: Red and Size: M, then fill in Color: Red and Size: M.
Supplier Code: The number of the current vendor.
Supplier Ref No.: required, when setting up the supply of goods, you need to use the barcode number provided by the supplier, which is unique, and you can enter the SKU number of the product to the supplier reference number, which cannot be repeated.
Unit Price: Indicates the purchase cost price of the product.
After filling in the supplied products, return to the supplier page of CMS, click the tab on the supplied Product List page, click the Supplied Product Listclick [import]click [select file...]upload the Excel you just edited.
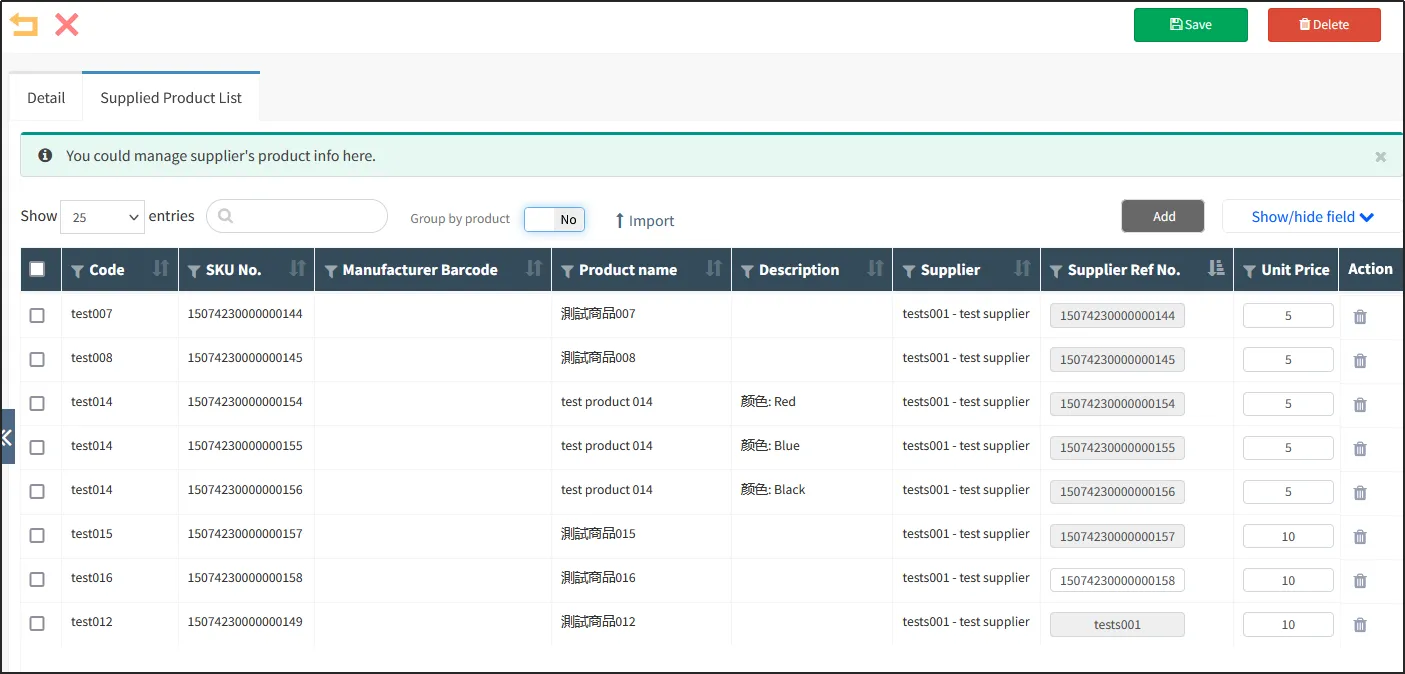
After the import is successful, you can see the supplied products imported by Excel under the Supplied Product List tab on the supplier edit page.
Set up the supplier of the product from the product module
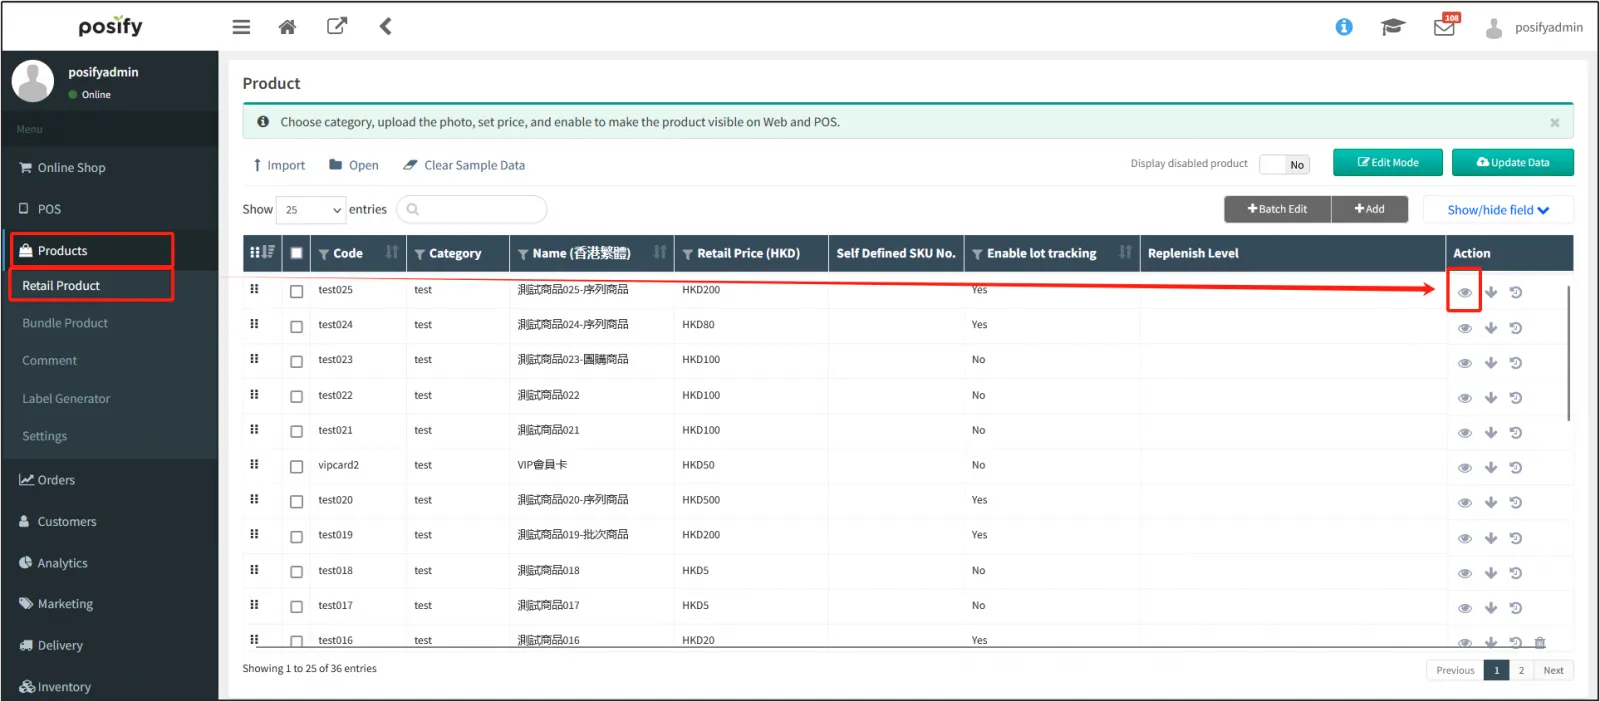
Open the CMSClick ProductsClick Retail ProductFind the product you want to set up a supplier for and click on the right.
Click the tab Supplierclick [Add] to add a new supplier.
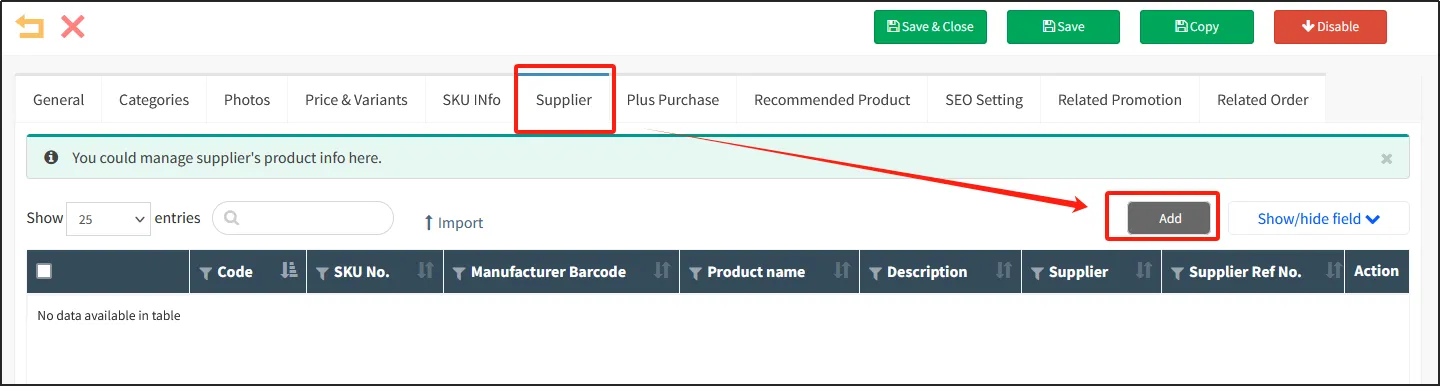
In the Supplier field, you can optionally fill in the preset supplier (supplier) and the purchase unit price of the product from the supplier. If you did not have a preset supplier (supplier) before, please refer to the steps in the previous section [Supplier] to preset.
You can set multiple suppliers for each product, and after you have set the settings, click [Save].
Set the supplier of the product through the product edit mode
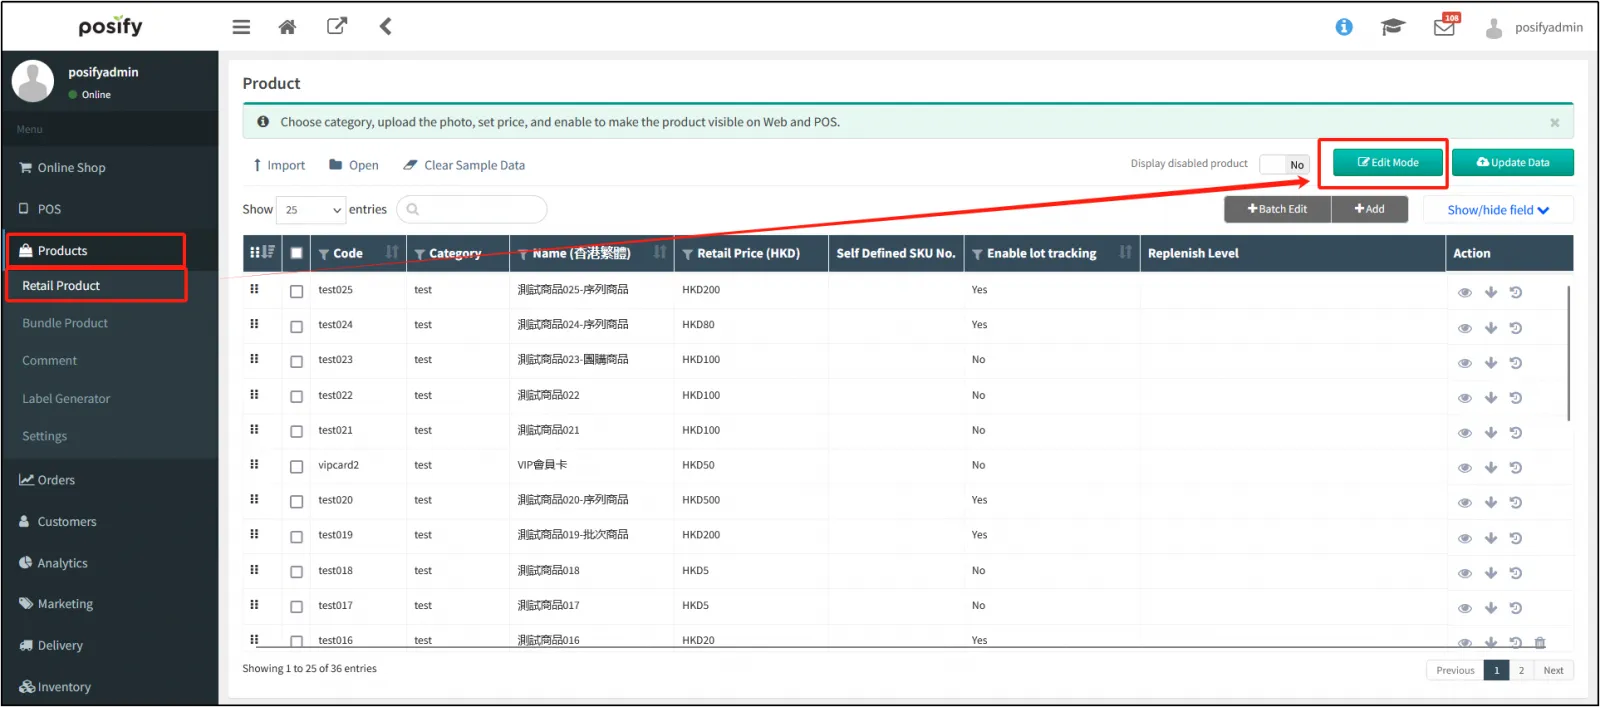
Open the CMSClick ProductsClick Retail ProductClick[Edit Mode].
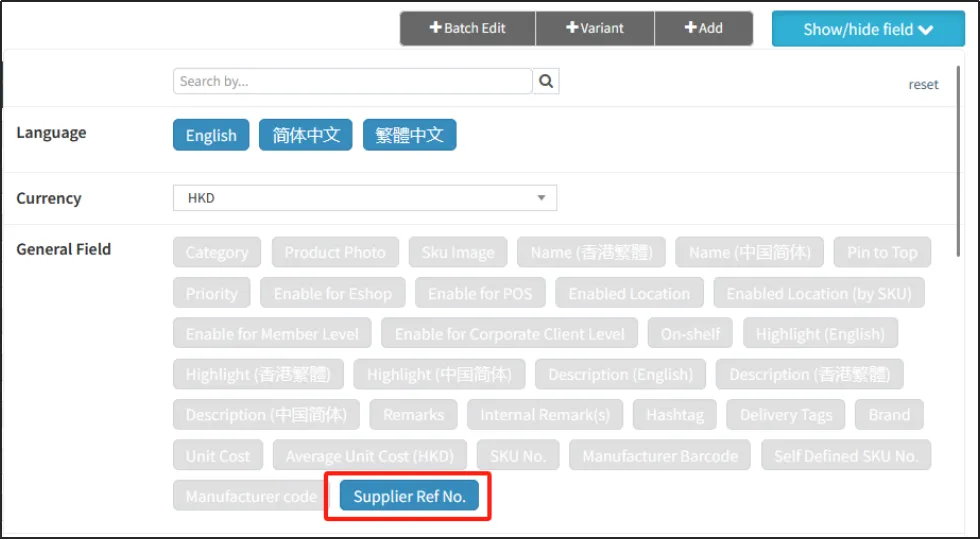
Click[Show/hide field]Light up the [Supplier Ref No.].
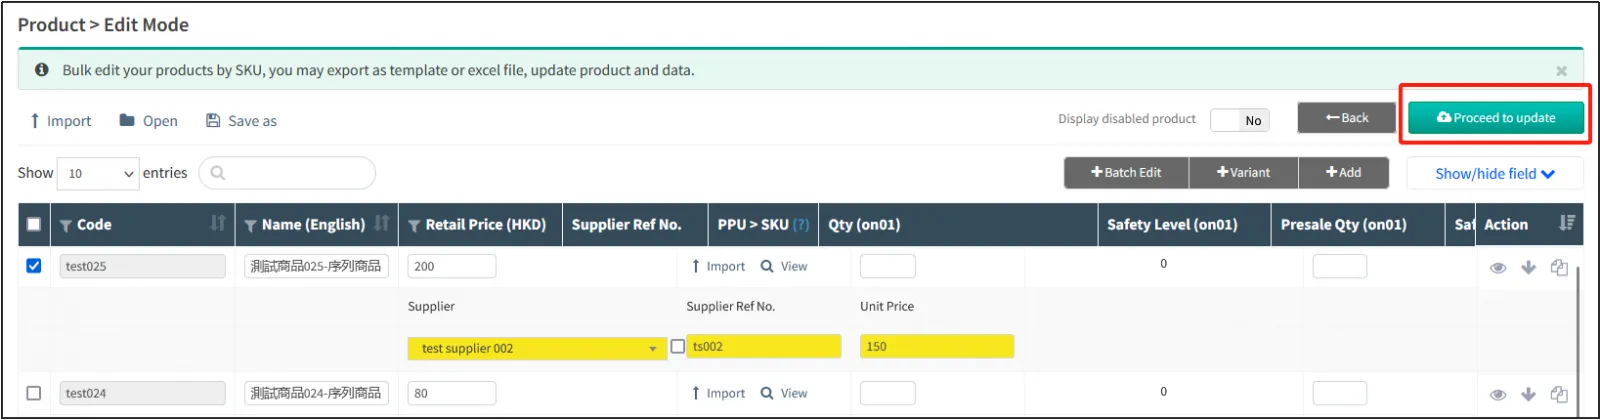
Search for the product for which you want to set a supplierclick [View] under the [Supplier Ref No.] columnselect the established supplier in the supplier drop-down boxenter the supplier ref No. and the unit price (purchase price) of the product.
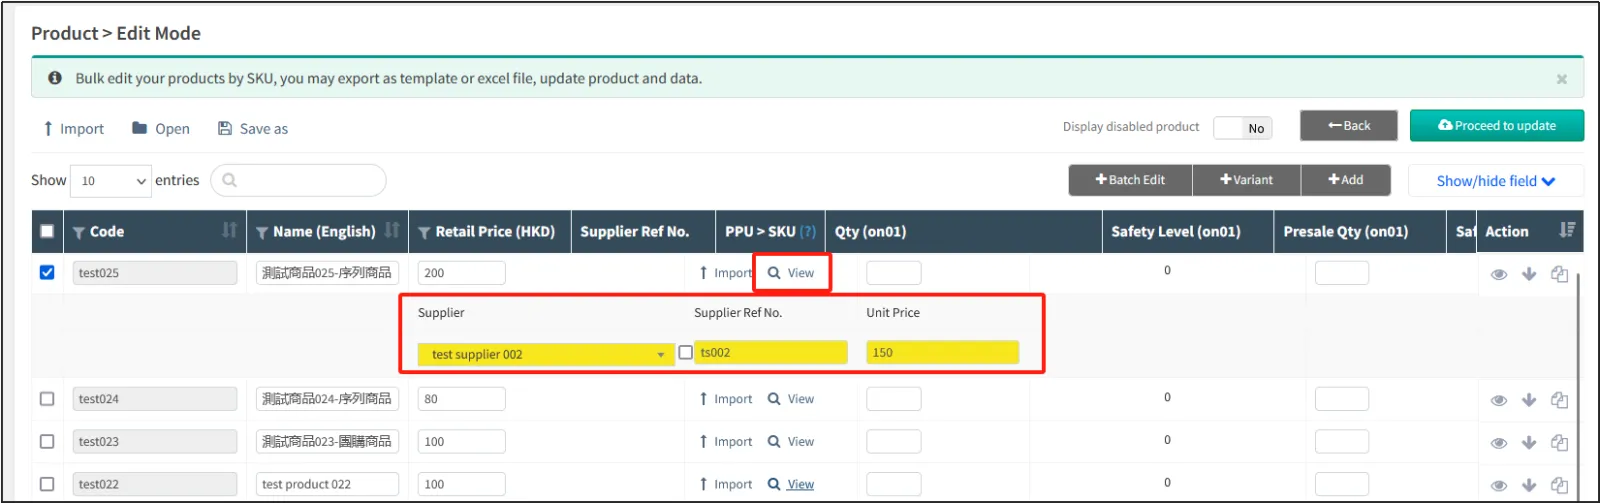
When you are finished entering, click [Proceed to update].
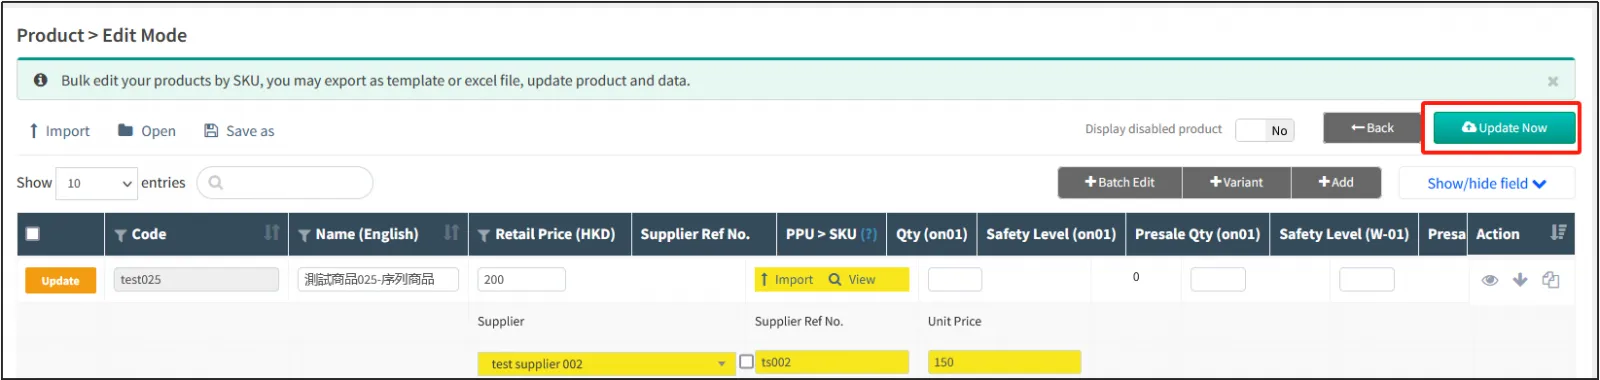
After confirming that the information entered is correct, click [Update Now] to complete the supplier product settings.
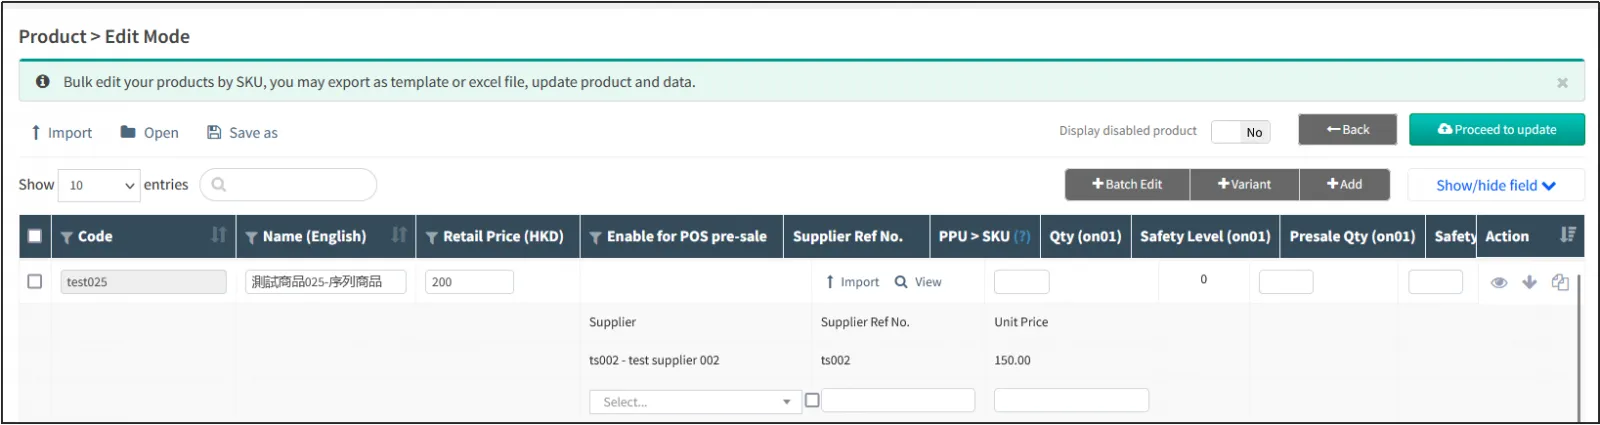
After that, click on the [Supplier Ref No.] column to view the supplier information that has been successfully set.
Set up the supplier of the product via Excel
Open the CMSClick ProductsClick Retail ProductClick[Edit Mode]。
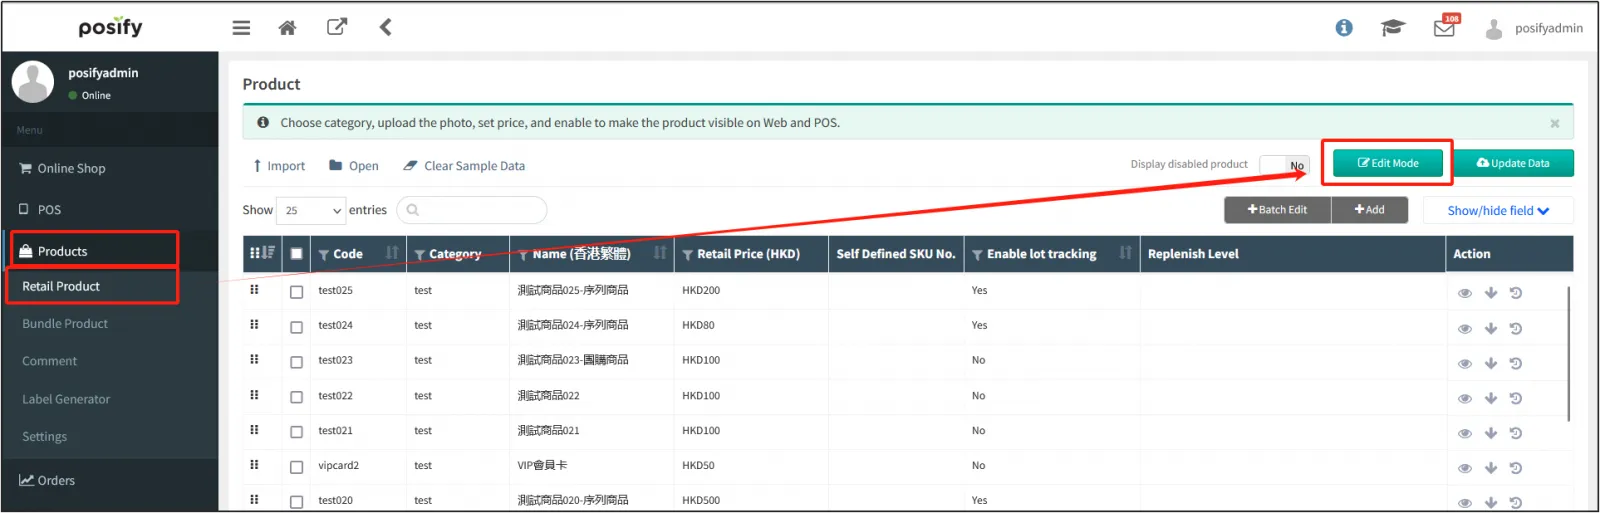
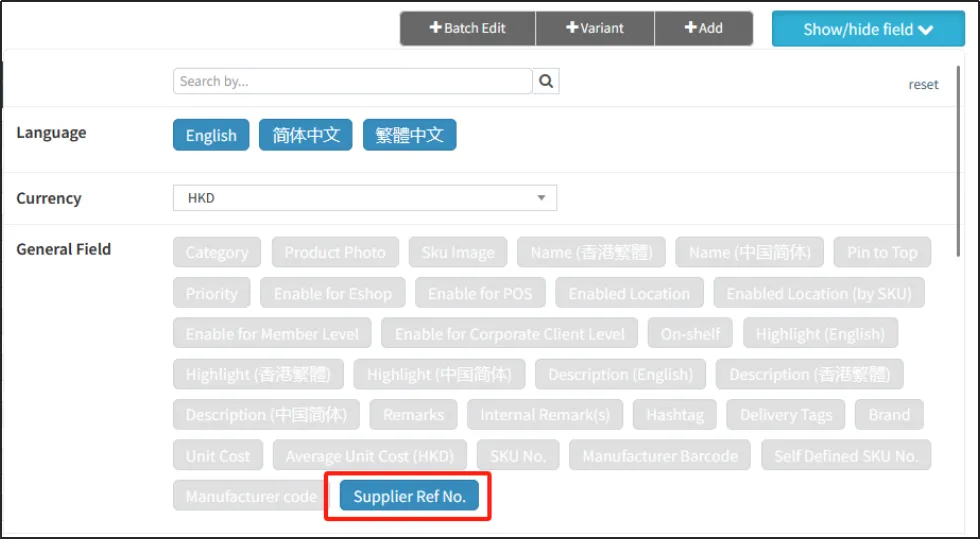
Click[Show/hide field]Light up the [Supplier Ref No.].
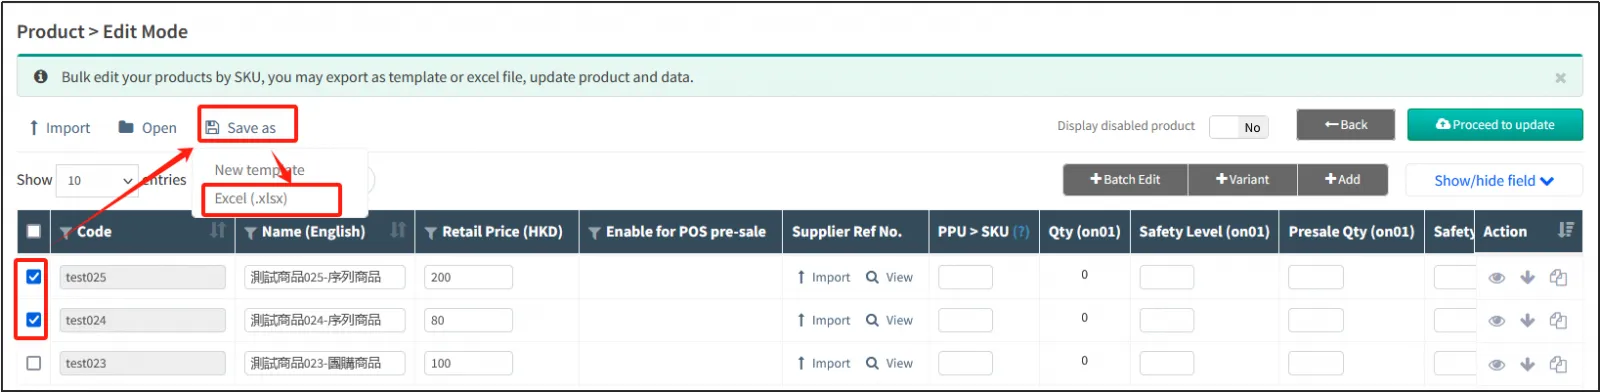
Select the products for which you want to set suppliersclick [Save]click [Excel(.xlsx)].
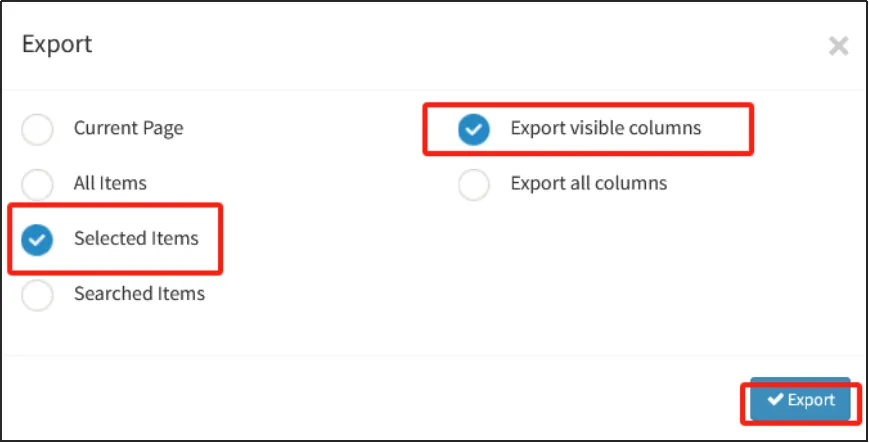
Select "Selected Items" and "Export only display rows"click [Export visible columns].
Open the exported Excelfill in [Supplier]enter [Supplier Ref No], customize, but not repeatenter the purchase price of the productsave the Excel after confirmation.

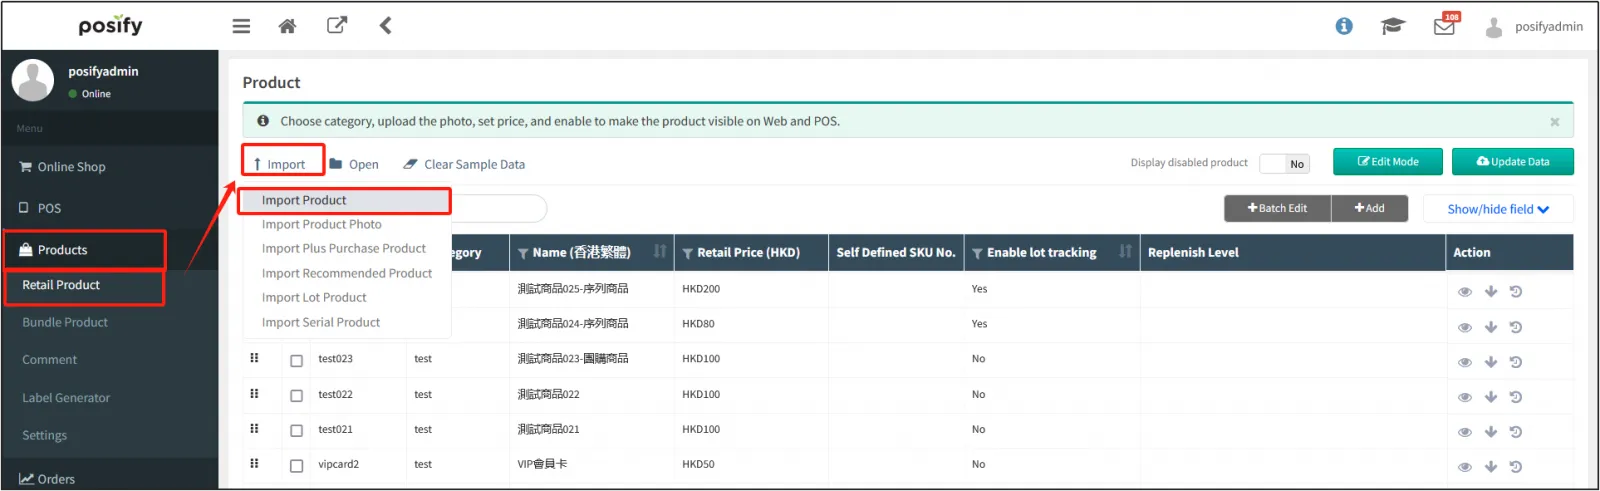
Go back to the product management page of the CMSclick "Import"click "Import products", and upload the Excel you just saved.
Click [Proceed to update].
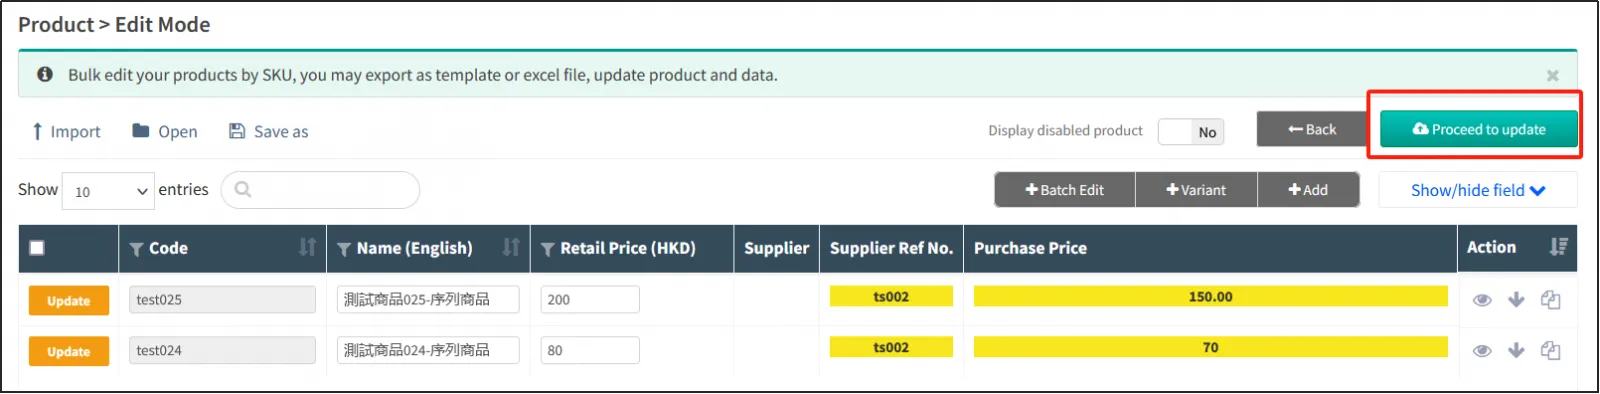
After the import is successful, you can click [View] in the product editing mode to see the supplier and purchase price set for the product.