Set a charge/discount on an item in an order
The mobile version of POS supports setting a discount for a certain item of an order separately, that is, you don't need to set a discount to use it when you need to discount it. For example, if a member is a regular customer of yours and you want to give him an additional discount, then you can give the member a discount by changing the price instantly.
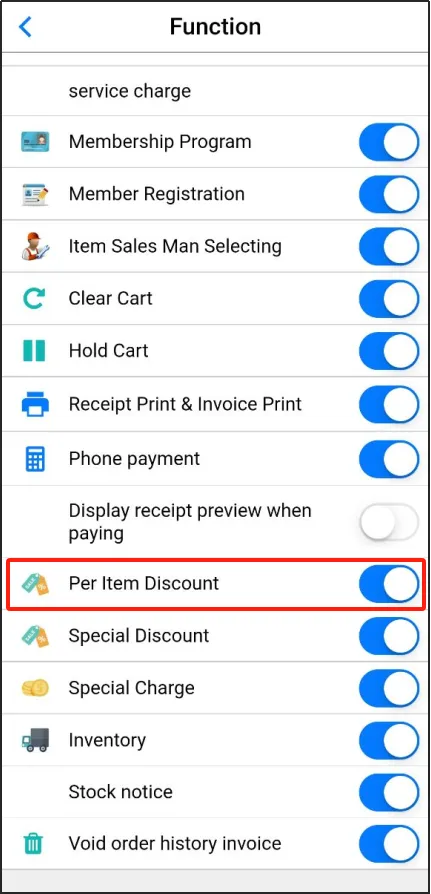
Open the mobile version of POS click on the three horizontal lines in the upper left cornerin Settings - Functions, enable [Discount for each product].
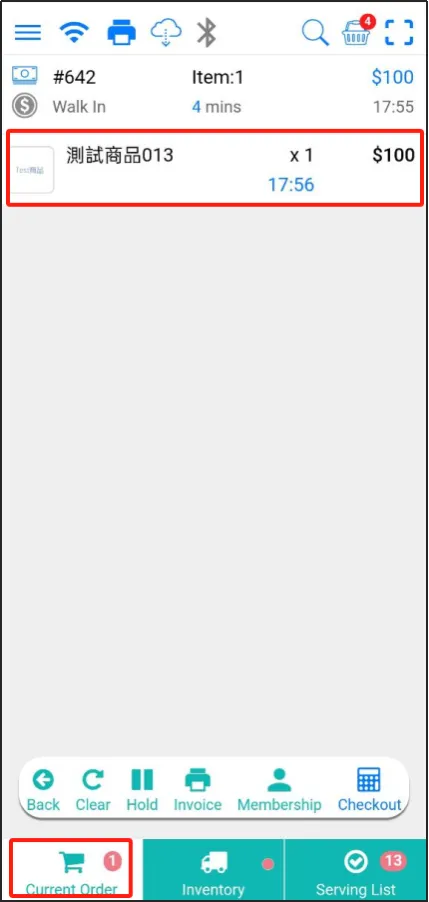
Go back to the POS homepage and click [Current Order] at the bottom to view the items contained in the current shopping cart. Click on an item in your shopping cart to open the product details.
Click [Price] or [Discount] to change or discount the price of the item in the order individually.
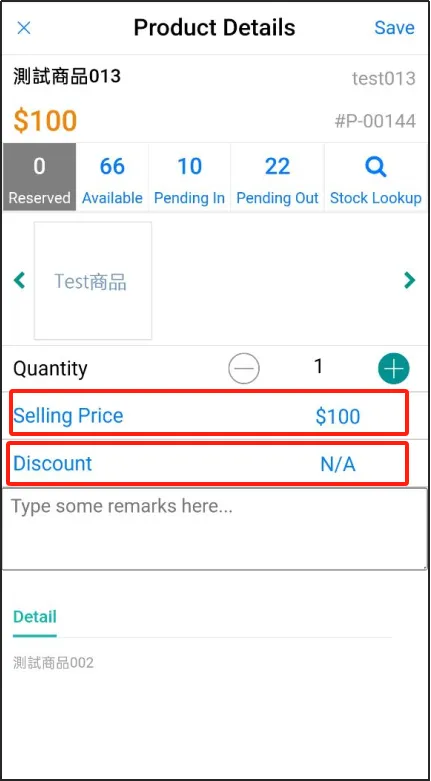
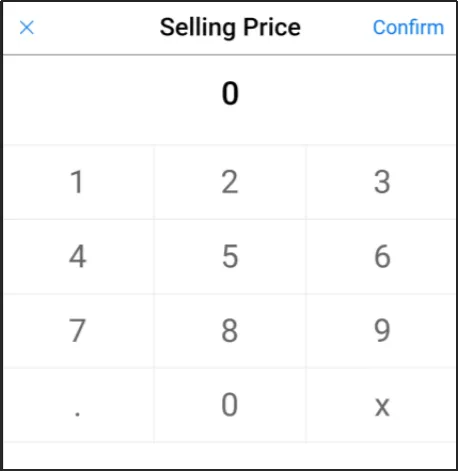
Click [Price] to enter the new price of the product, and you can change the price.
For example, if the current original price of the item is $100, you can enter $95 (lower than the original price) or $105 (higher than the original price).
Click [Confirm] in the upper right corner.
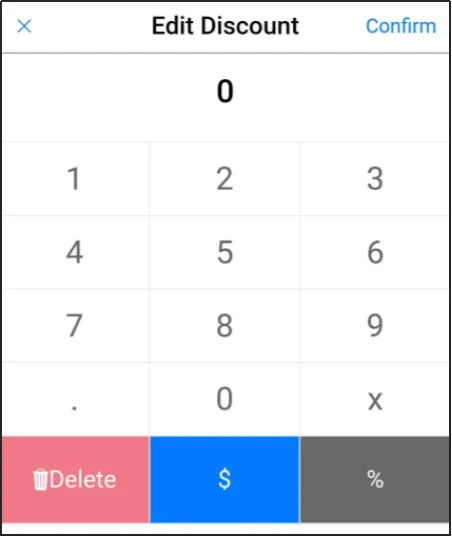
Click [Discount] to enter a discount for the product. You can directly reduce the price or set a percentage discount.
For example, if you enter "10", click [$] to reduce the price by $10, and click [%] to reduce the fee by 10%, which is a 10% discount.
Click [Confirm] in the upper right corner.
If you set a discount, the selling price will change accordingly.
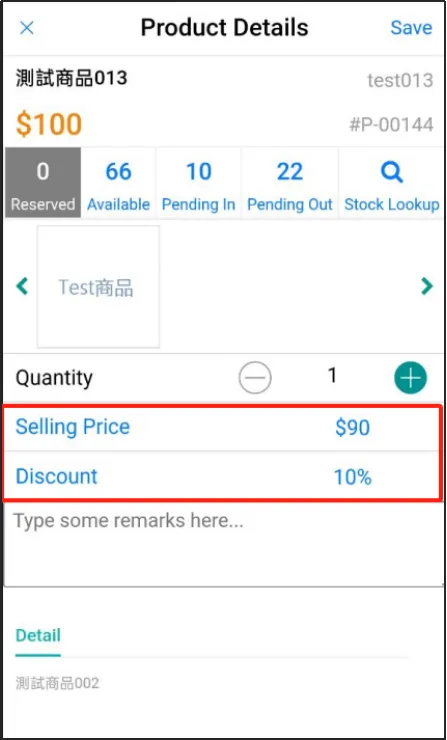
Click [Save] in the upper right corner to complete the price change/discount setting.
Use preset charges/discounts
If you want to give regular customers an additional discount, but don't want to modify the price/discount on a product-by-item basis, you can set a discount in advance and give this preset discount directly when regular customers come to shop.
Similarly, it is okay to set additional charges in advance, such as service fees, plastic bag fees, etc.
Open the CMSclick POSclick Settingsclick the tab to display additional charges and discountsclick [Add].
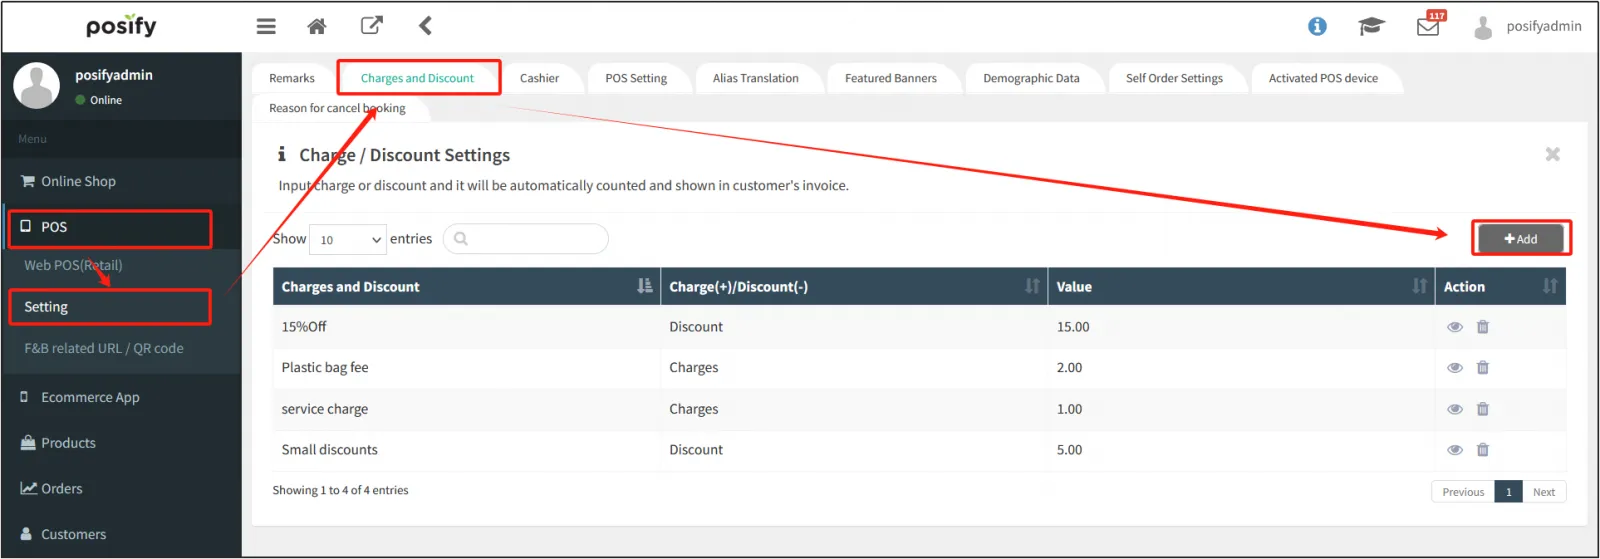
Enter a name for the default charge/discount, select the type is Charge (+) / Discount (-), enter the settings and select Percentage/Actual Amount. For example, selecting Discount, Percentage, and entering "15" means a 15% discount, and if you select Charge, Actual Amount, and entering "2" means that you will be charged "$2".
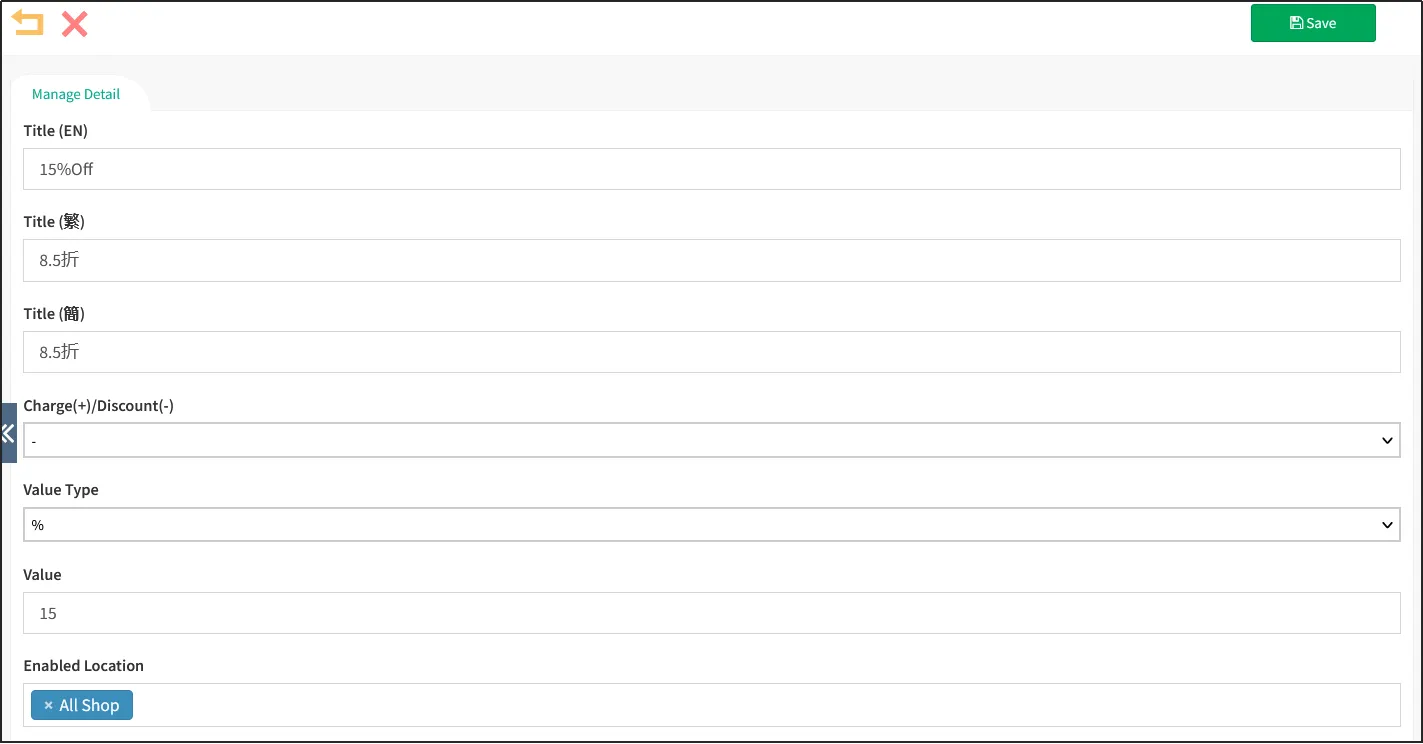
After the CMS new discount is completed, the mobile POS needs to log in again to see the new preset discount.
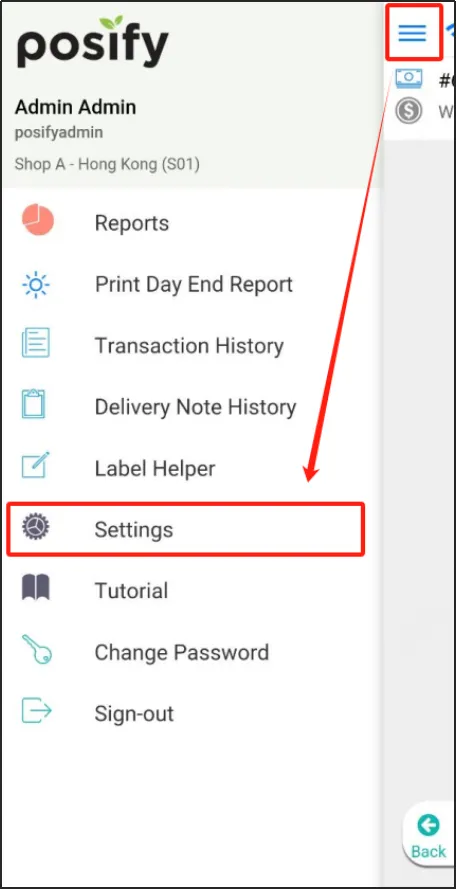
Open the POSclick on the three horizontal lines in the upper left cornerclick Settings.
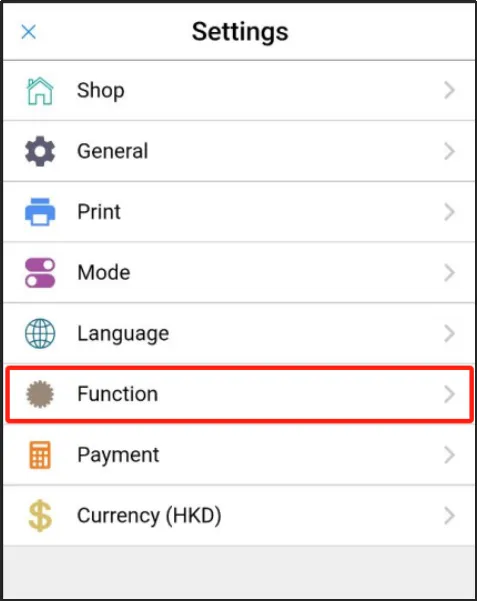
Click Functions.
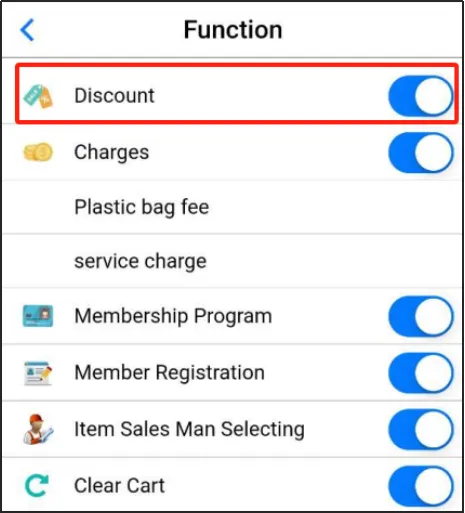
Enable [Discount].
Similarly, add the item to your shopping cart in the POSclick Checkout.
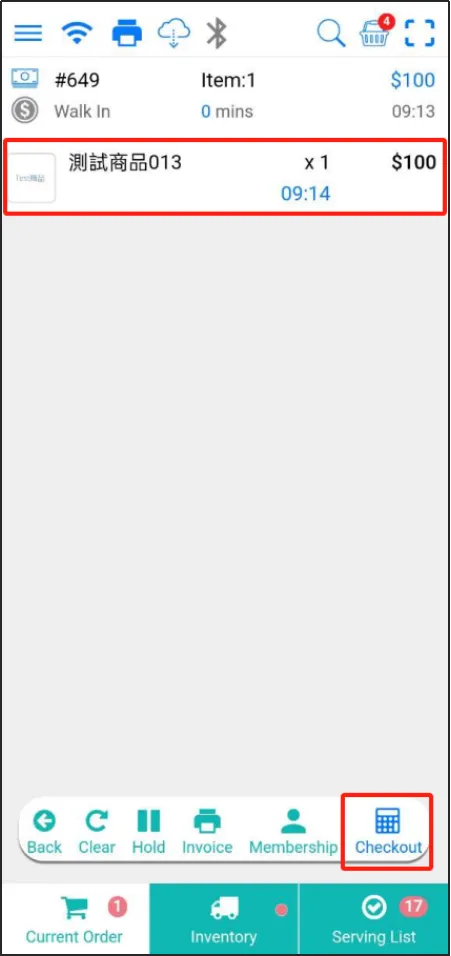
On the checkout screen, click "Discount".
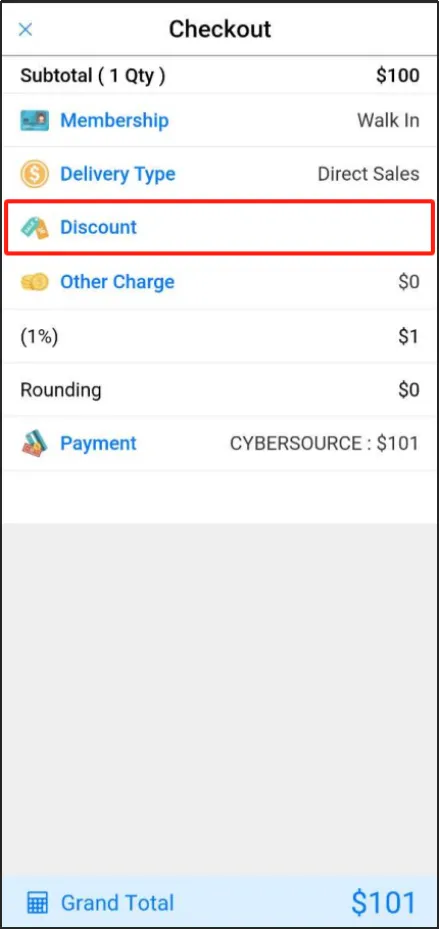
Click [Preset] at the bottom to see the preset discount, click [+] to use, click [-] to cancel, and then click [Confirm] after making the selection.
Note: Charges/discounts of type Percentage can only be added once, while charges/discounts of type Actual Amount can be added multiple times. For example, as shown in the figure below, [8.5% off] can only be added once, while [Small Offer] can be added multiple times.
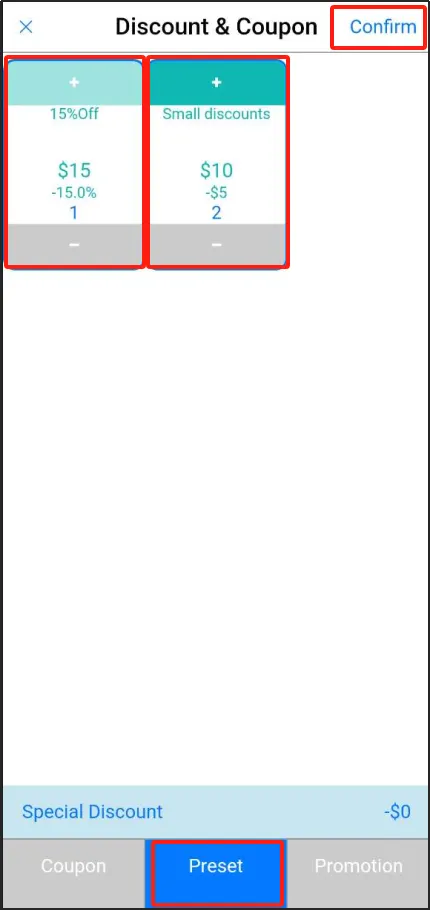
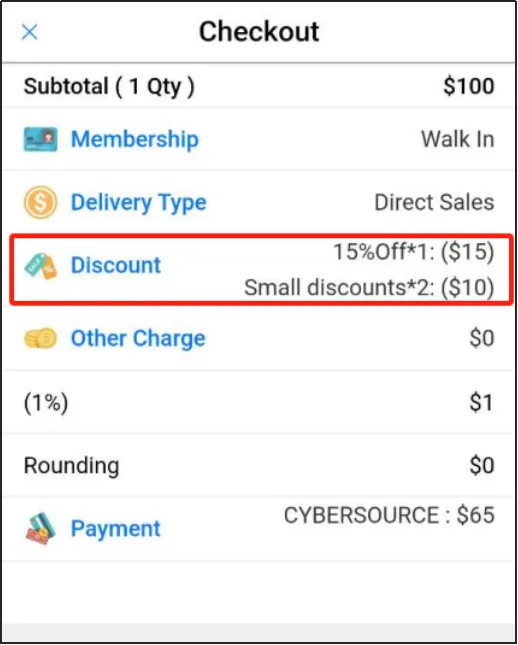
After you confirm the use of the discount, you can see the default discount in effect on the checkout page.
On the checkout screen, click [Service Charge].
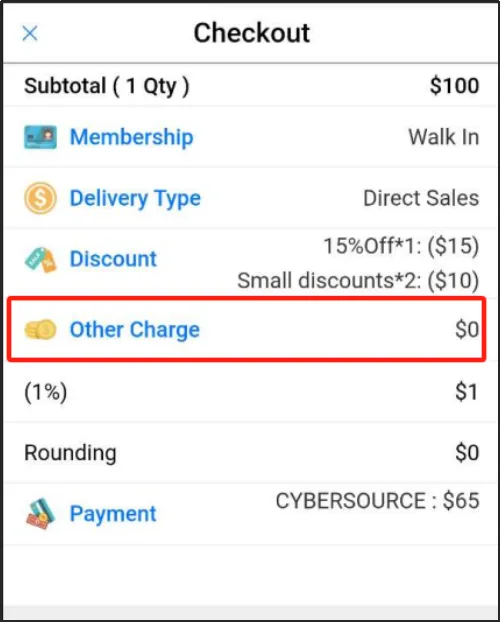
You can see the preset chargesclick [+] to use, click [-] to cancelclick [Confirm].
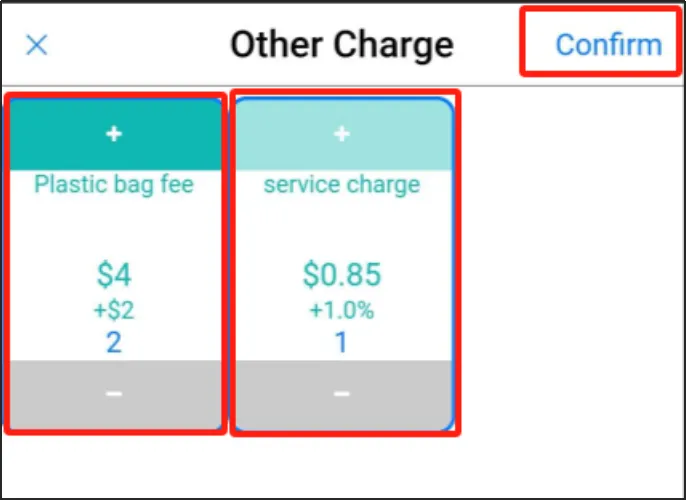
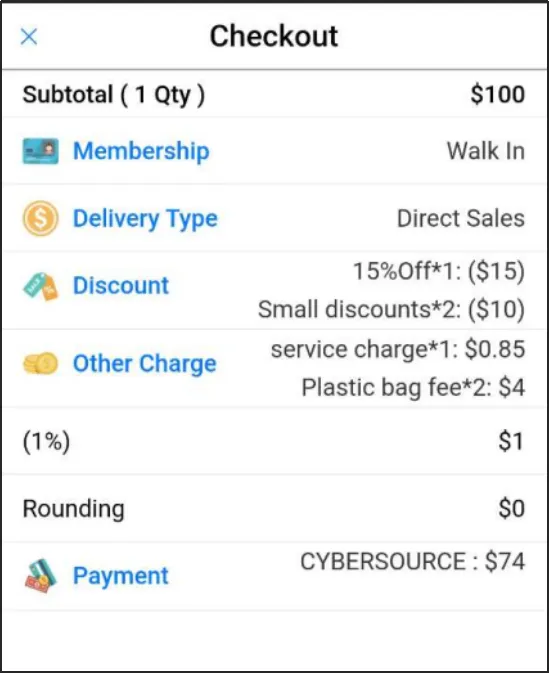
Once you've confirmed your usage charges, you'll see the preset charges take effect on the checkout page.
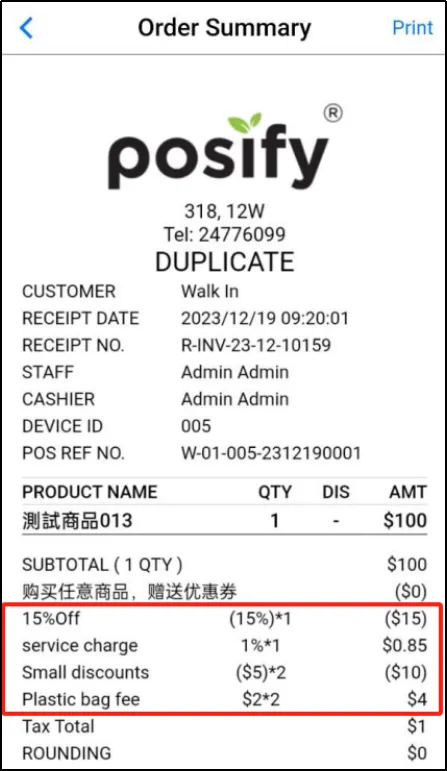
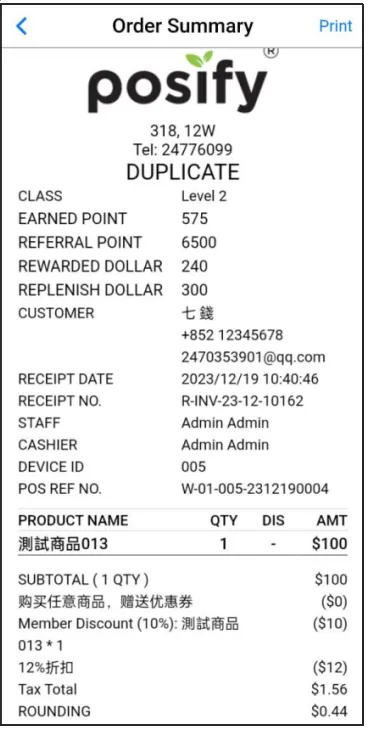
After checkout, you can see the fees/discounts used on the order page.
Special charges are made for orders
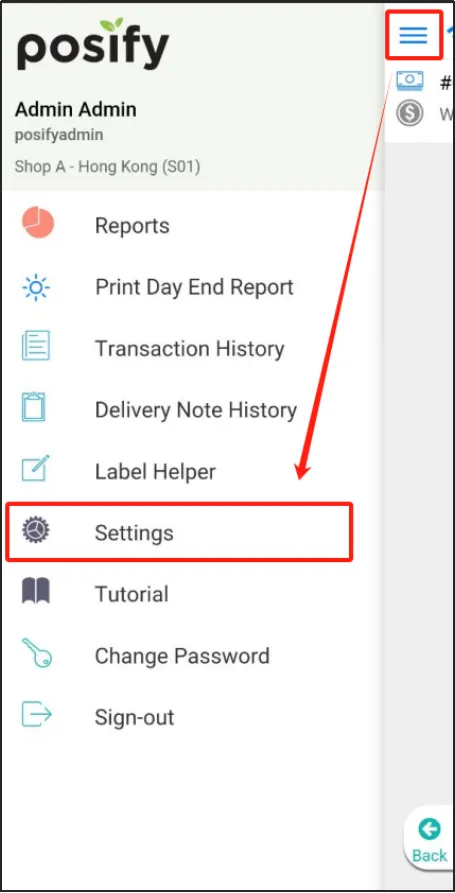
Open the POSclick on the three horizontal lines in the upper left cornerclick Settings.
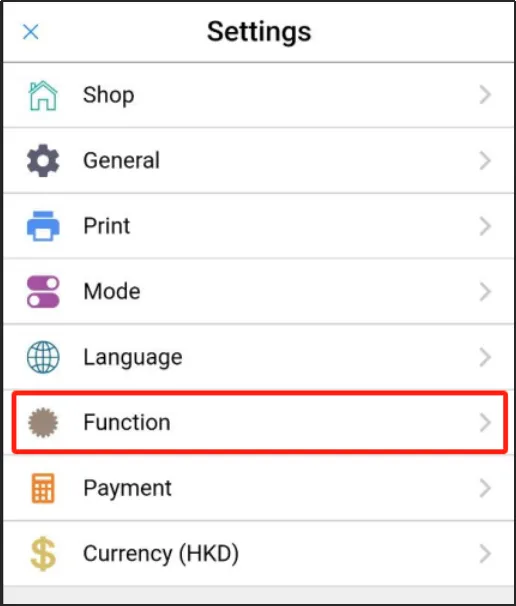
Click Functions.
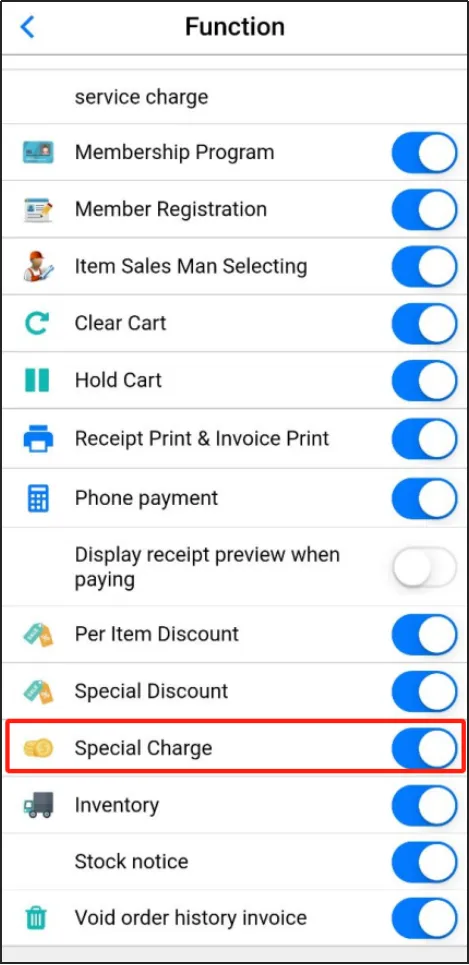
Activation [special charge].
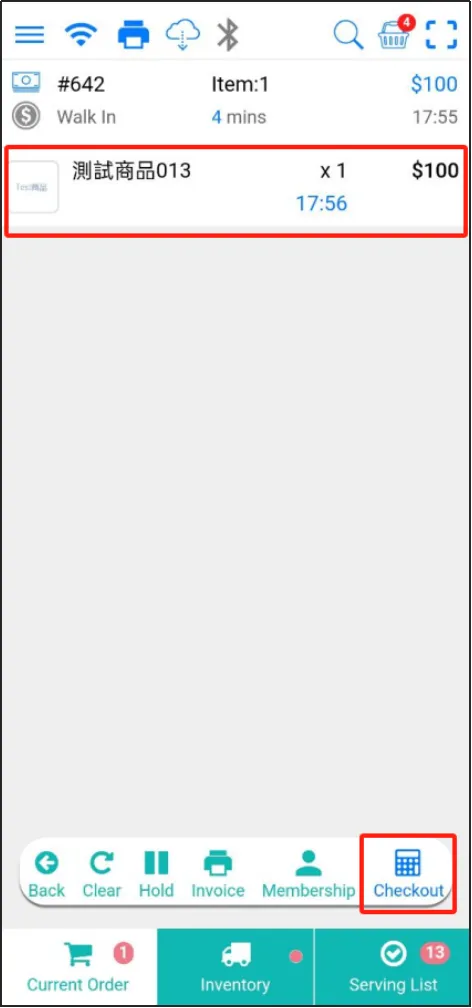
Go back to the POS homepageadd items to your shopping cartclick Checkout.
On the checkout page, click [Service Charge].
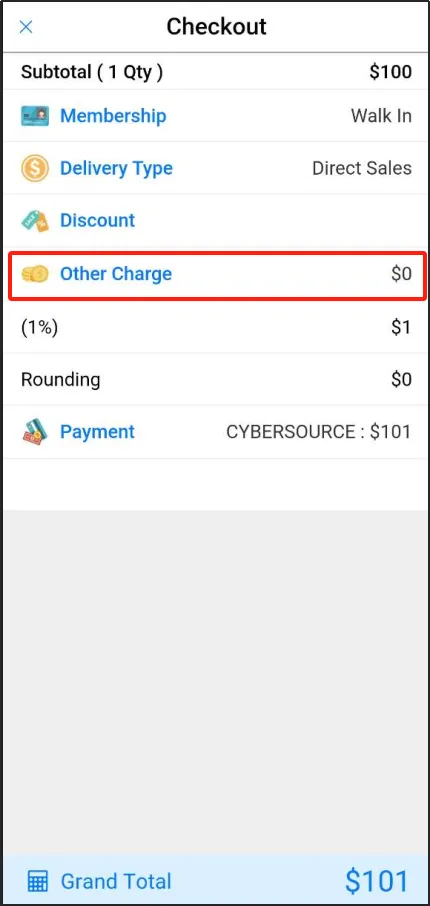
Click [Special Charges] at the bottom of the Service Fees page.
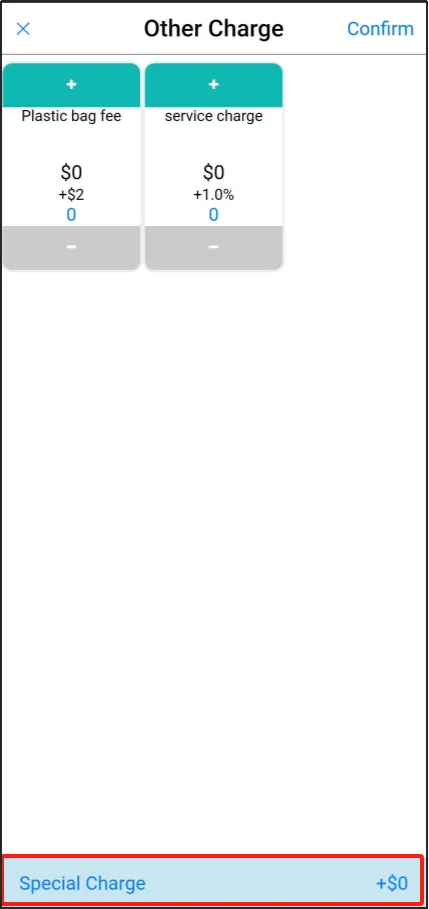
Enter the special fee, click [$] to represent the actual amount, click [%] to represent the percentage charge, and enter a comment below if necessary. For example, if you enter "10", click [$] to charge $10 directly, and click [%] to increase the fee by 10%.
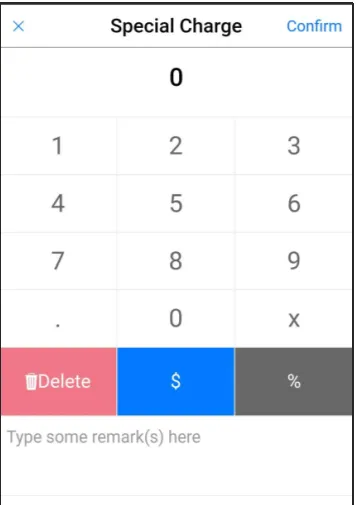
When you click Confirm, you will be able to see the special fees charged on the checkout page.
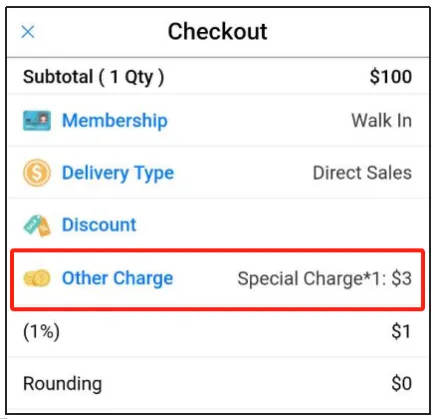
After checkout, you will see the special charges and notes in the bill.
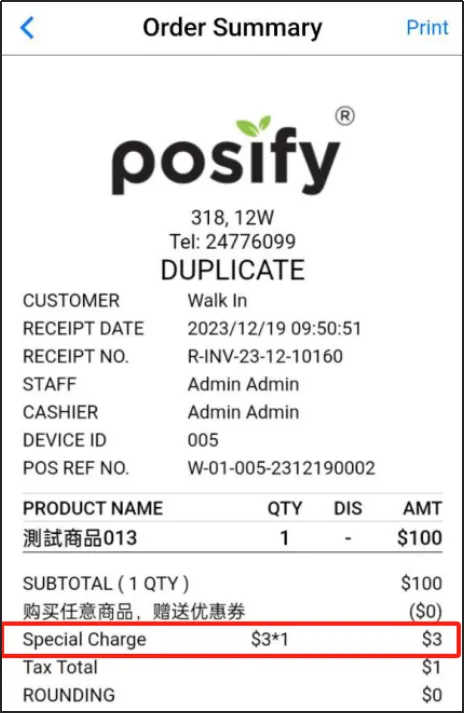
Make special offers on orders
Open the POSclick on the three horizontal lines in the upper left cornerclick Settings.
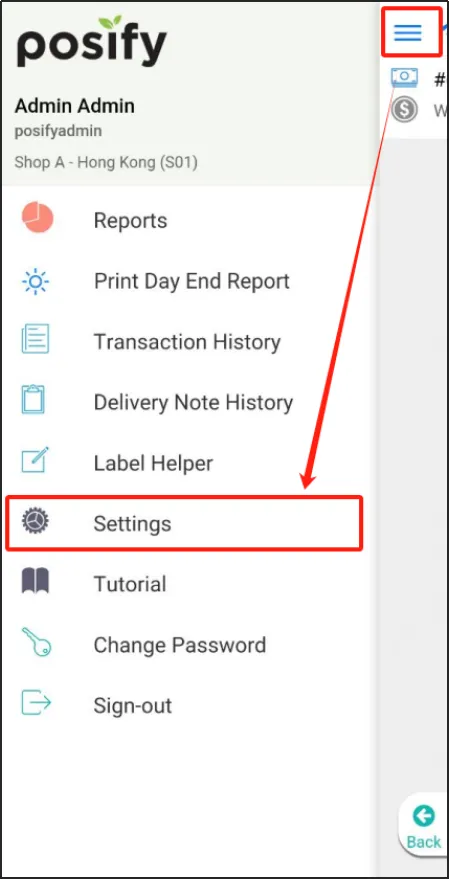
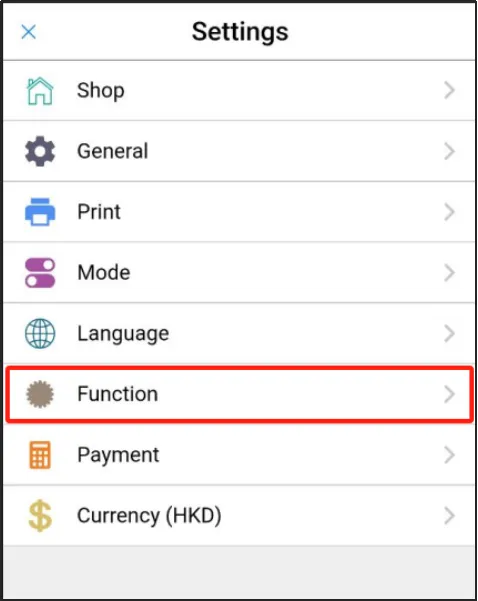
Click Functions.
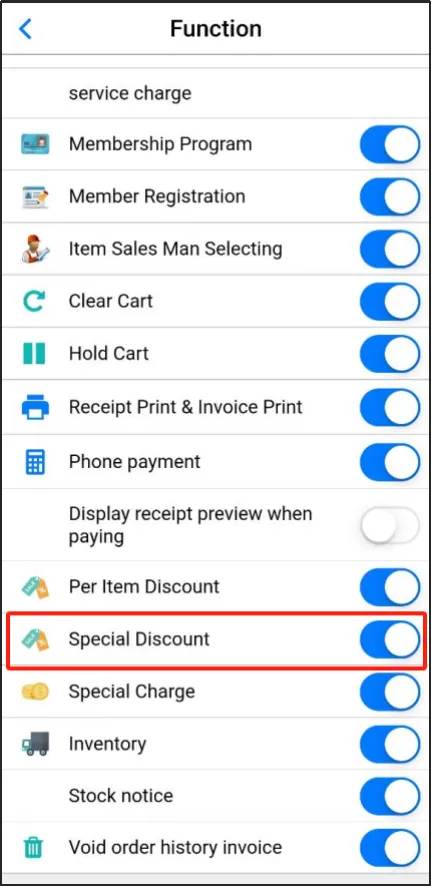
Activate [Special Offer].
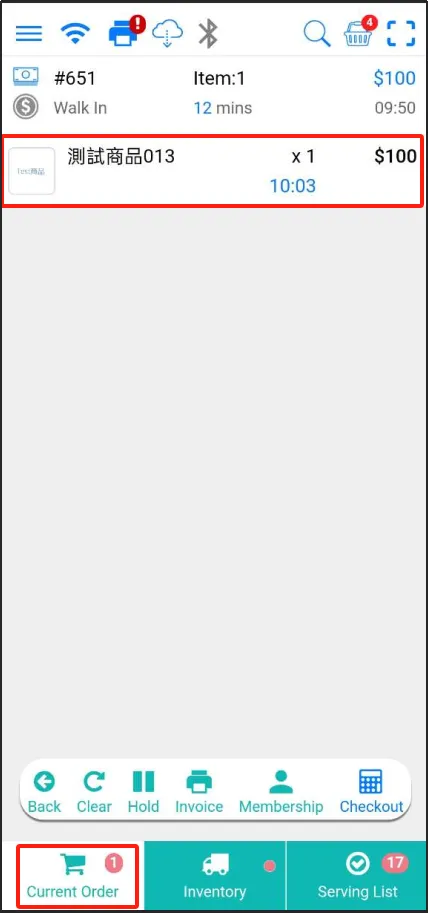
Go back to the POS homepageadd items to your shopping cartclick Checkout.
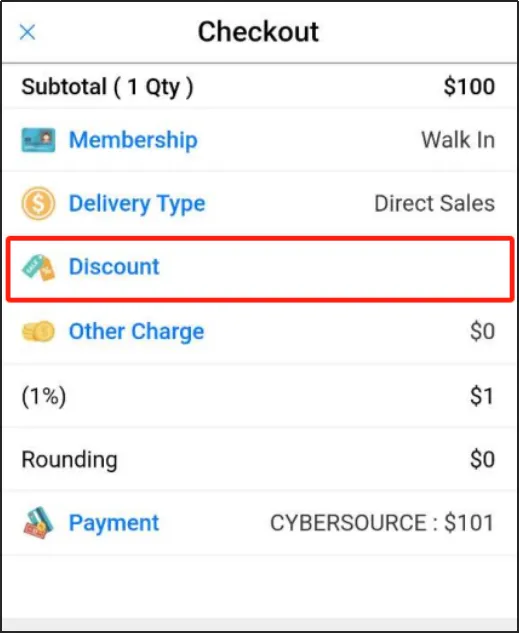
On the checkout screen, click "Discount".
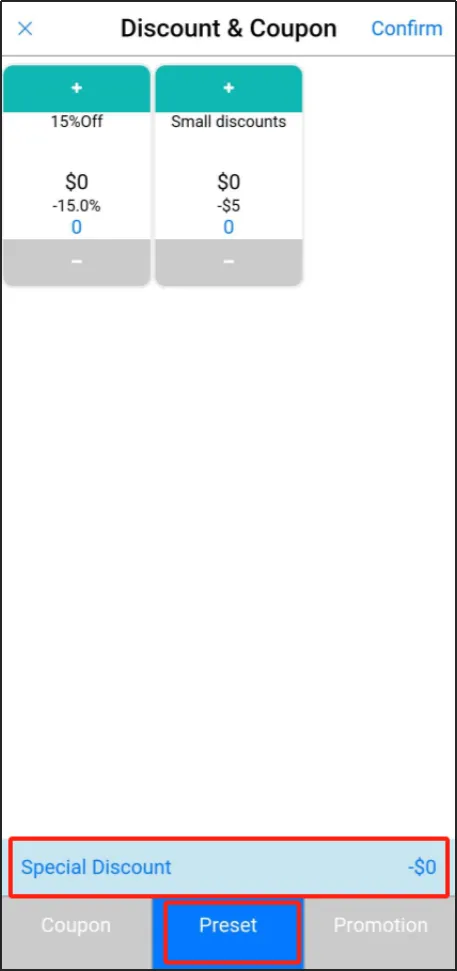
Click [Preset] at the bottom of the service fee screenclick [Special Offer].
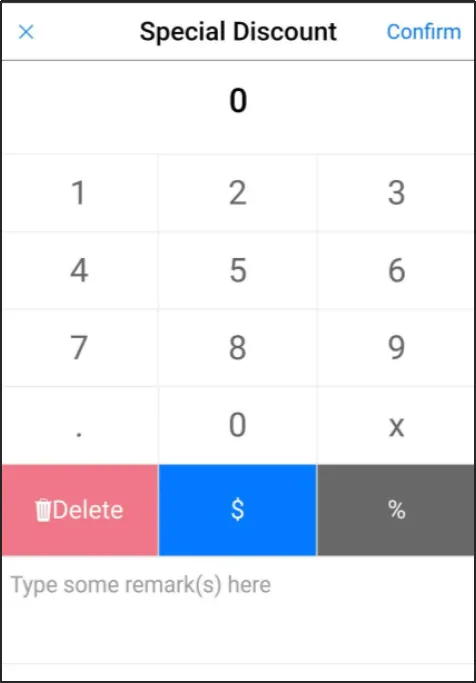
Enter the special offer, click [$] for the actual amount, click [%] for the percentage discount, and enter a comment below if necessary. For example, if you enter "10", click [$] to get $10 off, and click [%] to get a 10% discount.
When you click Confirm, you will see the active special offer on the checkout page.
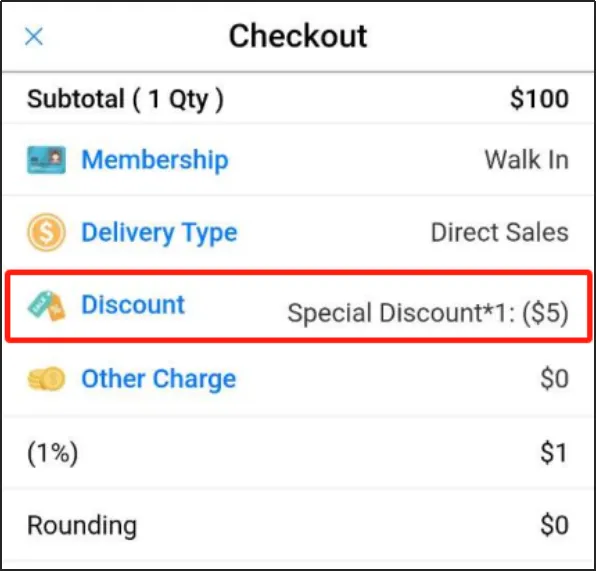
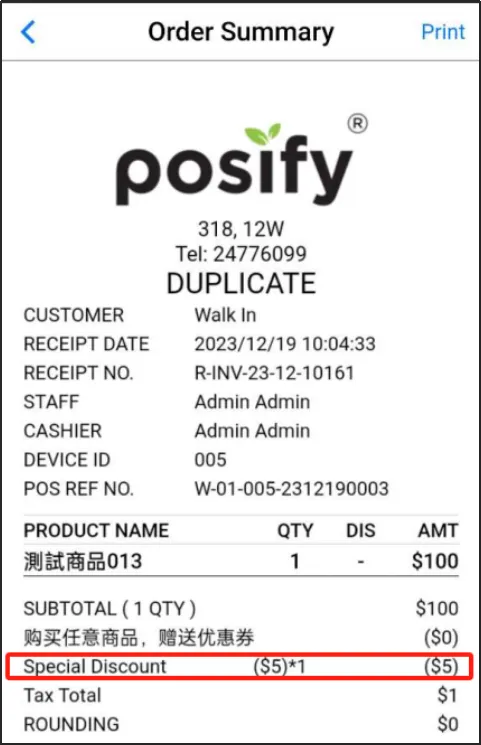
After checkout, you can see the special offer and remarks for the reduction in the invoice.
How to use coupons for mobile POS
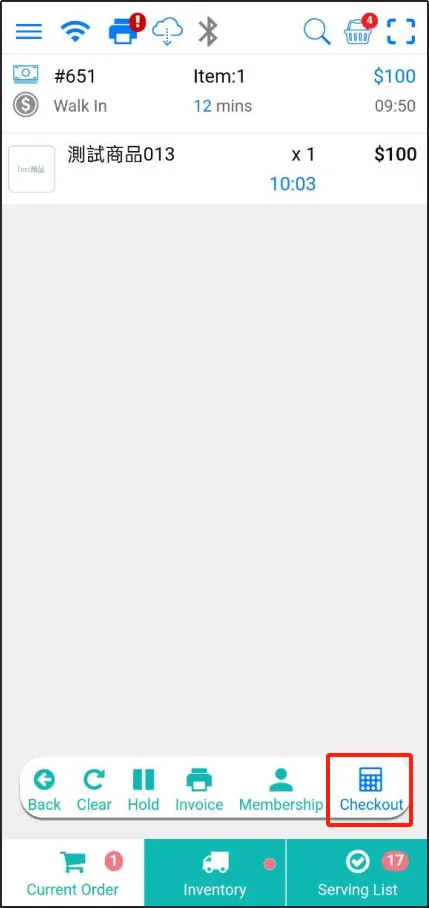
Open the mobile POSadd the items you want to purchase to your shopping cartclick Checkout.
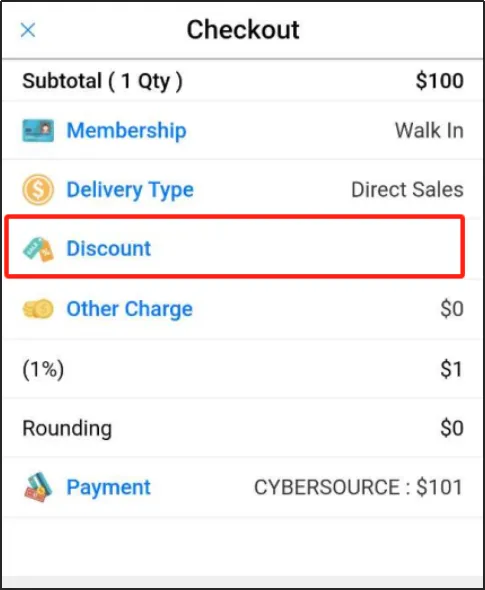
Click [Discount].
Click Scan icon in the upper right cornerscan the coupon QR code provided by the customer.
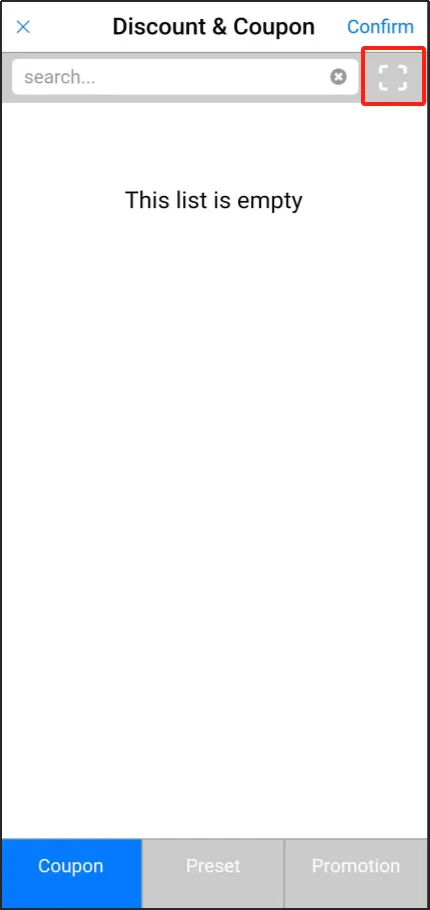
After the code is successfully scanned, the corresponding coupon will be displayedclick [Confirm] in the upper right corner.
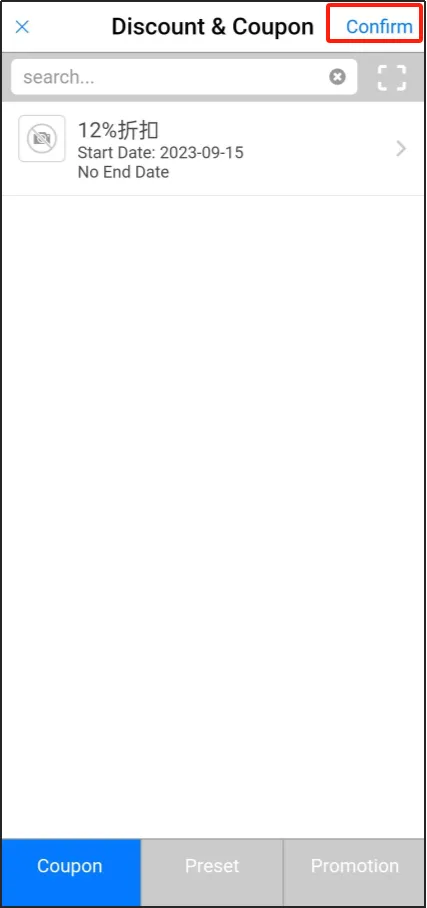
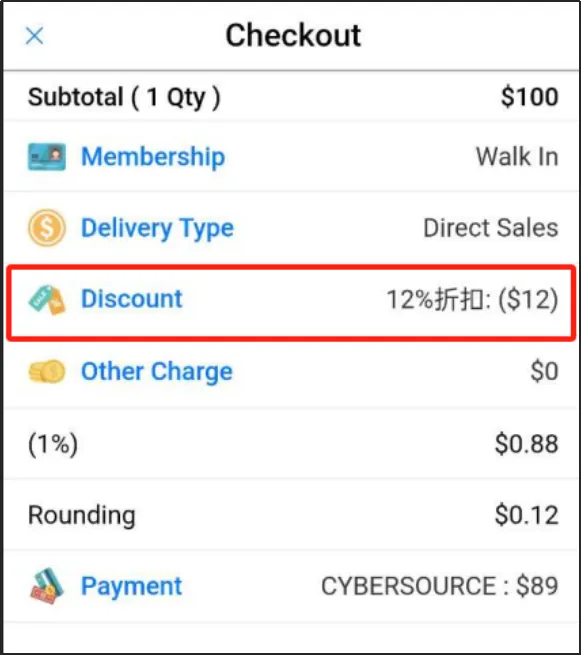
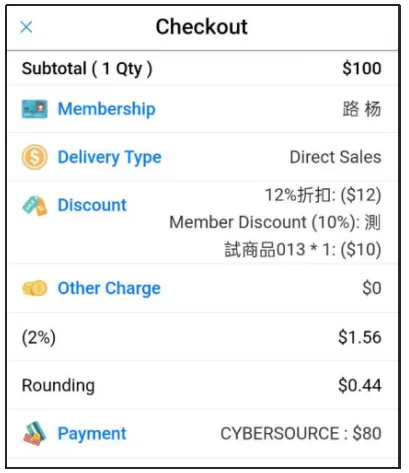
On the checkout page, you can see that the coupon has been activated.
Alternatively, you can click Member, select Member, and click Coupon at the bottom of the Membership page.
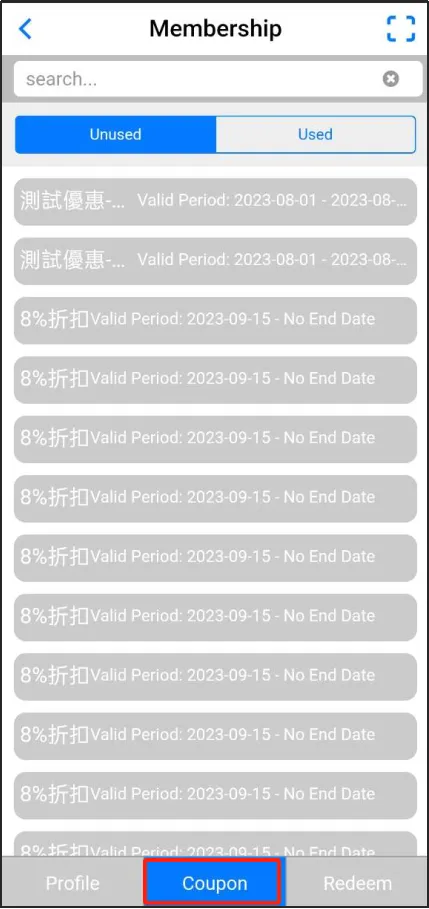
Click [Use Now].
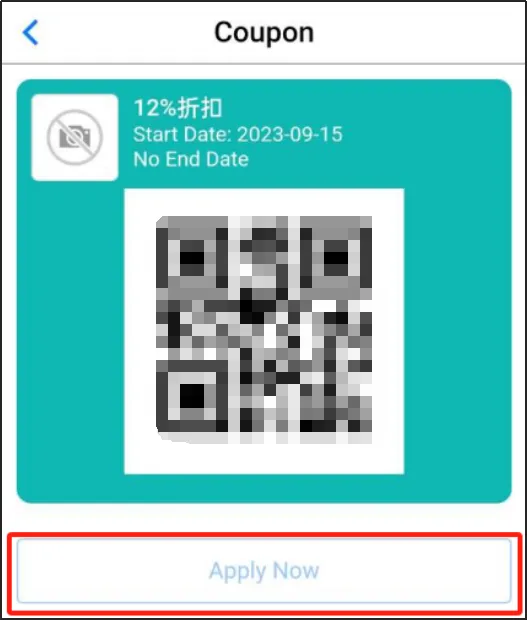
On the checkout page, you can see that the coupon has been activated.
After checkout, open the order summary in your transaction history and you'll see information about how the coupon was used.
View reports for additional charges/discounts
Open the CMS
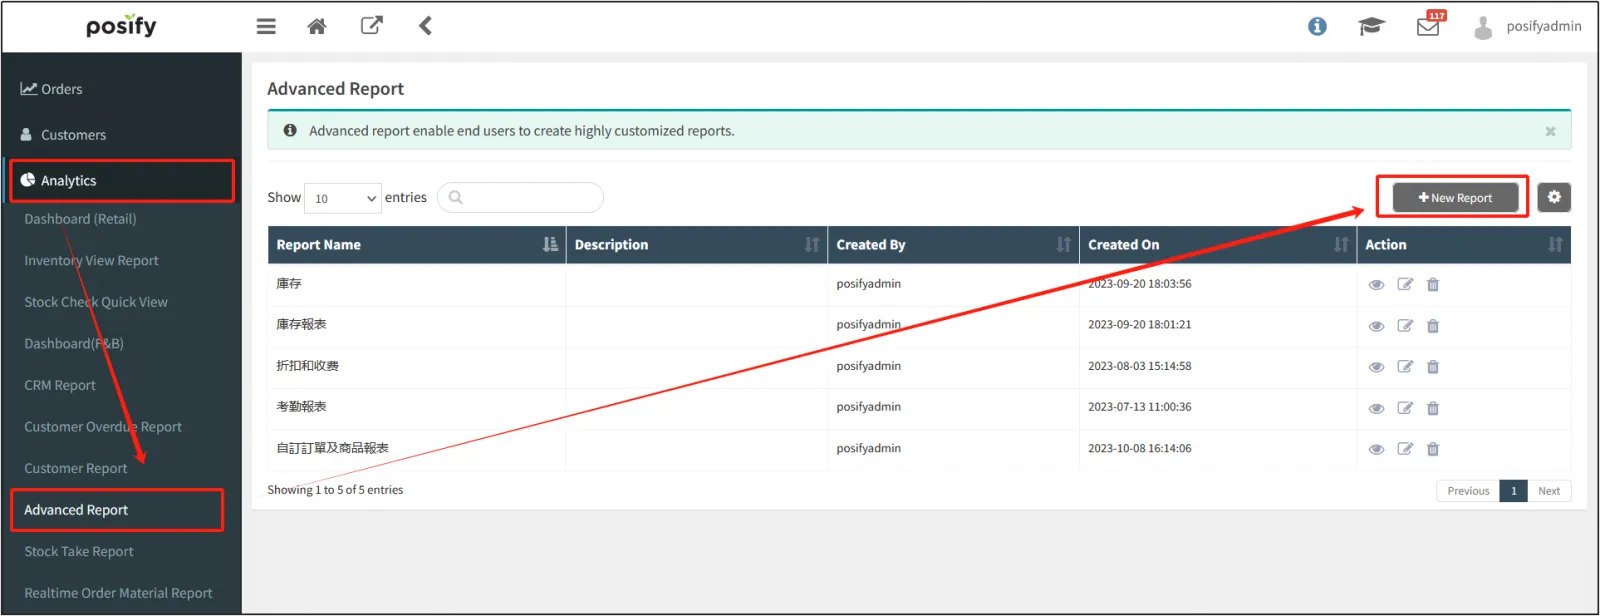
Click Order Reports
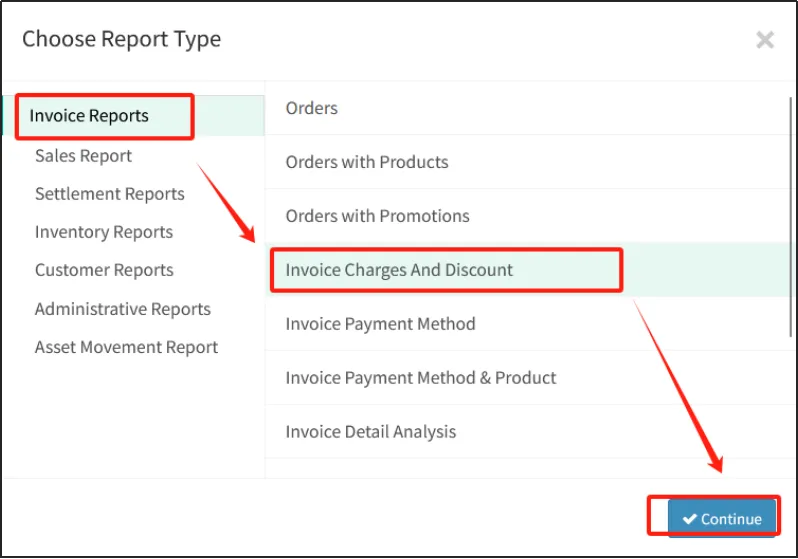
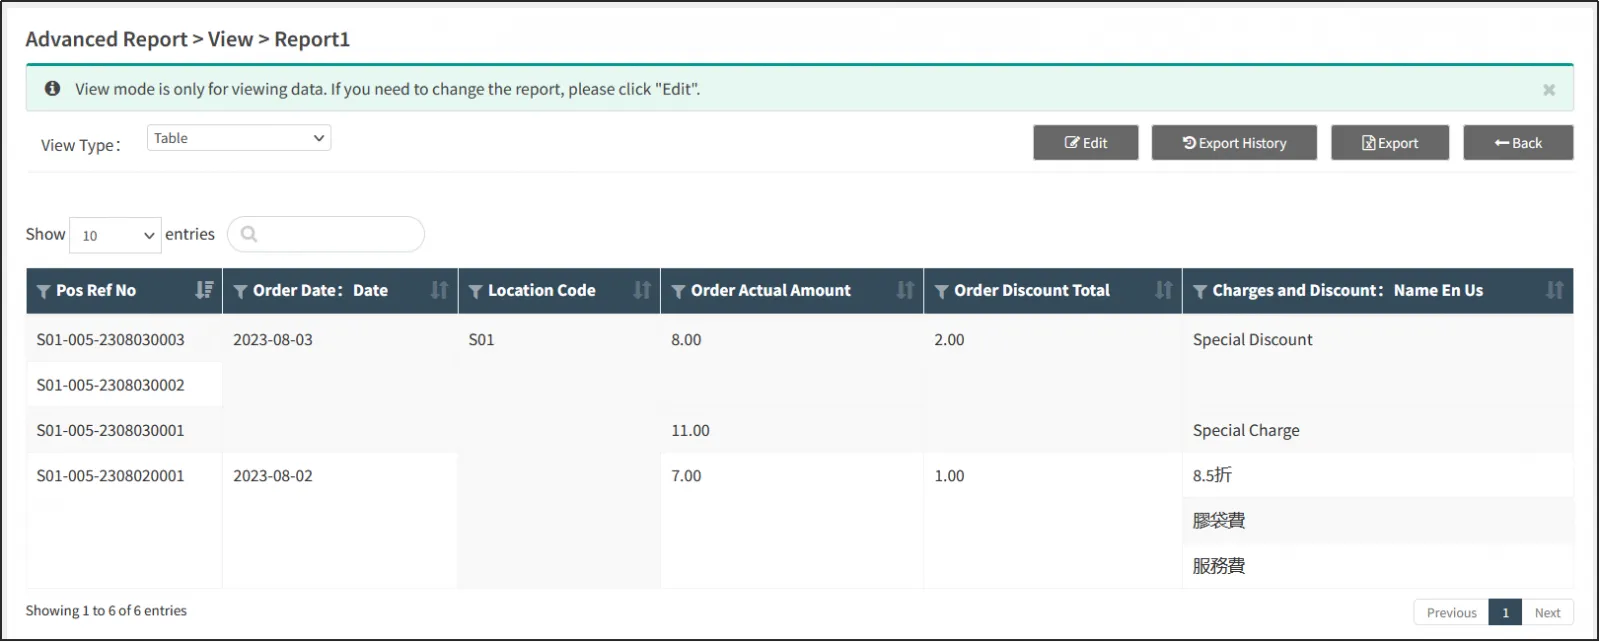
You can see the charges/discounts used and the corresponding order number in the report, click [Save] to enter the report name, and then click [Run] to view or export to Excel.