Transcend Purchase Order
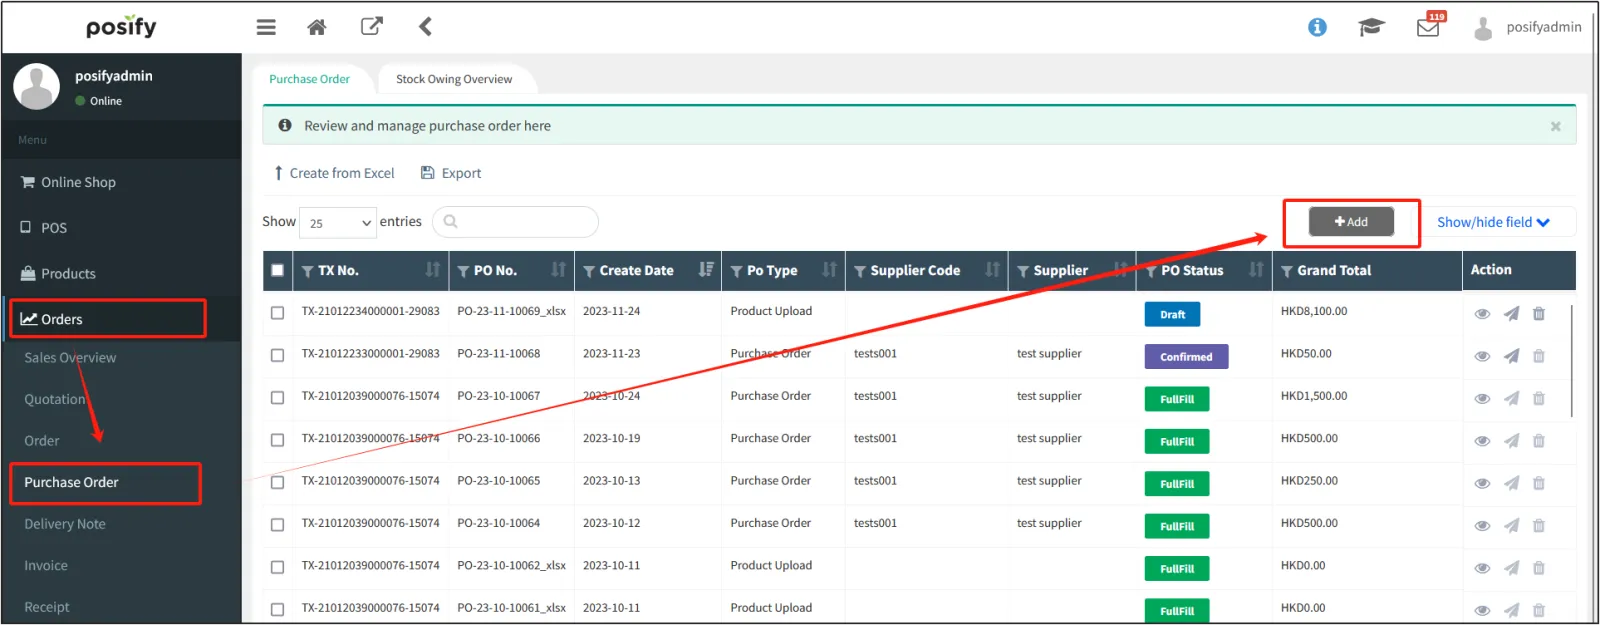
Open CMS click orderclick purchaseClick [Add] in the upper right.
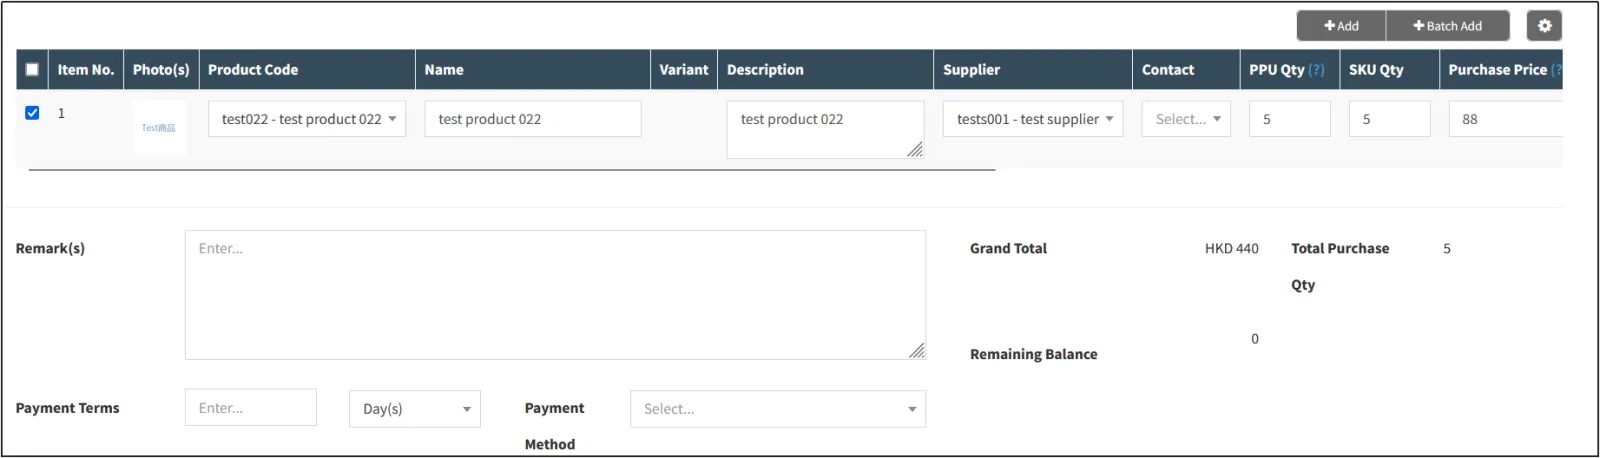
Fill in the product form with the products to be purchased, including the product number, supplier, SKU quantity, purchase price, etc., and click [Add] in the upper right corner to add a new line.

Number of SKUs: The quantity of the product purchased.
Incoming Price: The cost of purchasing the product.
You can enter the shipping cost and VAT percentage of this purchase, check the VAT calculation including the shipping cost, which means that the freight is also * VAT percentage = VAT subtotal, if you do not check it, you only need the subtotal of the purchase price of the goods * VAT percentage, and finally select the payment method.
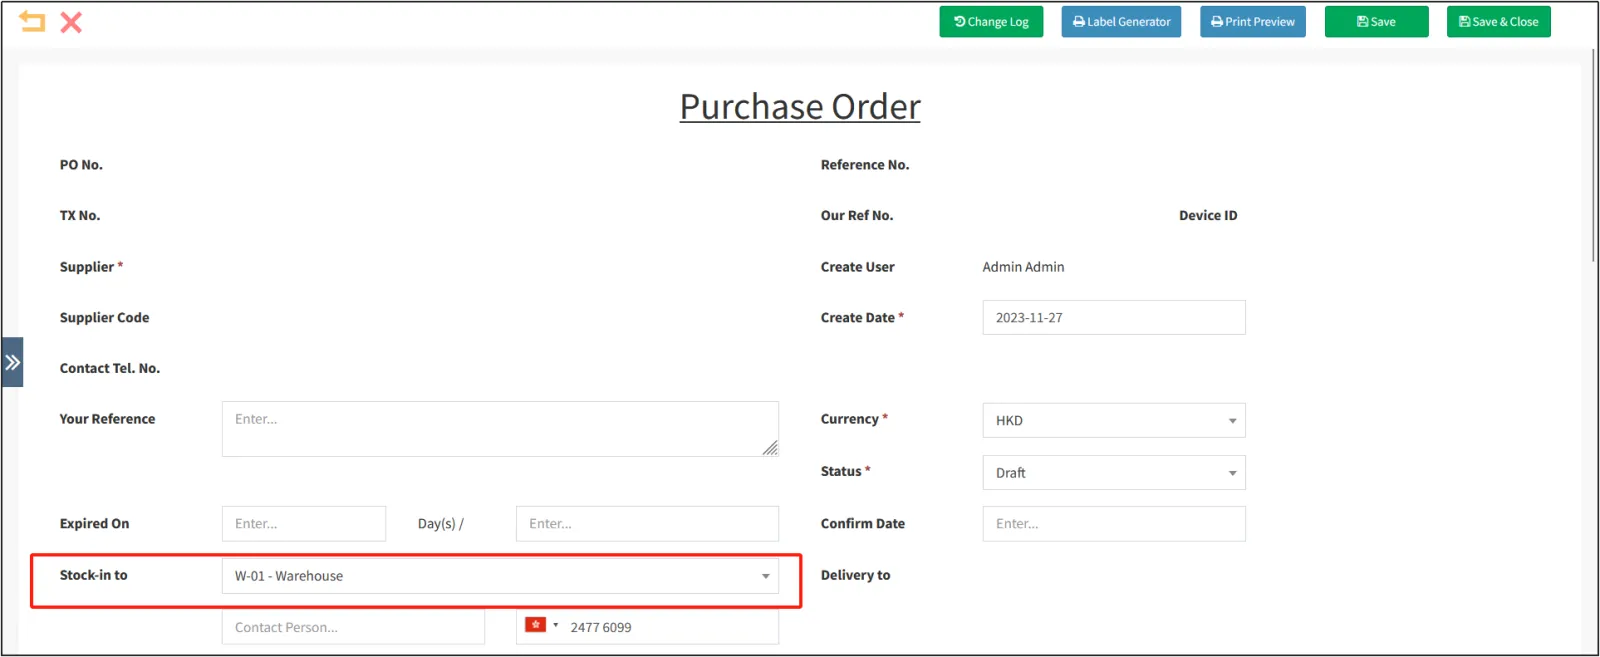
After entering, you can see the total price of the purchased product, set the payment time limit in the Payment Terms, and select the payment method.
In the [Billing to] column, select the location where the purchased goods are warehousedclick [Save] in the upper right corner to complete the purchase order creation.
After checking that the purchase order information is correct, change the status to Confirmedenter the confirmation dateclick [Save] to complete the purchase order.
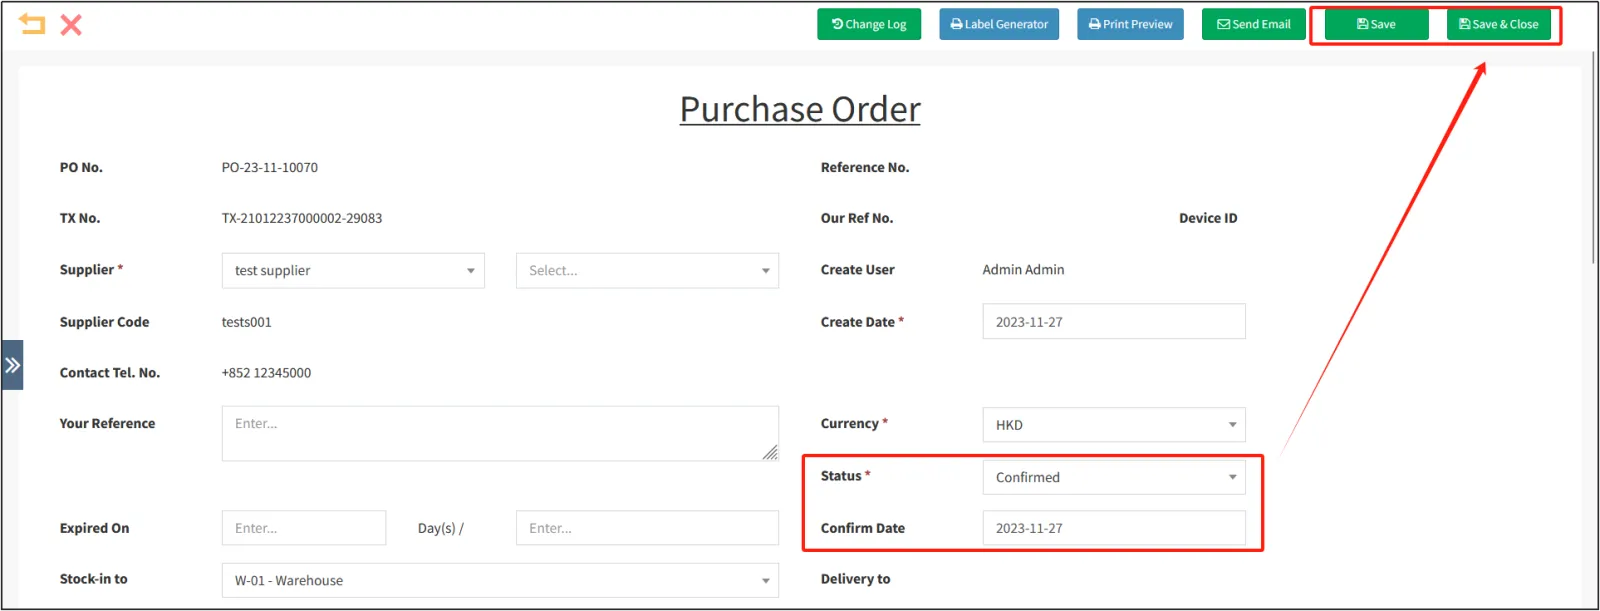
You can see that the status of the purchase order is Confirmed.
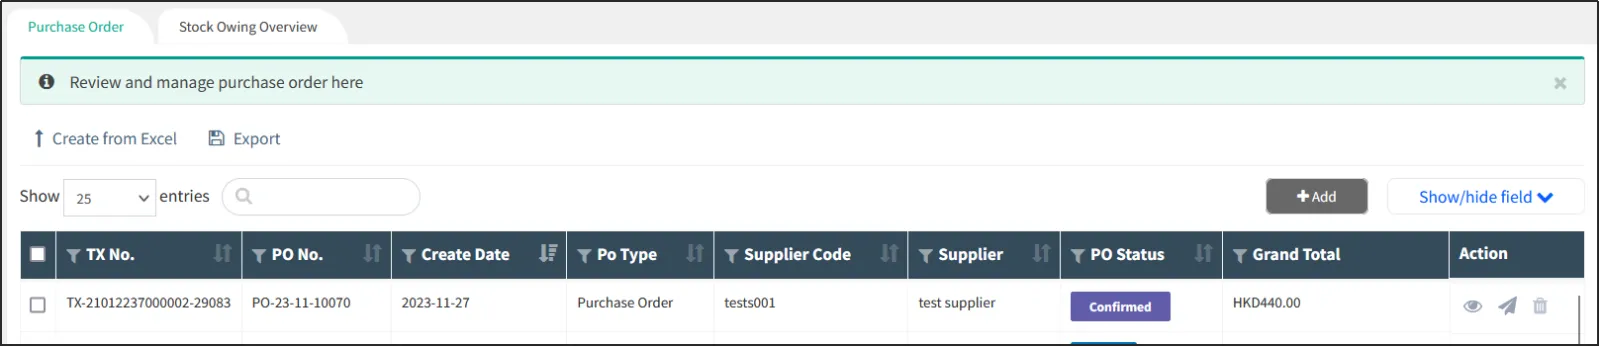
Create purchase orders by importing into Excel
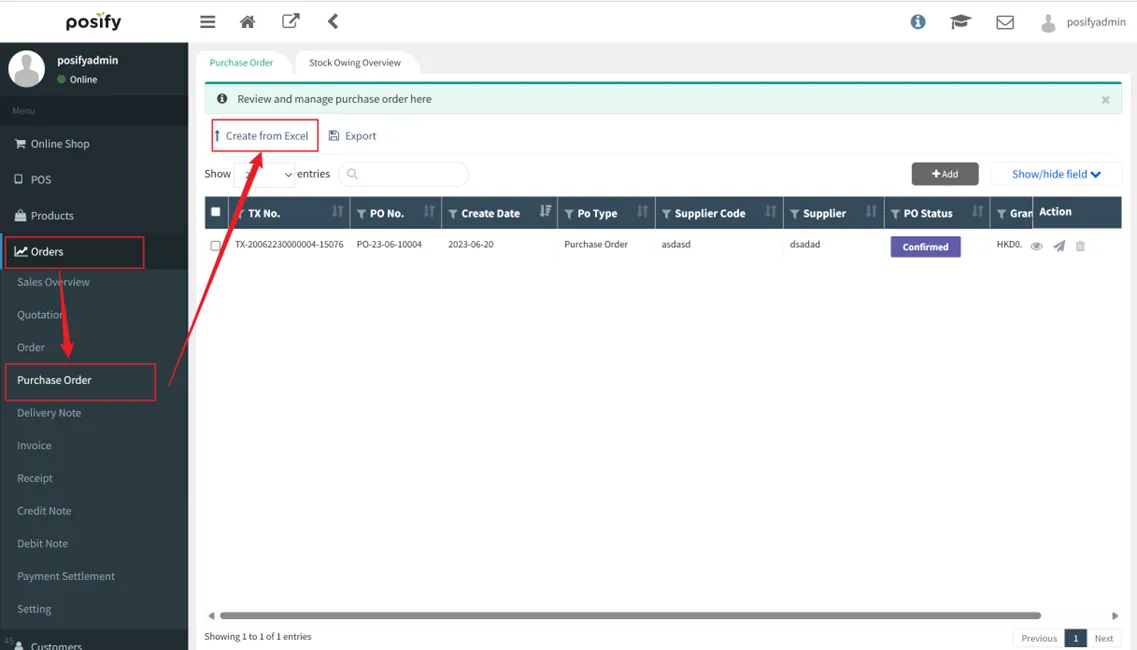
Open CMSclick orderclick purchaseClick [Create from Excel] in the upper left corner.
click new template .
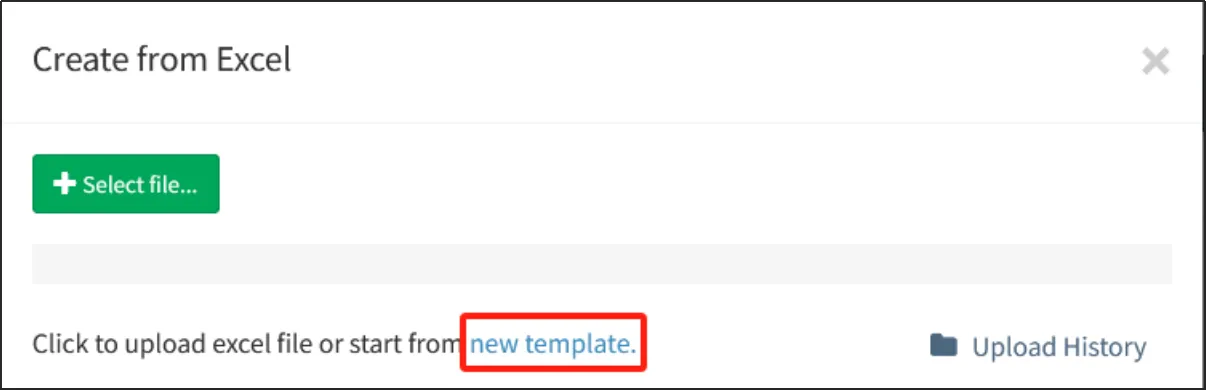
Open the downloaded Excel template and enter the information of the products you want to purchase.

Item Number: Required, the number of the purchased item.
SKU number/manufacturer number/custom SKU number: It is mainly used to distinguish the attribute options of attribute products, and at least one of the three must be filled.
Provider Reference Number: Optional, set the Supplier Reference Number that was set when the product was offered.
Description: Optional, will only be displayed in the details of this purchase order and in the purchase order PDF.
Supplier Number: The number of the supplier who supplied the product.
Number of SKUs: The quantity of the product that is purchased this time.
Purchase price: The cost price of the product for this purchase.
Currency value: The currency used for this purchase, e.g. HKD.
Your Reference: Optional, only displayed in the details of this purchase order and in the PDF of this purchase order.
Credited to: the location of the goods purchased this time, such as S-01.
Confirm Date: Fill in the date format (year. Month. day), use "." Separate.
Once you've finished filling it out, save it to Excel.
Go back to the CMSclick on Ordersclick on Purchasingclick on [Create by excel].
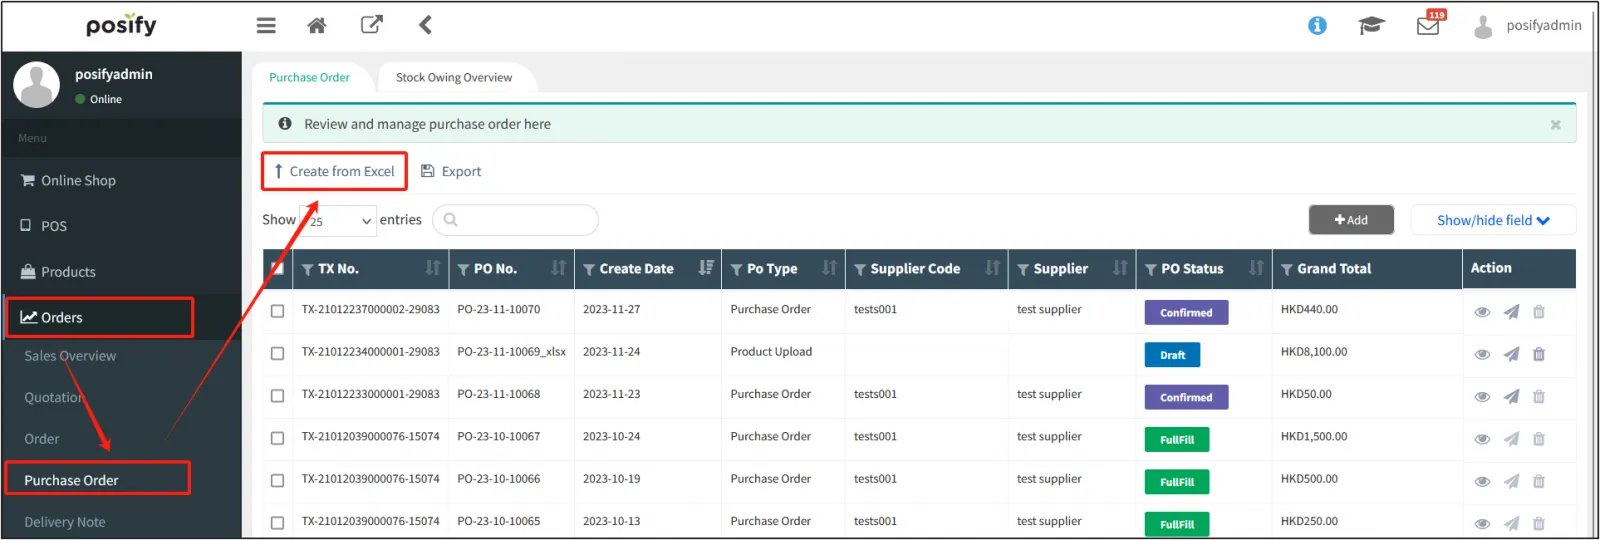
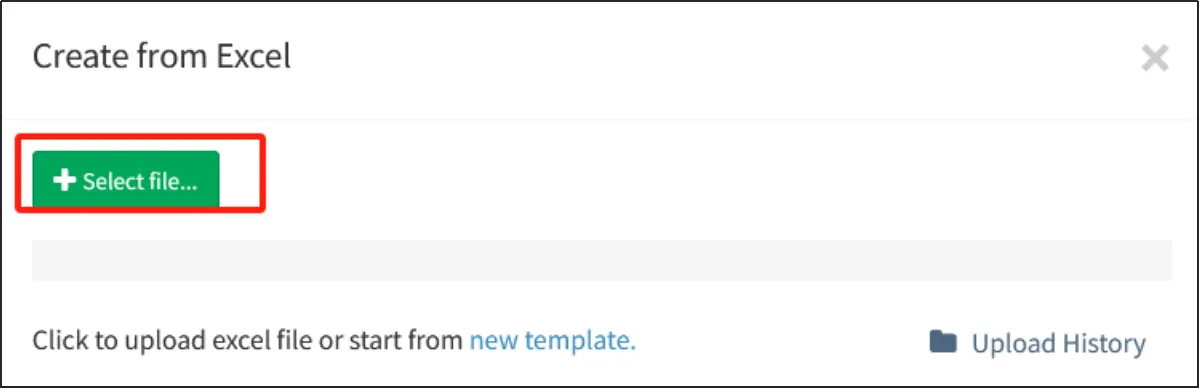
Click [Select File]select the Excel import you just saved.
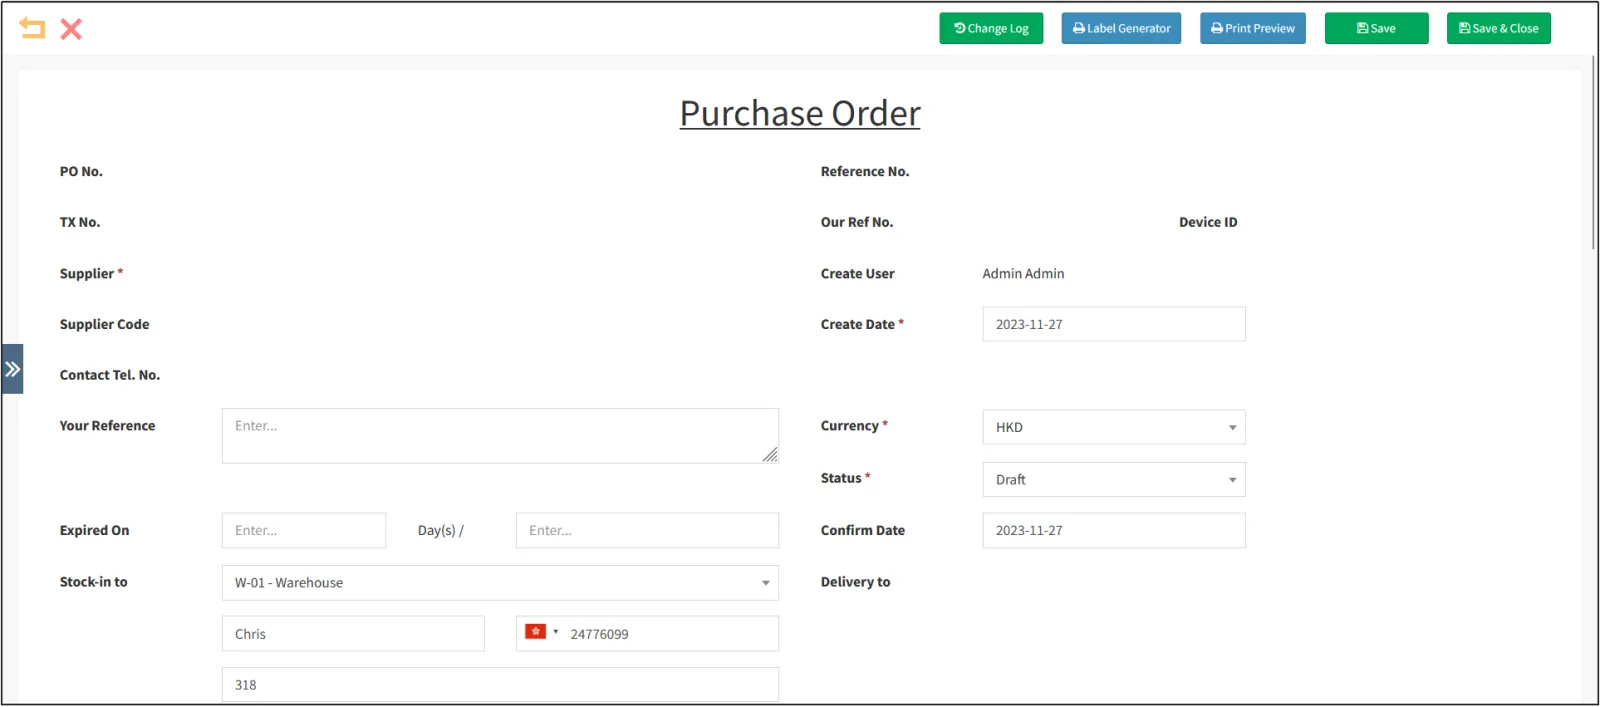
If you generate a purchase order after importing, you can see that the information displayed is the same as that entered in Excel.
Click [Save] to save a draft of the purchase order.
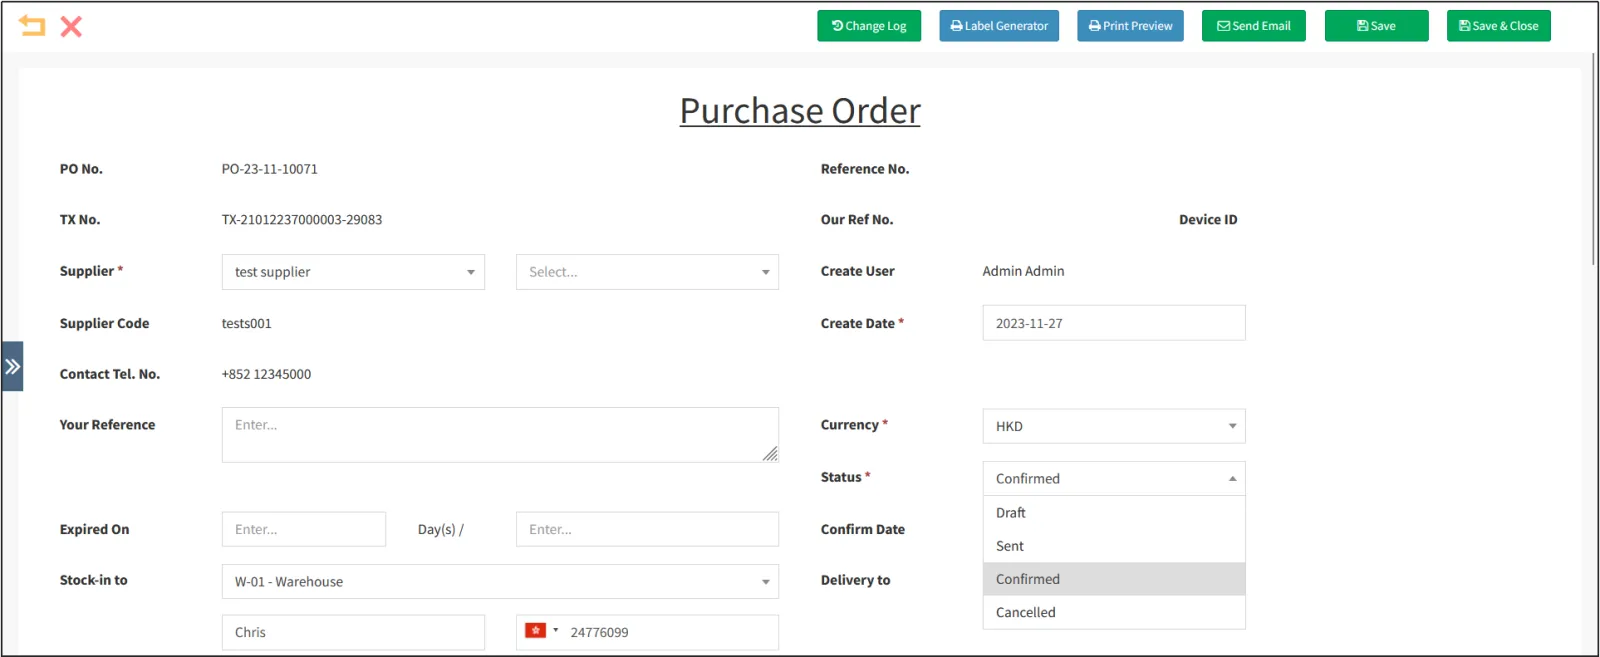
Check the purchase order information again, change the status to OK, and click [Save].
Commodity editing mode import Excel to create purchase
Open the CMSclick on the productclick on the retail productClick on [Edit Mode].
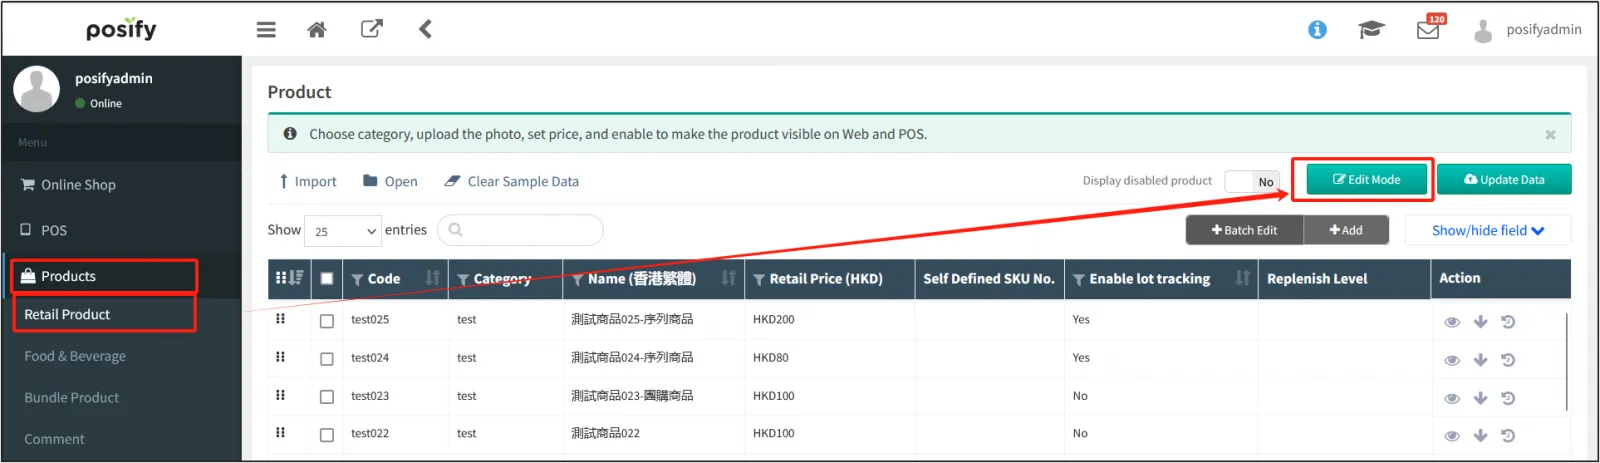
Click [Hide/Show Columns]light up the purchase cost 。
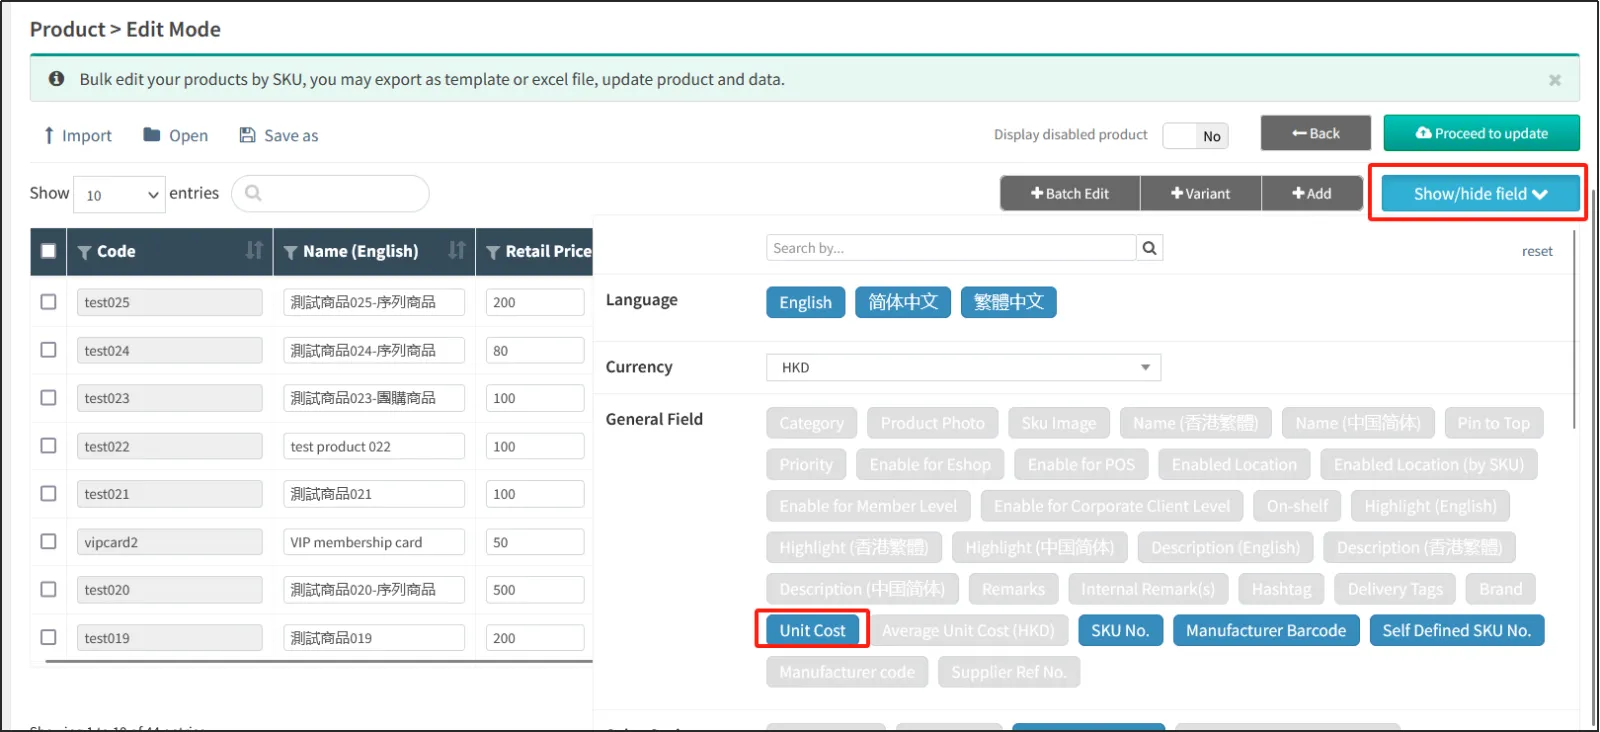
light update inventorySelect the location where purchased goods are put into storage, such as S-01.

Search for the items you want to purchaseenter the purchase cost and update the inventoryclick [Update Now] in the upper right corner.
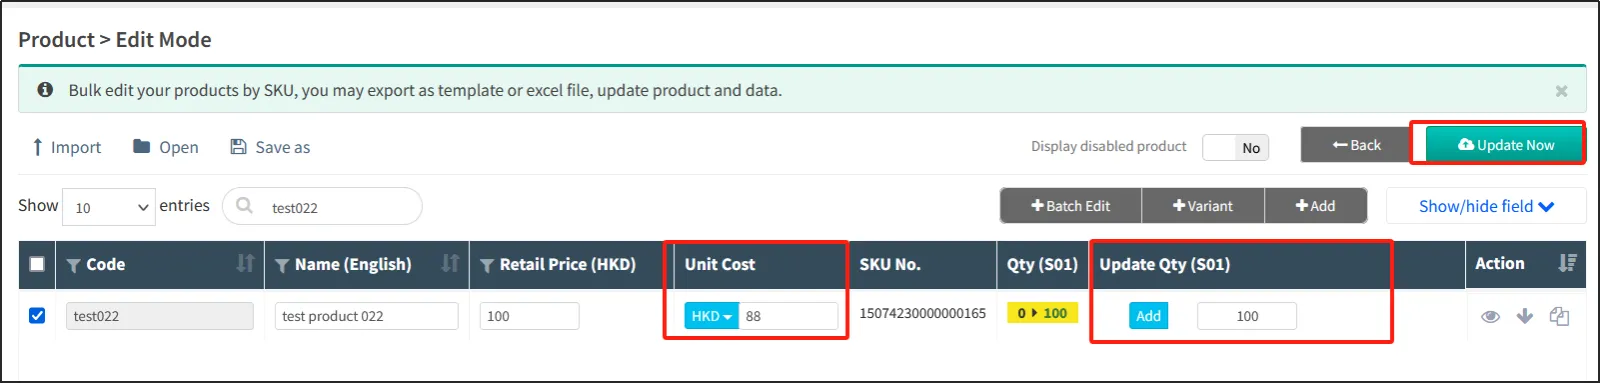
The yellow highlight is the information to be modified, and after confirming that it is correct, click [Update Now] in the upper right corner.
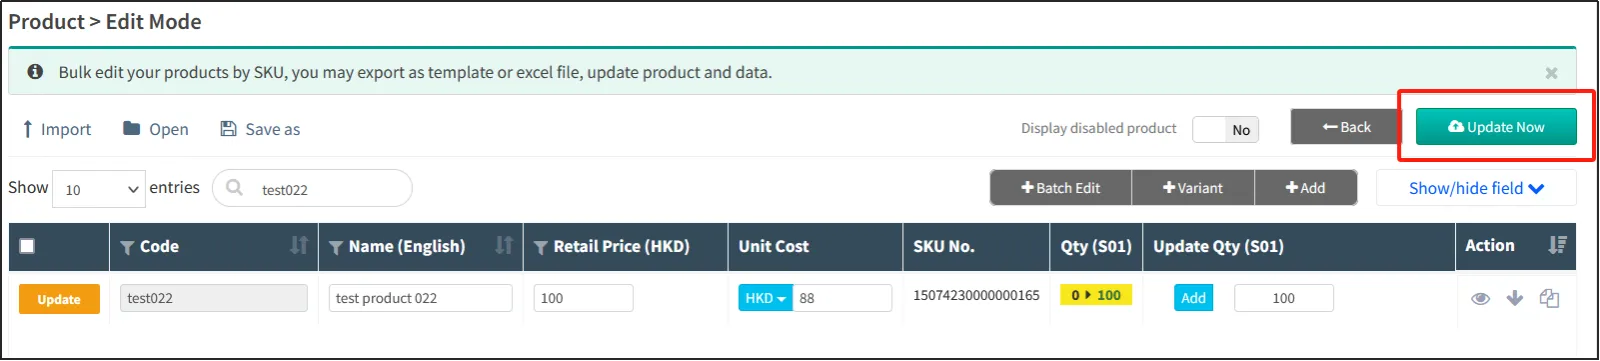
When you're done, you can see that the listing has been successfully updated in edit mode.
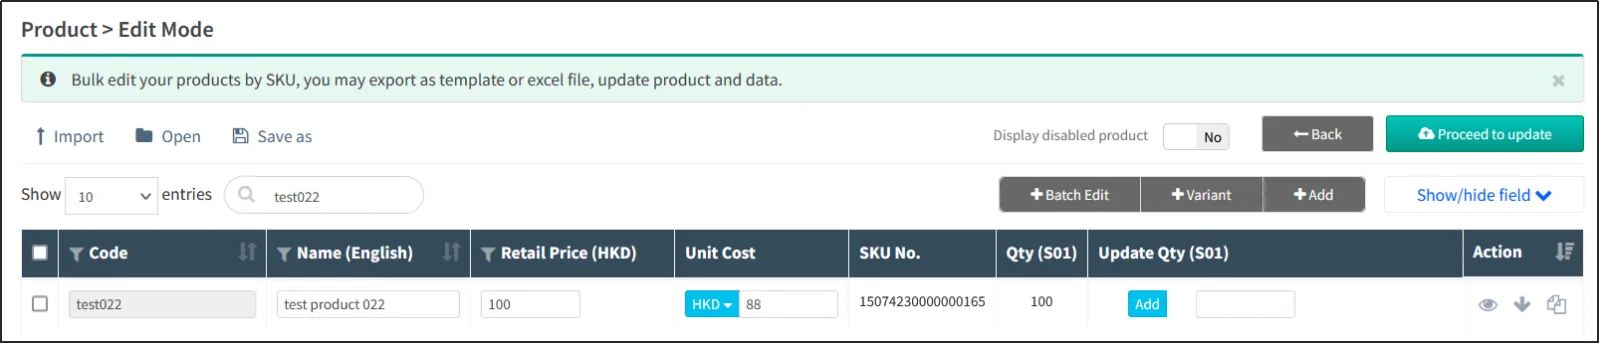
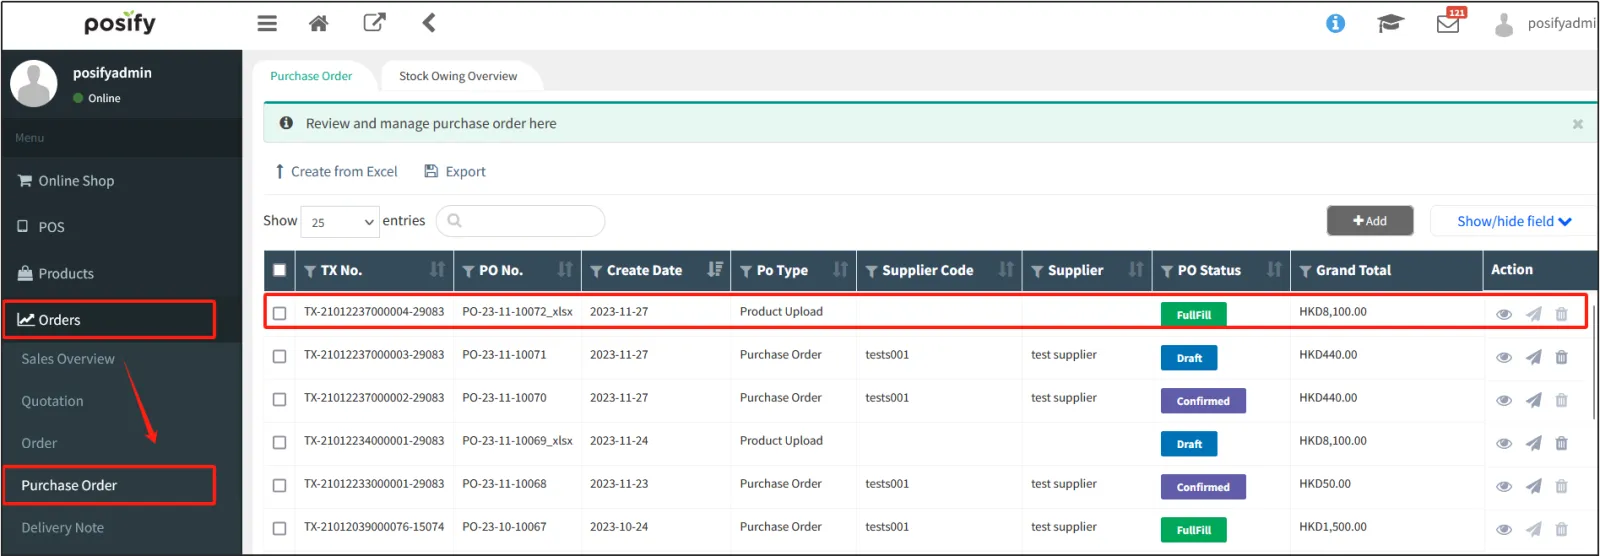
Click Orderclick Purchase, you can find the purchase record that has just updated the inventory information of the product, the purchase order type is Commodity Management Upload, and the status is Arrived.
Import the product editing mode into Excel to create a purchase
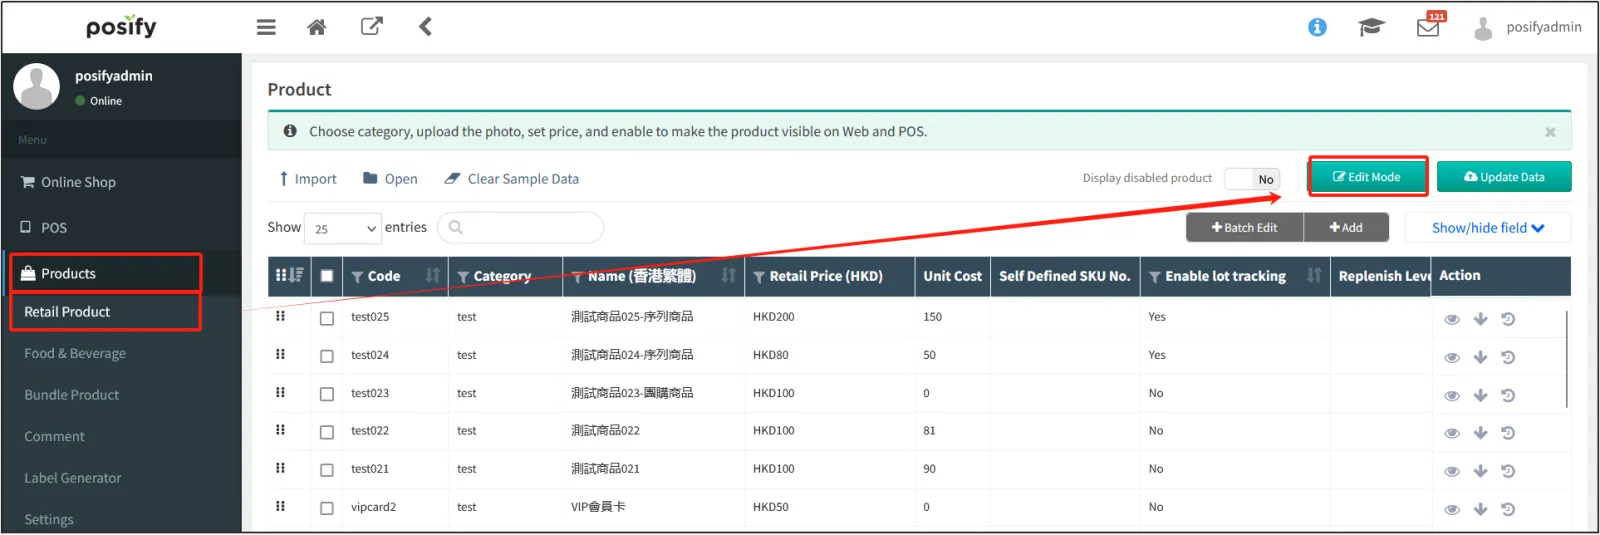
Open the CMSclick on the productclick on the retail productclick on [Edit mode].
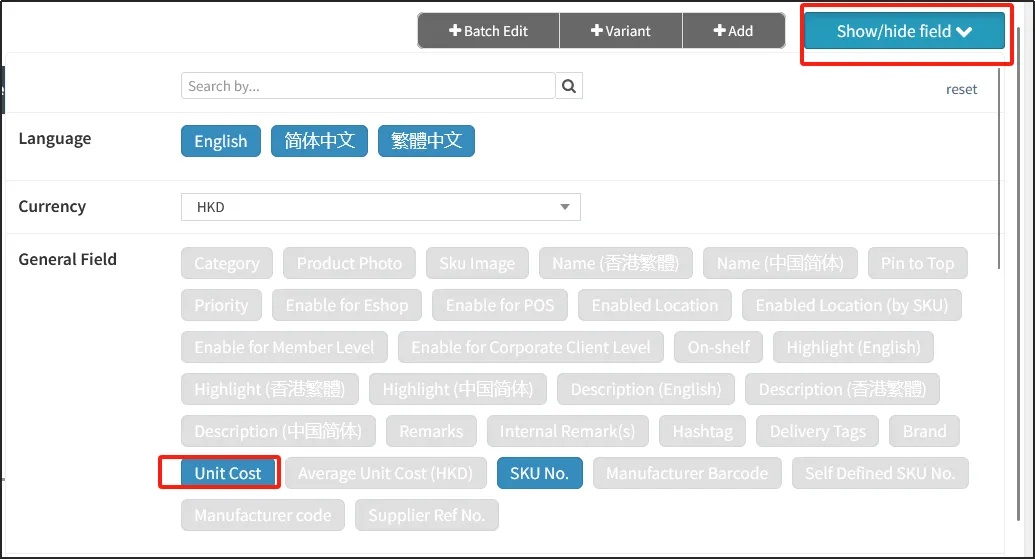
Click [Hide/Show field] light up the unit cost.
Light Update Inventoryselect the location where the purchased goods will be stored, such as S-01.

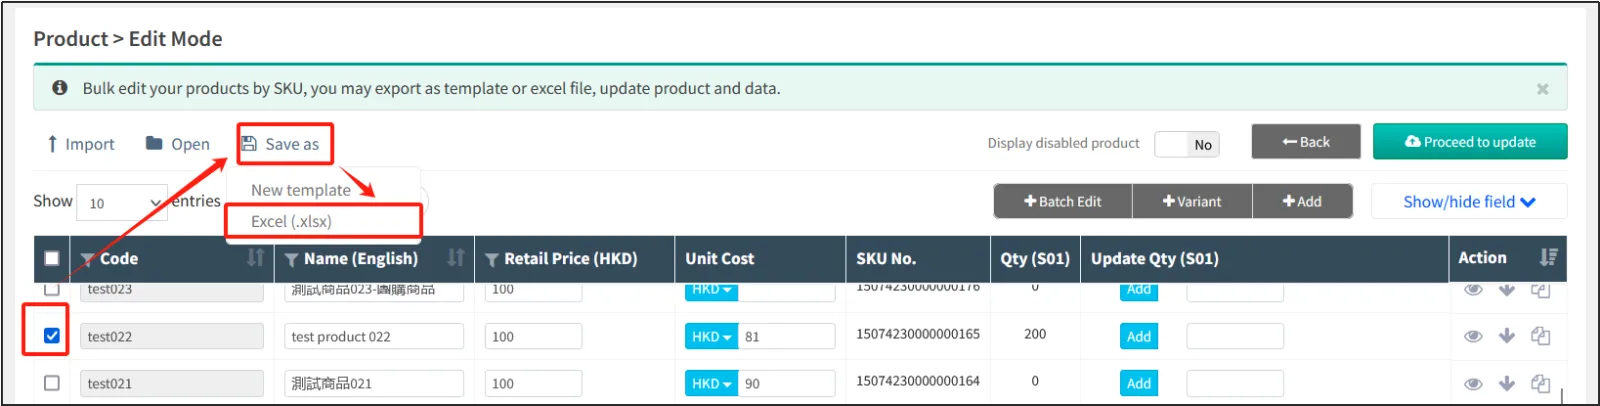
Find and select the items you want to purchaseclick [Save]click [Excel(.xlsx)] to export to Excel.
When exporting, select [Selected records] and [Export display rows only].
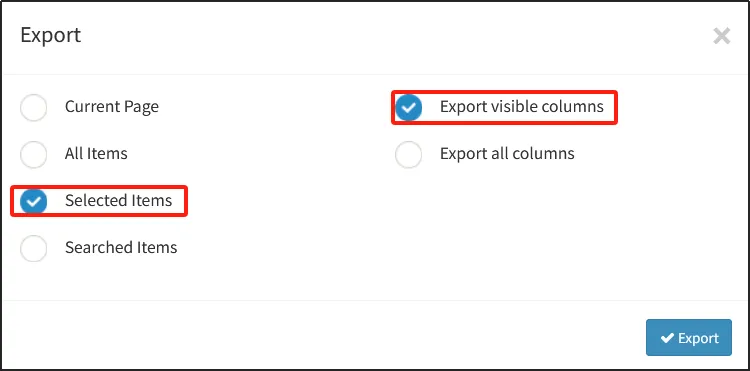
Open the exported Excel fileenter the purchase cost and inventory of the product (that is, update the inventory, that is, the quantity of the product purchased this time)save it to Excel after the input is completed.

Go back to CMSclick on the productclick on the retail productclick on [Edit Mode].
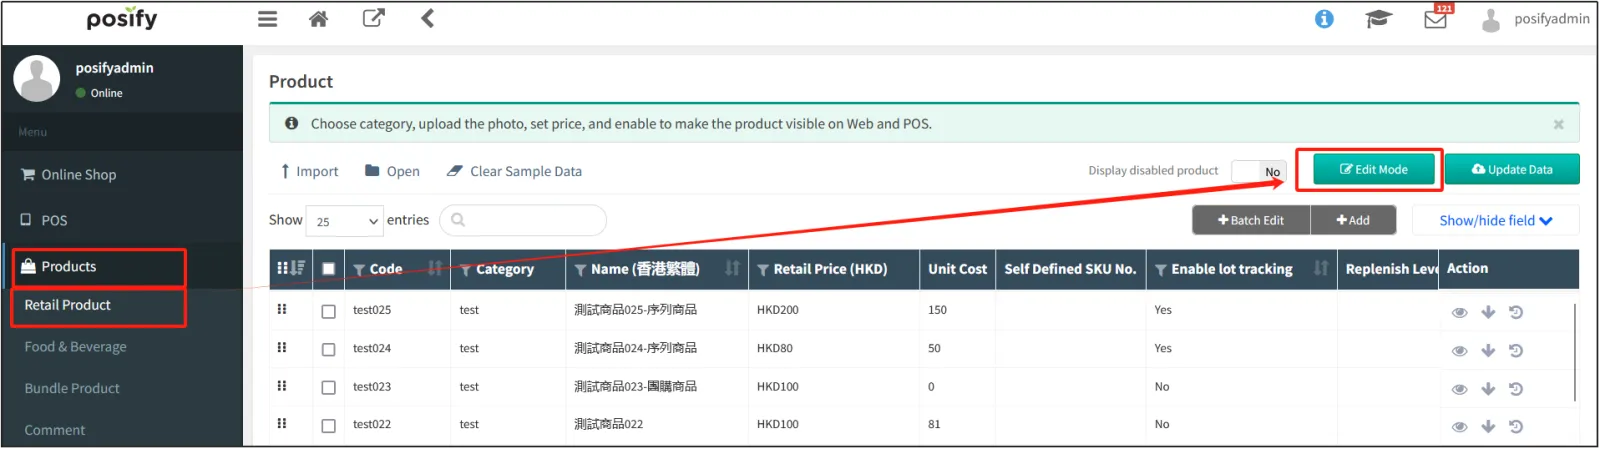
Click [Import]click [Import products]select the Excel import that you just saved.
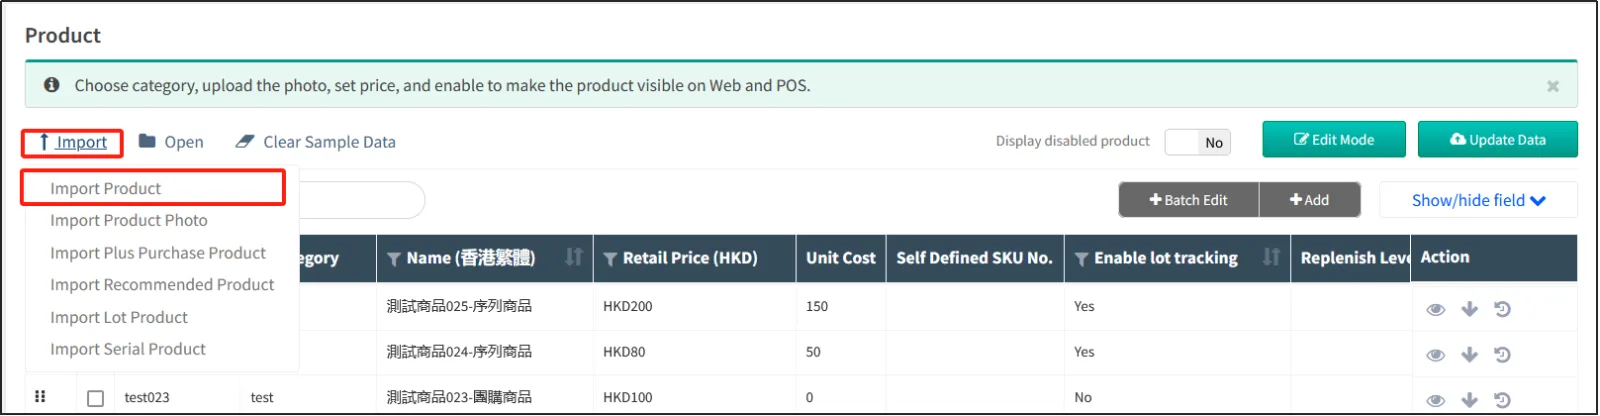
The yellow highlight indicates the information about the modification of the imported file, and after confirming that it is correct, click [Update Now] in the upper right corner.
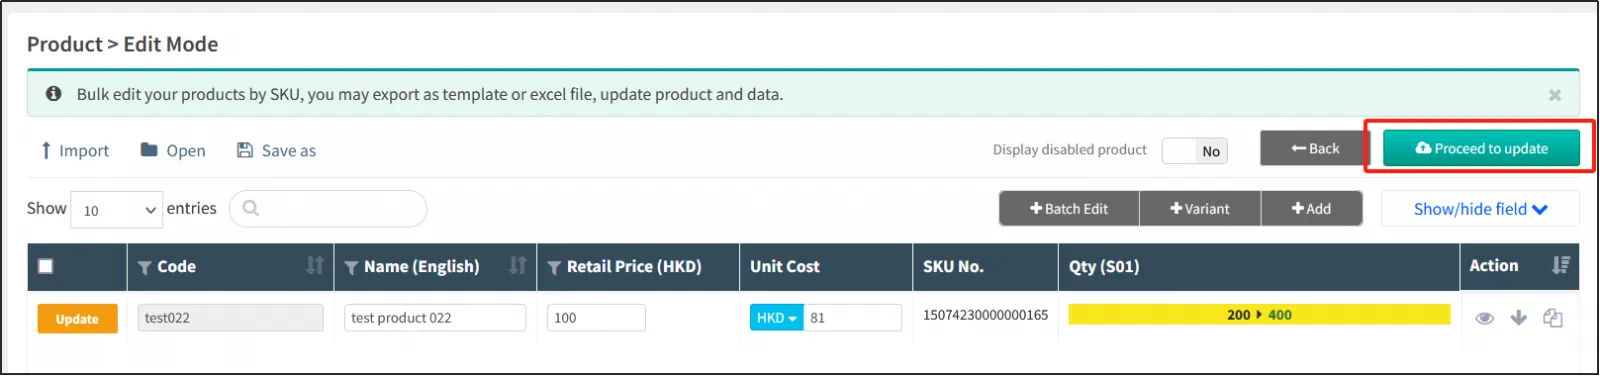
After completion, you can see that the information of the product has been successfully updated in the edit mode.
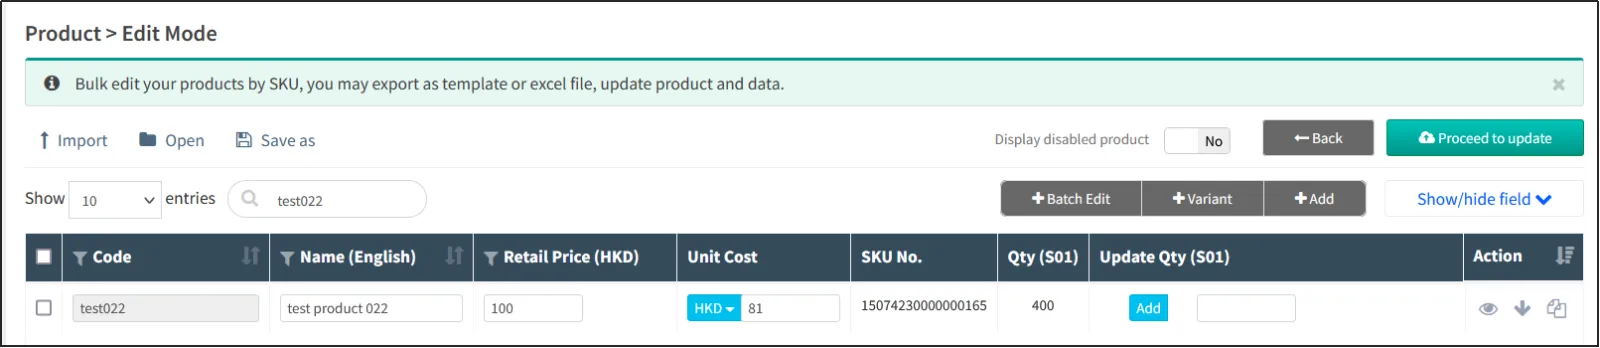
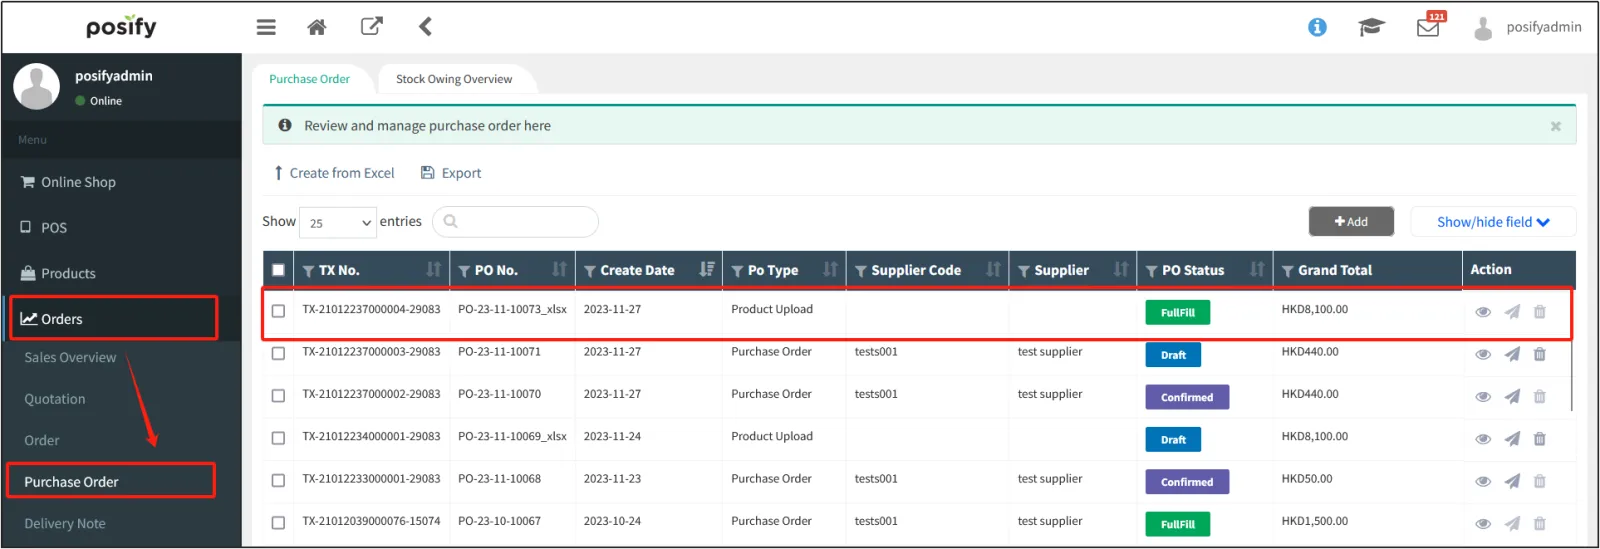
Click Orderclick Purchase, you can find the purchase record that has just updated the inventory information of the product, the purchase order type is Commodity Management Upload, and the status is Arrived.
商品采購的平均成本
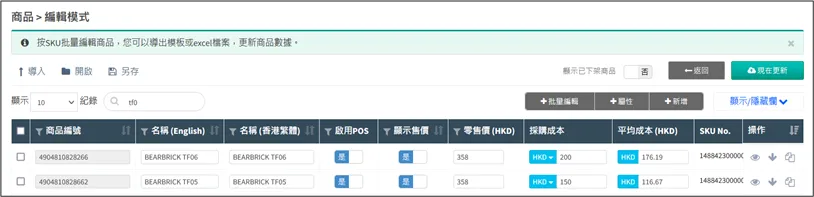
在商品-零售商品-編輯模式中,點亮[平均成本]可以看到商品采購的平均成本。
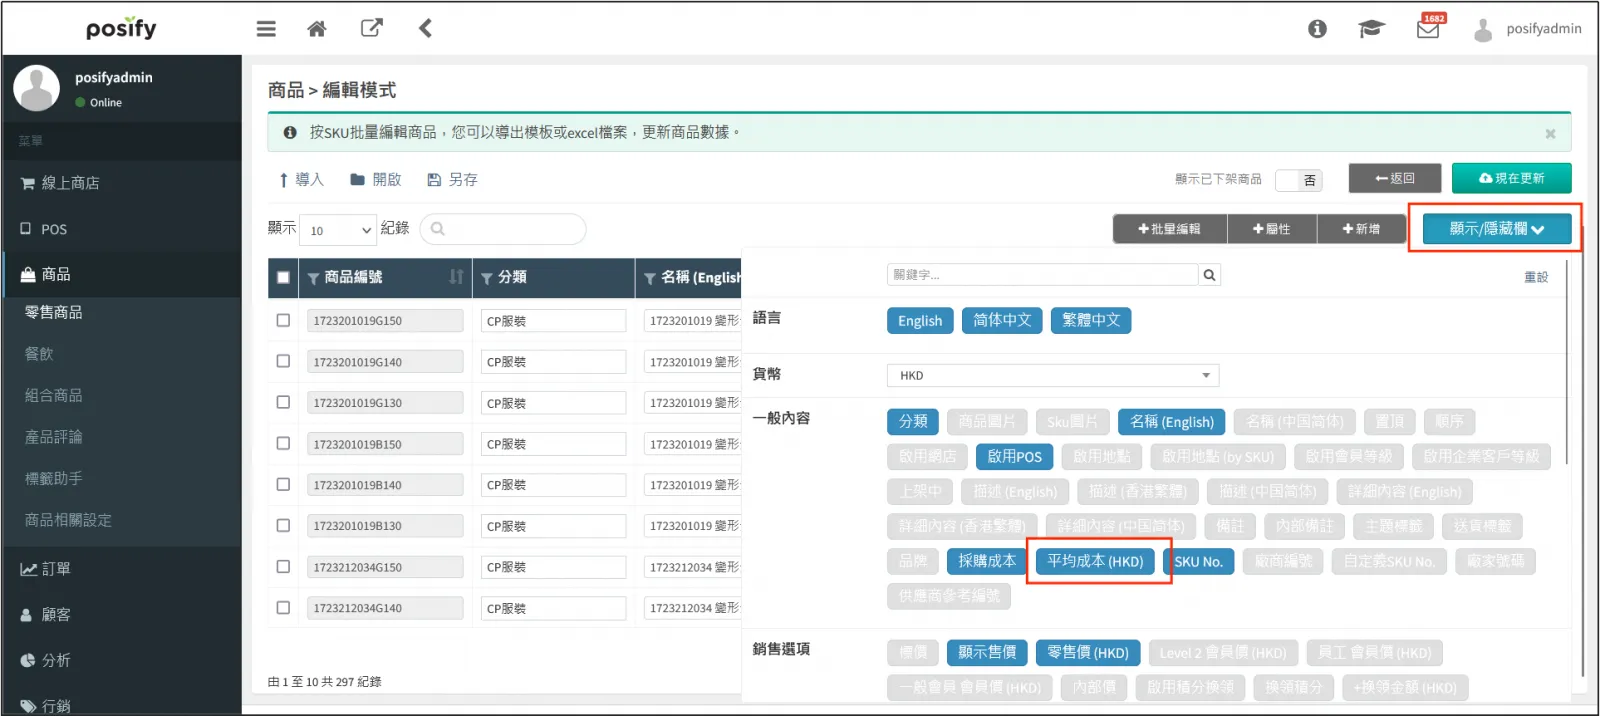
在商品編輯模式顯示的平均成本其實是通過該商品上一次采購的信息計算出的平均成本。
計算公式:當前的平均成本 =(上次采購時商品的庫存x上次采購時的平均成本+上次采購的商品數量x上次采購的采購成本)/(上次采購時的商品庫存+上次采購的商品數量)
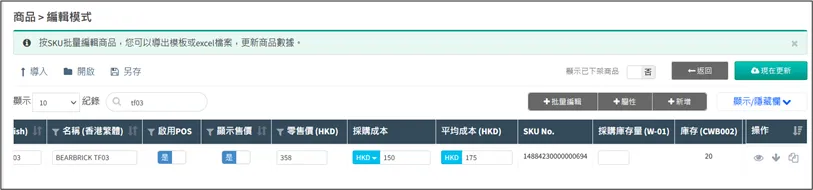
例如:此商品當前的庫存是10,平均成本是200,本次采購成本是150,本次采購數量是10。
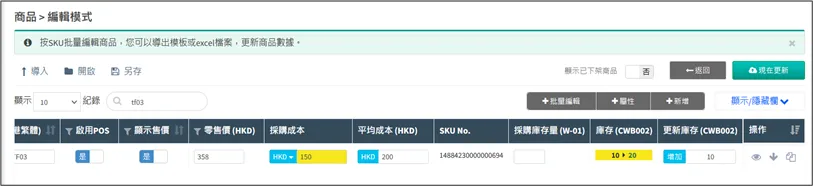
那麽采購完畢后,該商品的平均成本將會更新為(10 x 200 + 150 x 10)/(10+10)= 175。
Warehousing
After the purchased goods arrive, they need to be put into the warehouse, which can be done on both CMS and POS.
Open CMSclickin stockclick entering warehouse .
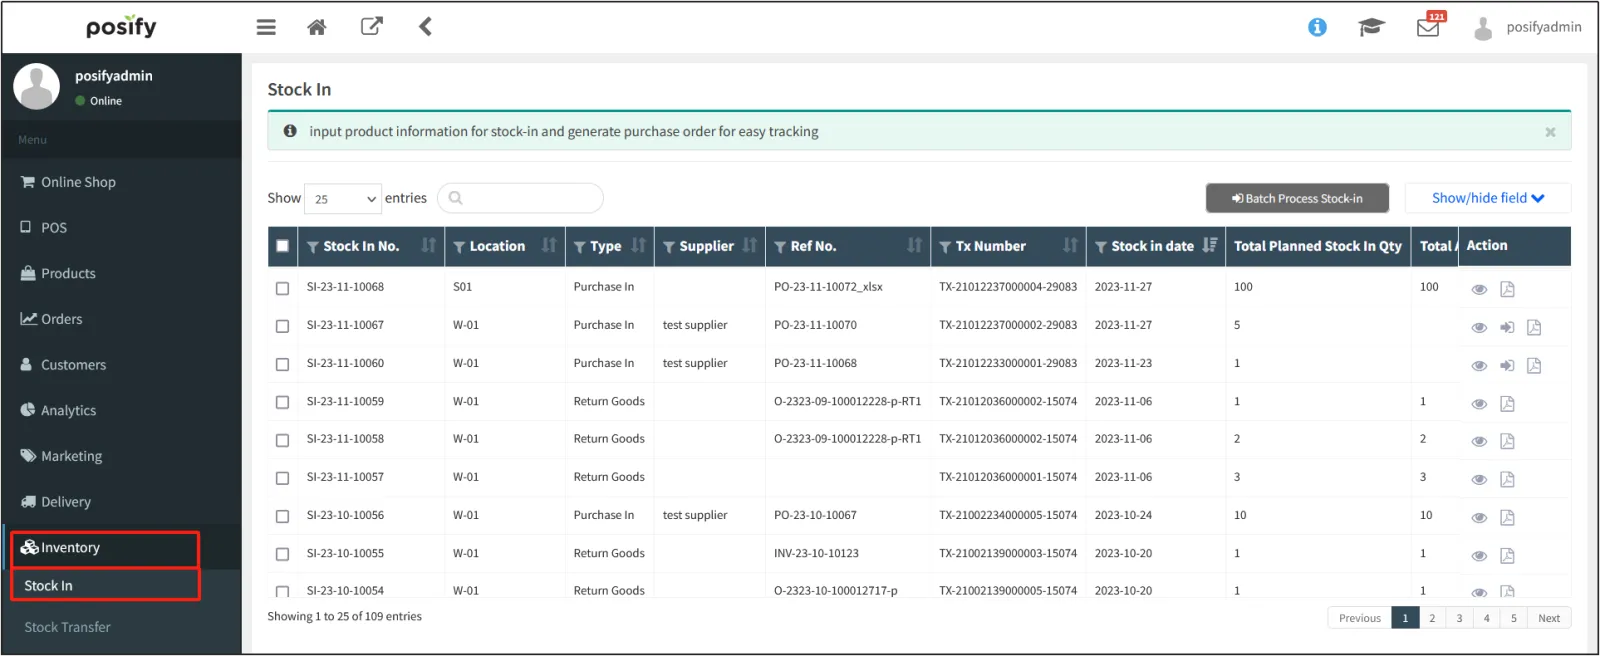
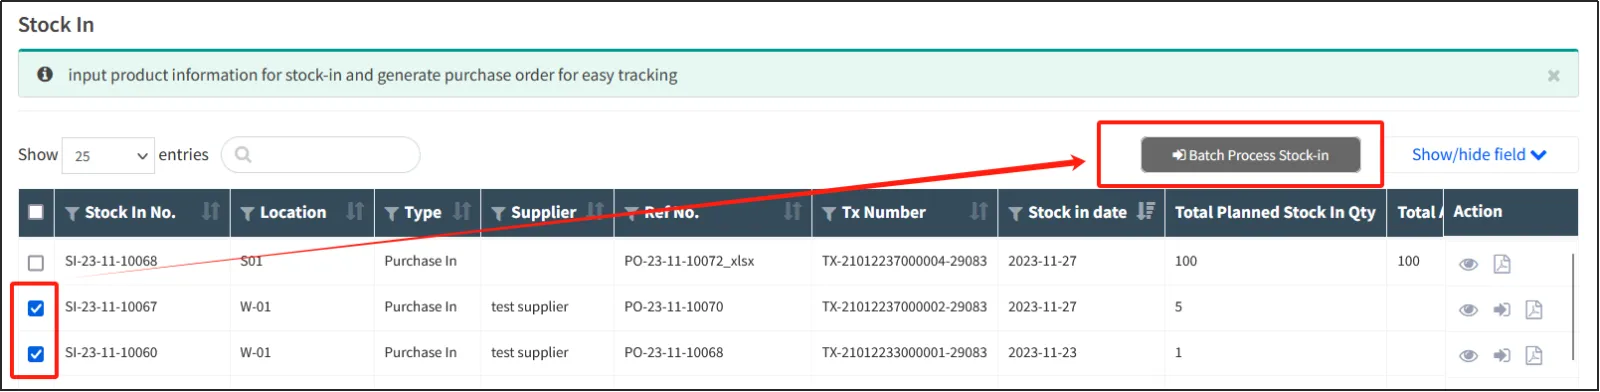
Find the purchase record corresponding to the purchase order just now through the purchase order reference number or transaction numberClick the arrow icon on the right to complete the warehouse entry.
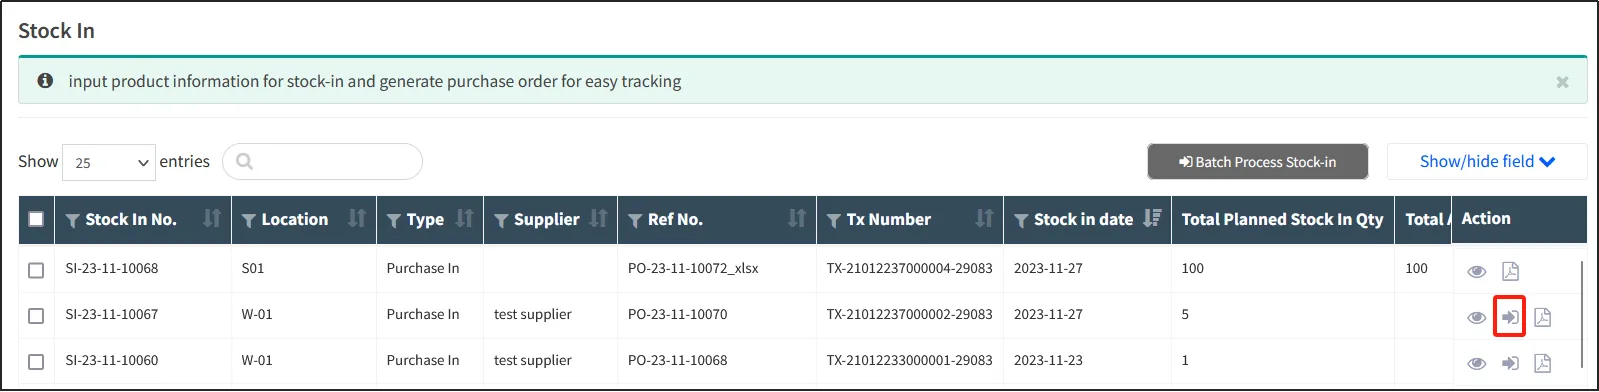
If there are multiple purchase orders to be warehoused, check all the records that need to be warehousedClick [Batch Warehouse] on the upper right.
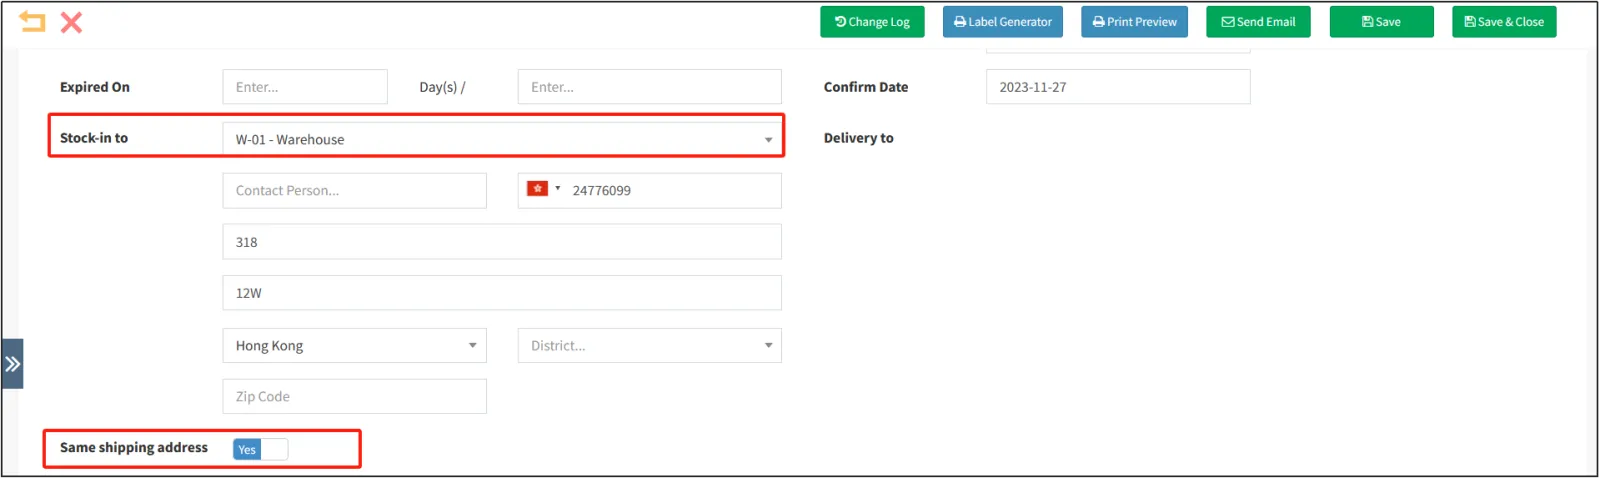
Check whether [same as delivery address] is selected in the purchase order, if yes , the place where the account is recorded is the place where the purchased goods are put into storage.
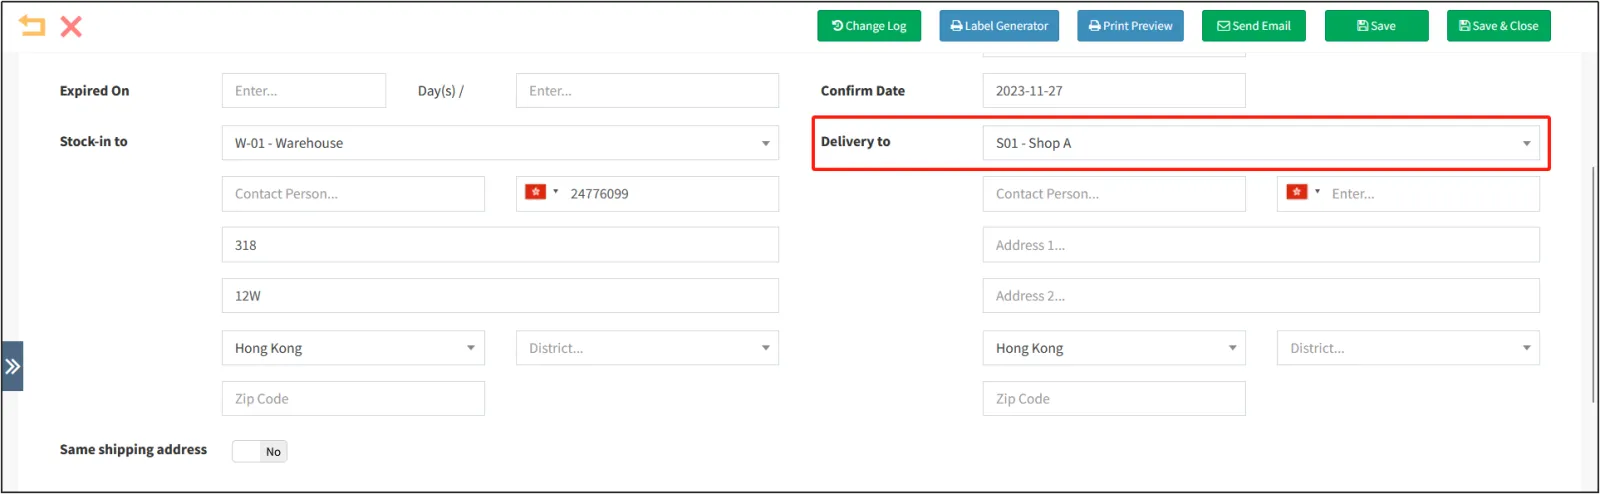
if no , the delivery to the recorded location is the location where the purchased goods are put into storage.
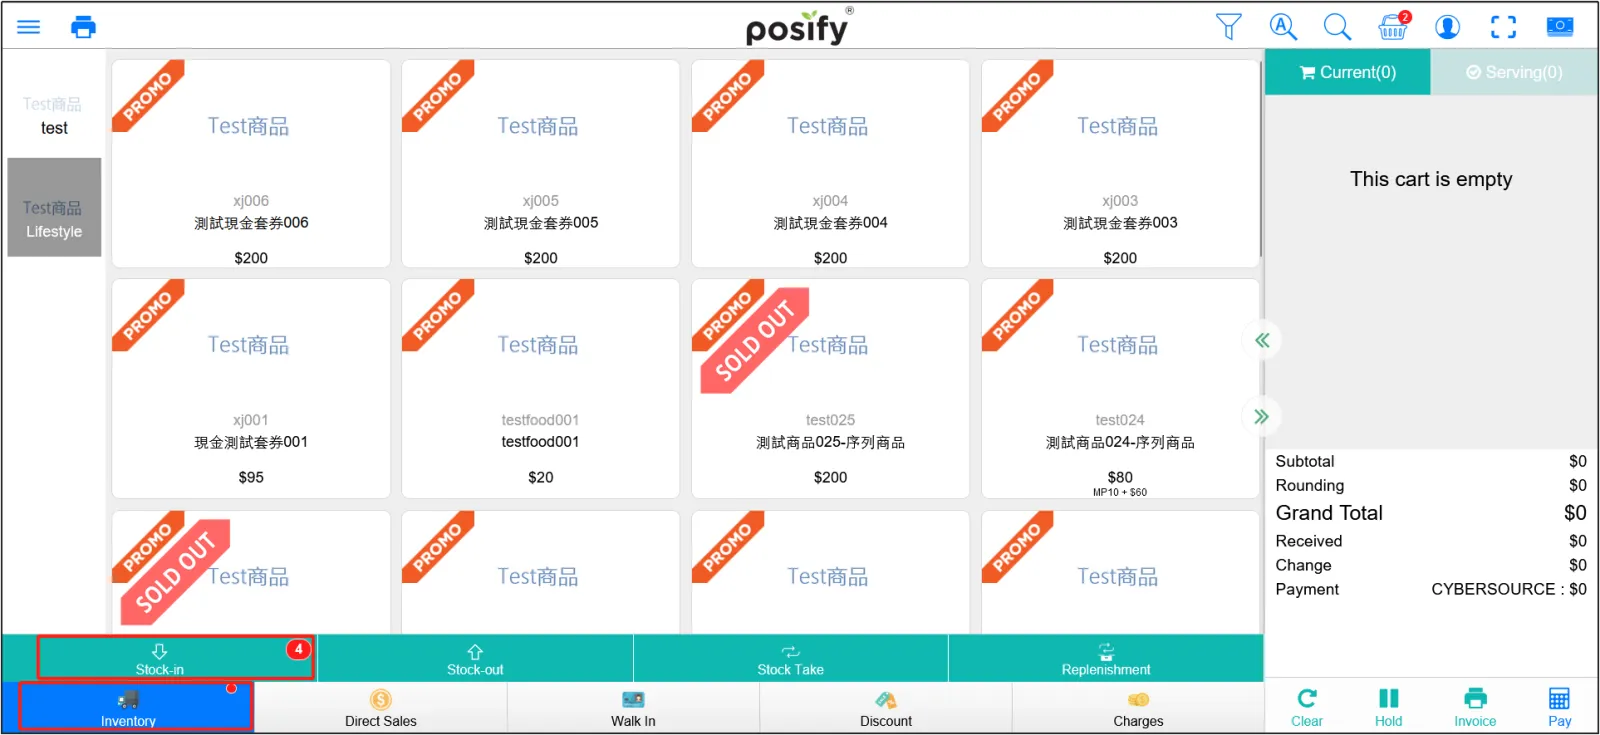
open storage location POSclick inventoryclick entering warehouse .
Click on the upper right Open the search box.
Enter the purchase order number in the search box to search for the corresponding warehousing record, click the arrow icon on the right to complete the warehousing.

Use the label assistant to print the labels of the products purchased this time
Use the label assistant to print the label of the product purchased this time, and then paste it on the product, so that the product can be added by scanning the QR code or barcode of the product label when selling or transferring goods.
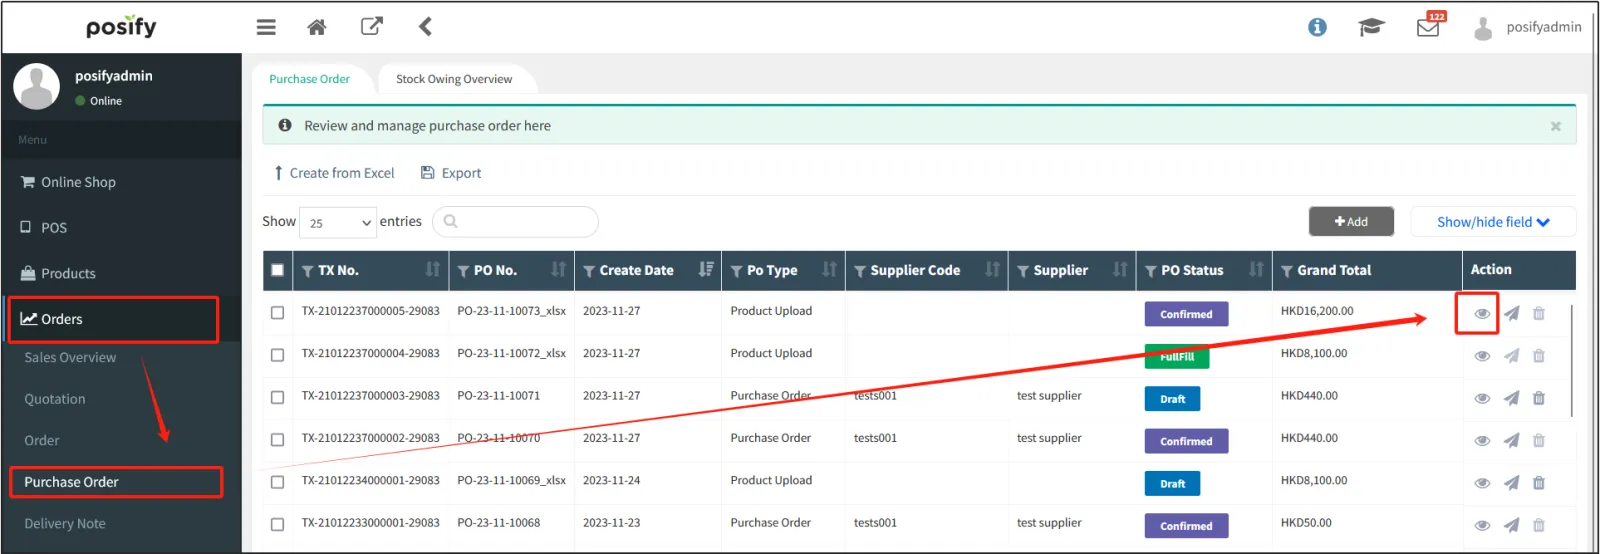
After the purchase arrives, open the CMSclick orderclick purchase , find the record corresponding to this purchasefind the record corresponding to this purchase, and click  on the right to view the details of the purchase order.
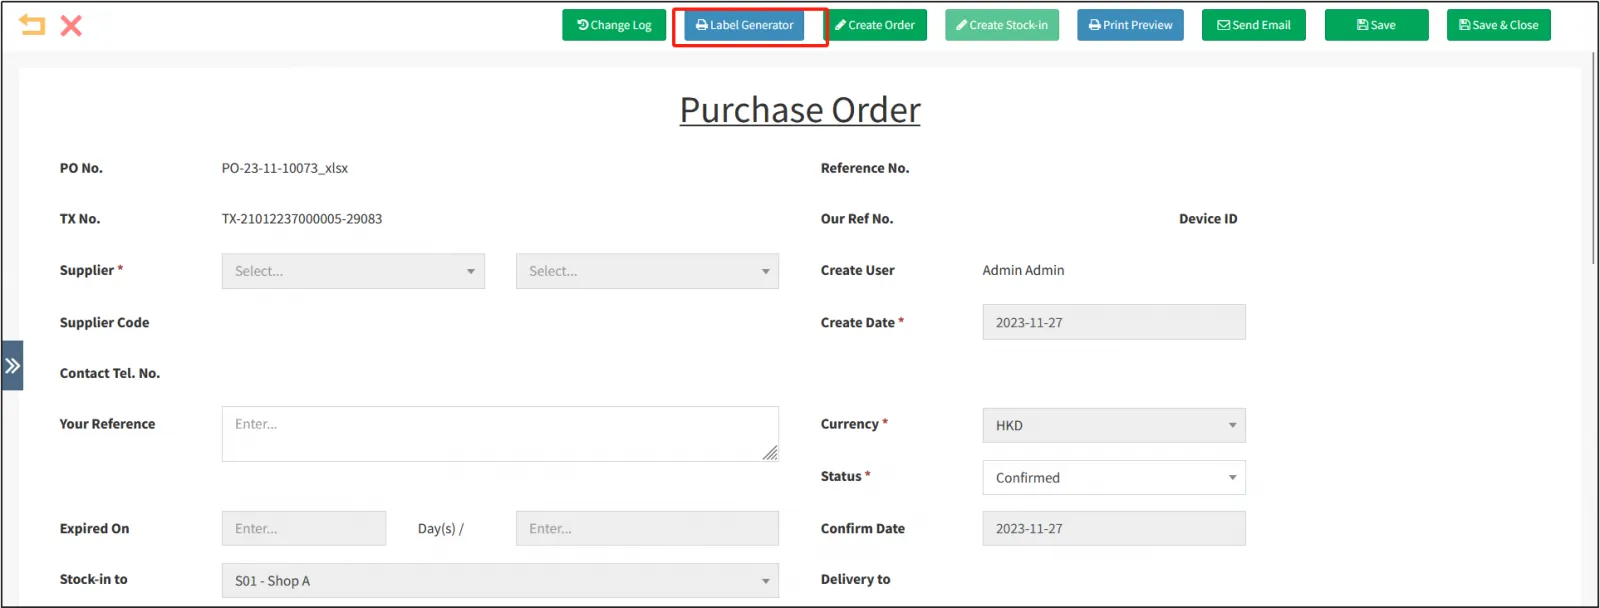
Click Label Assistant at the top of the purchase order details.
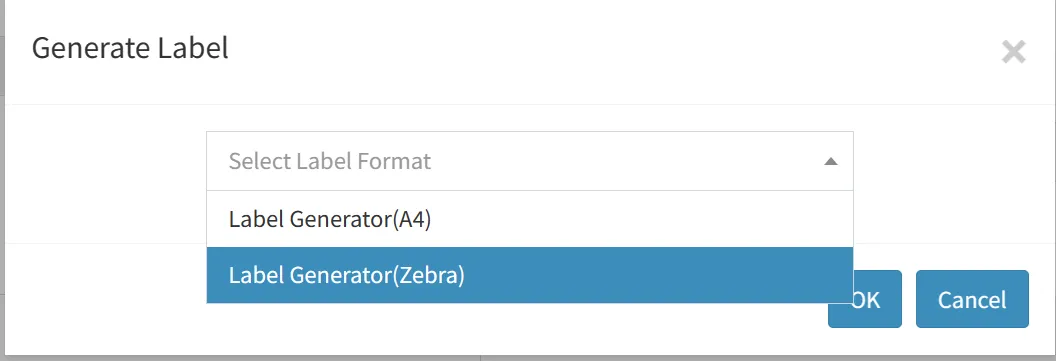
There are two options for choosing a label format: Label Assistant (A4) and Label Assistant (Zebra). 。
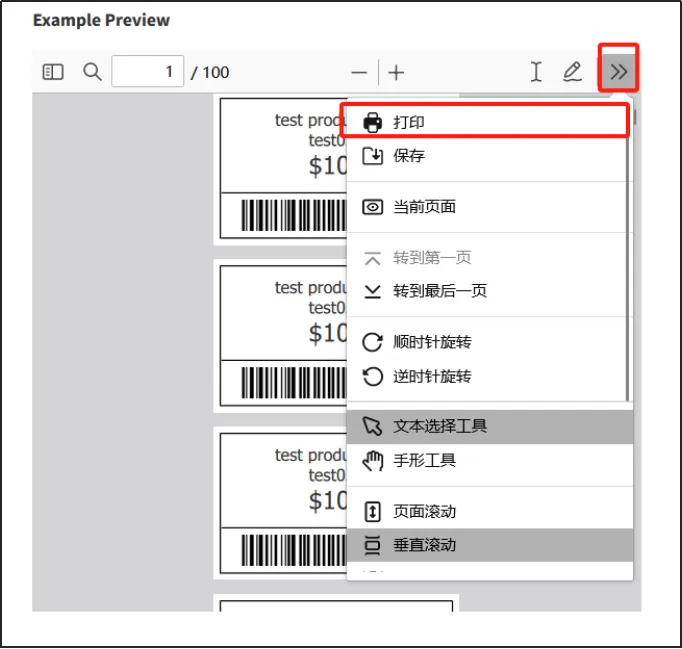
If you select Zebra, you will be automatically redirected to the Label Assistant page, where you can customize the fields displayed on the label and the font size, and click Preview to display the label of the number of items purchased in the preview box on the right.
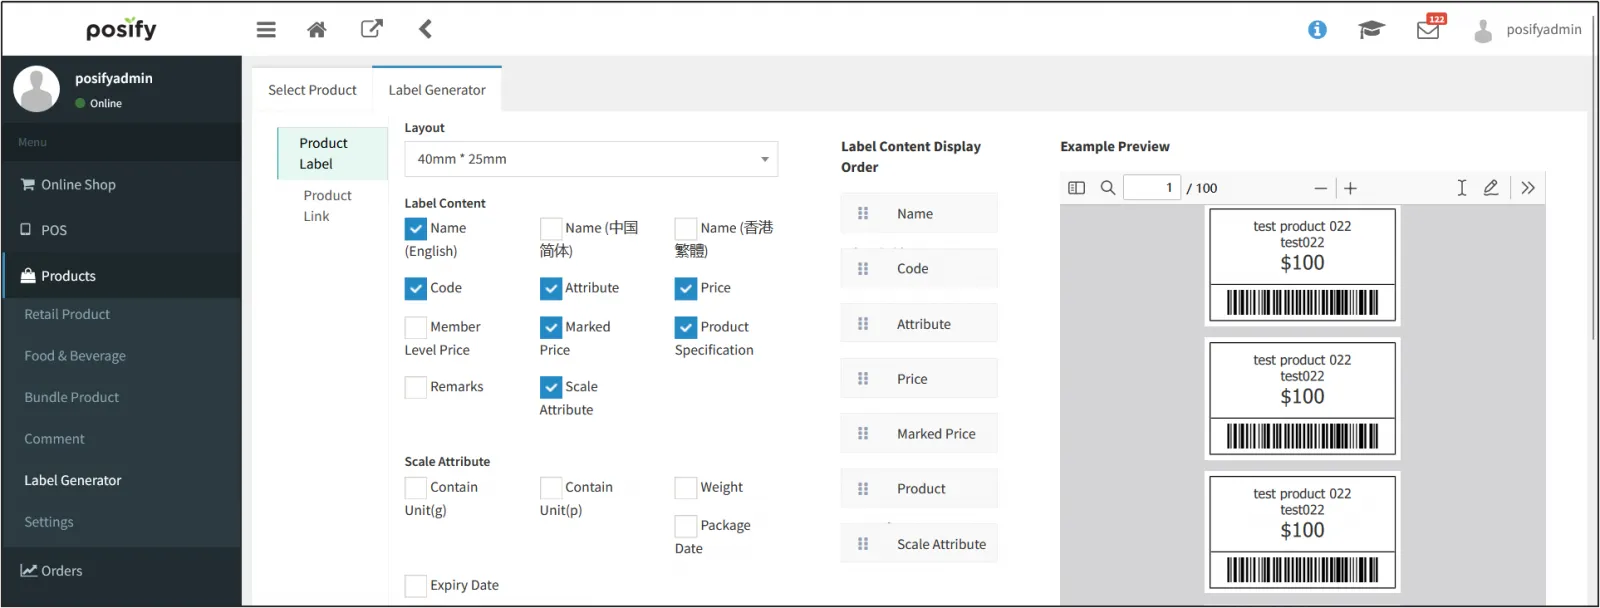
Click [>>] in the upper-right corner of the preview boxClick [Print].
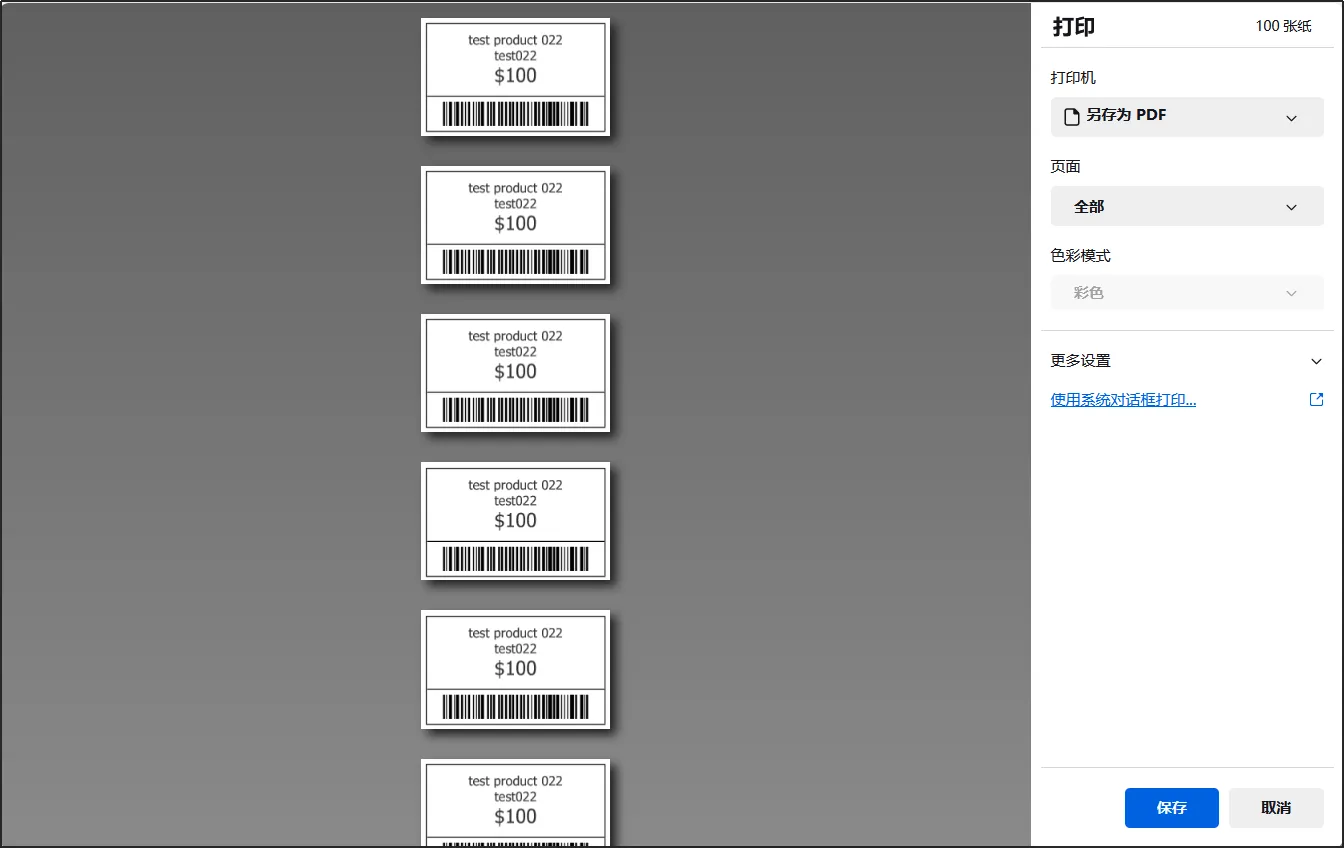
Set each parametersClick [Print].
If you select Label Assistant (A4), you will be automatically redirected to the Label Assistant page, and you can create the label corresponding to the purchase order on the right.
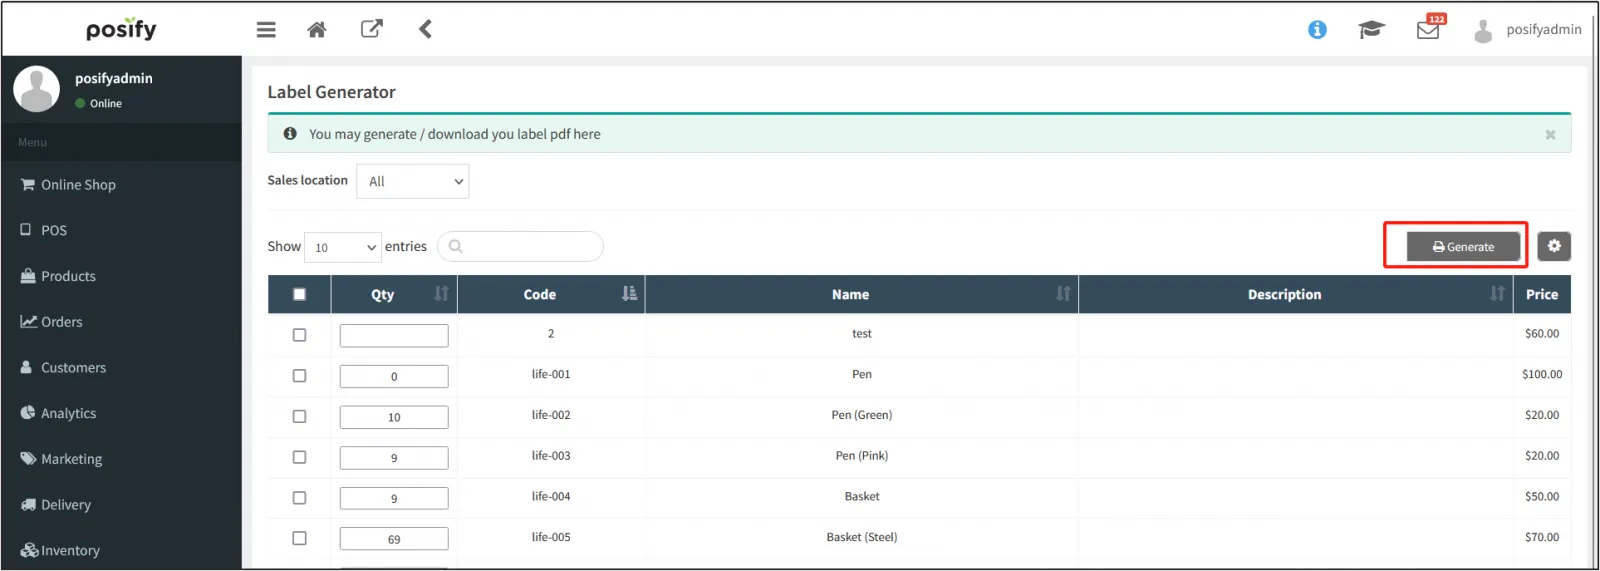
Select [Size], [Encoding Options], [Encoding Type]. Click [Create].
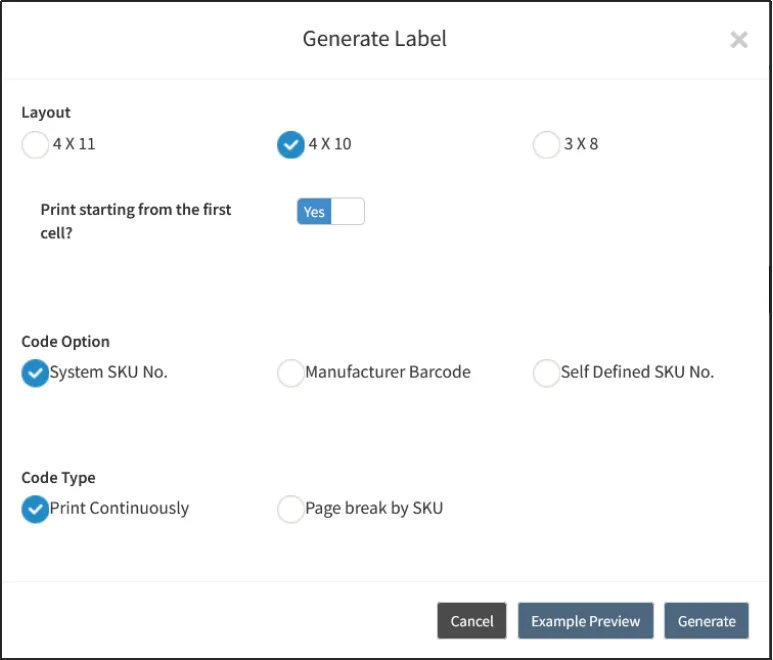
The label will be generated in a new tab.
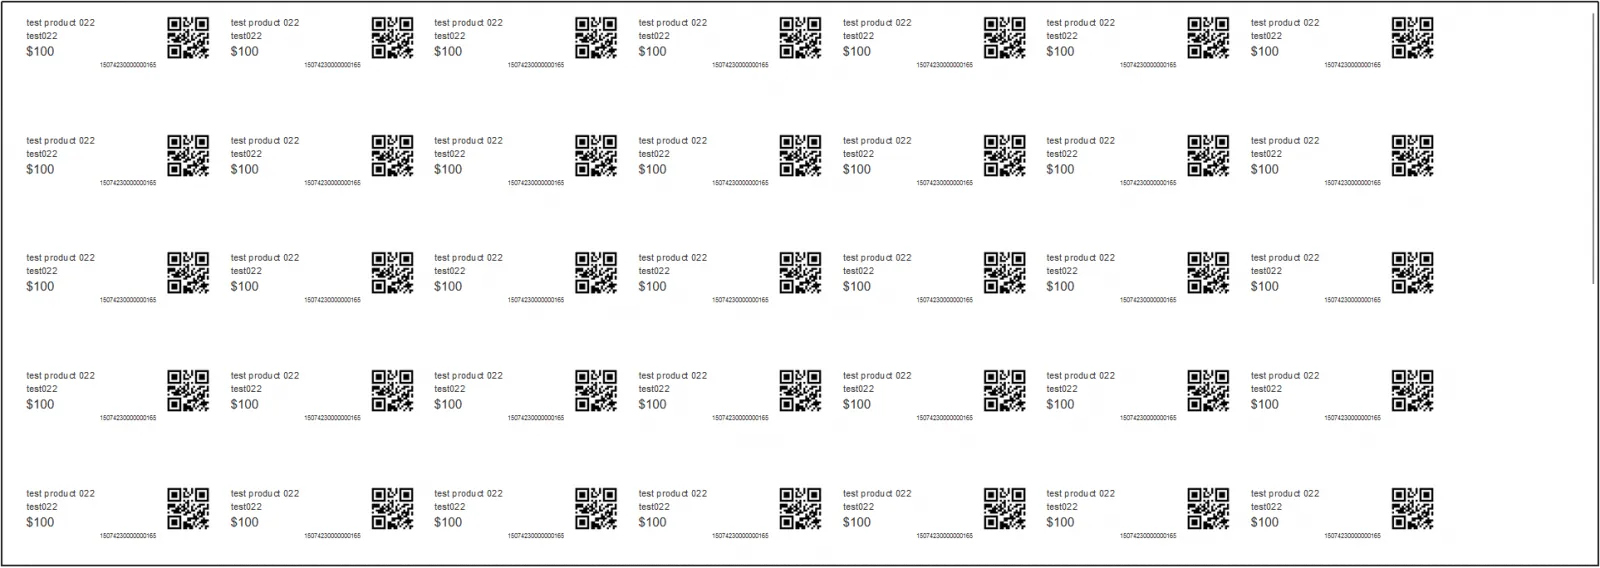
After the label is printed, apply the printed label to the newly arrived item.
print preview
Open CMSclick orderclick purchase , find the purchase record that needs to be printed as a PDF of the purchase order click to enter the details page of the purchase order.
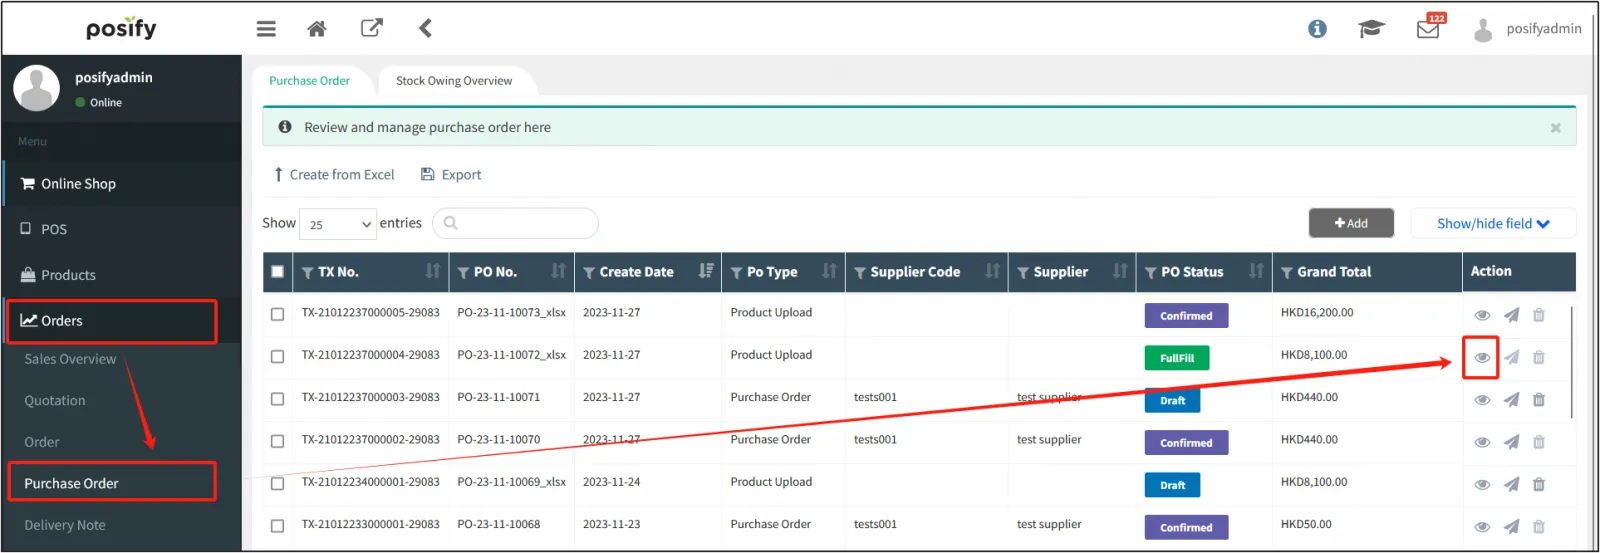
Open the purchase order details, click Print Preview at the topselect a print formatClick [OK].
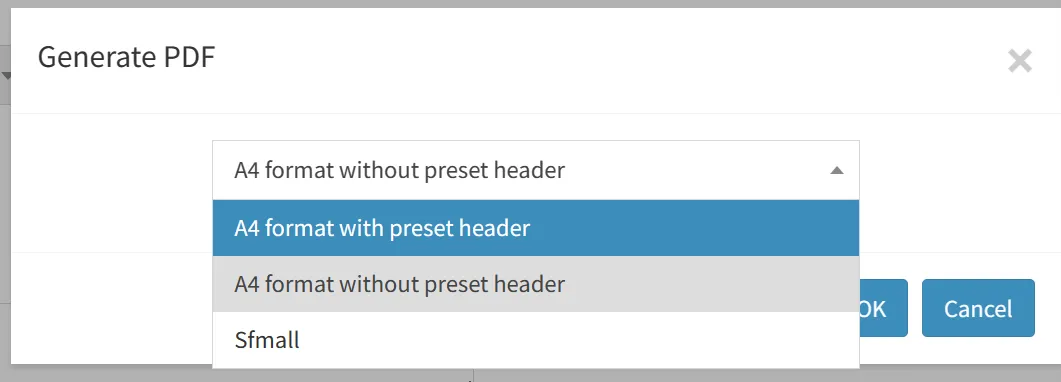
When confirmation, the generated purchase order will pops up.
If you select A4 (including the default page top), the default page top will be displayed, including the store logo and store name, and the following is the preview effect of A4 (including the default page top).
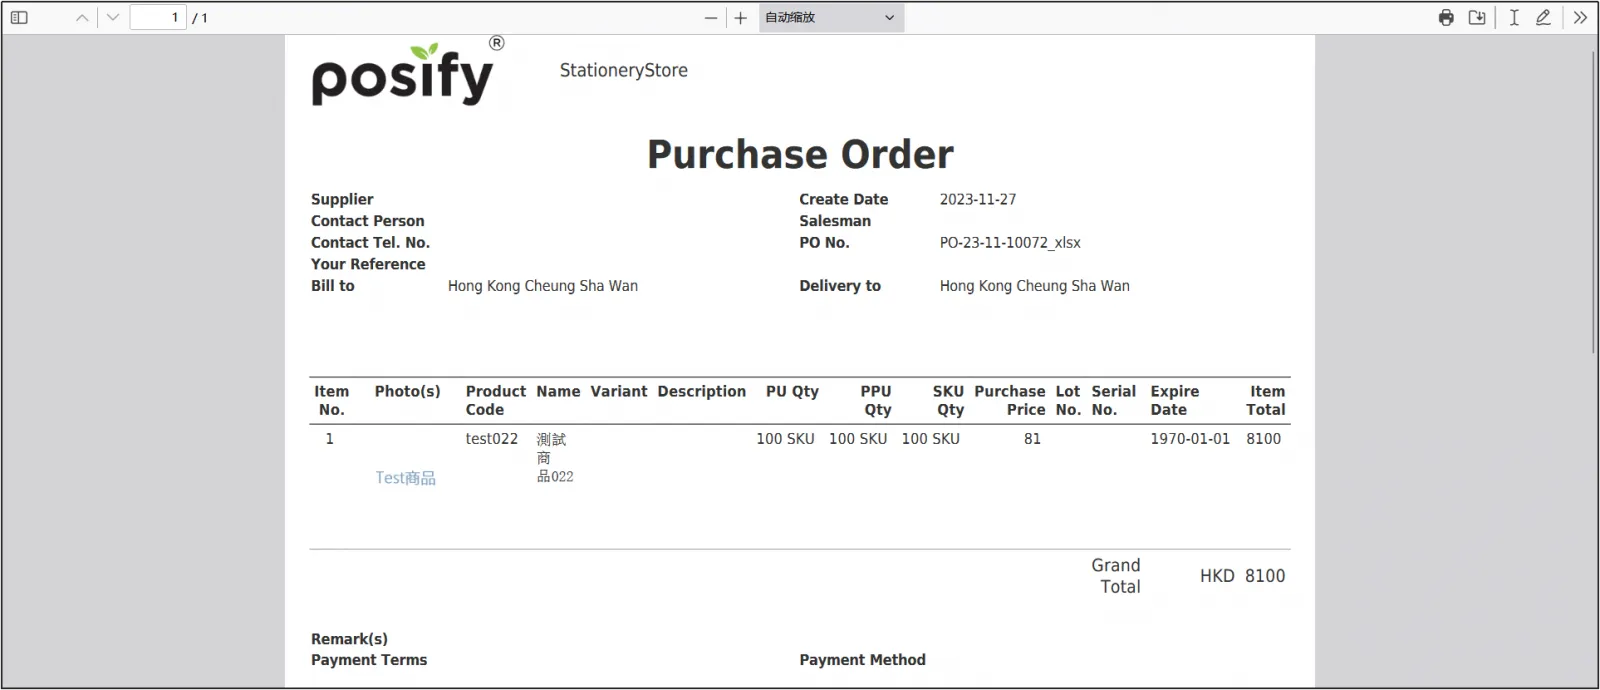
If you select A4 (without the default page top), the default page top will not be displayed, and the following is a preview of A4 (without the default page top).
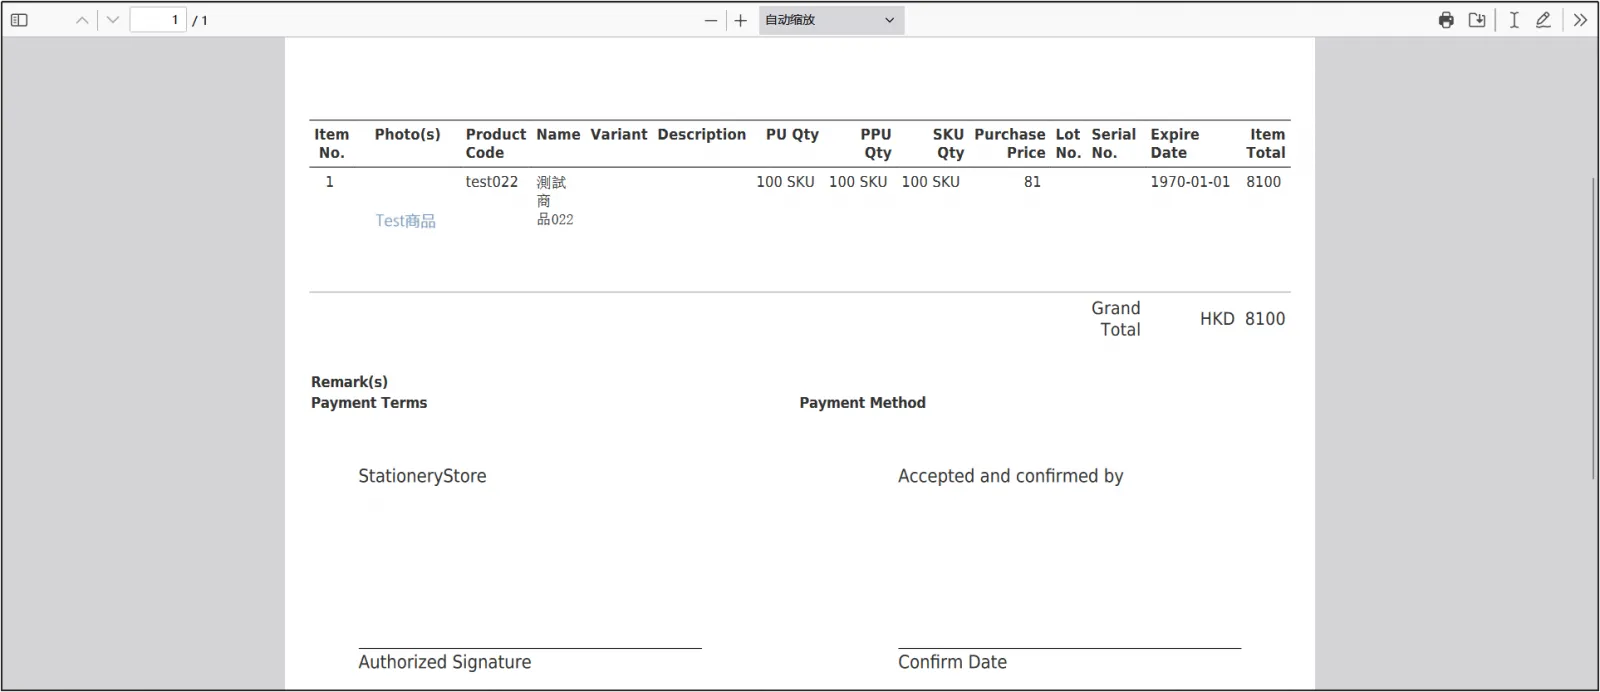
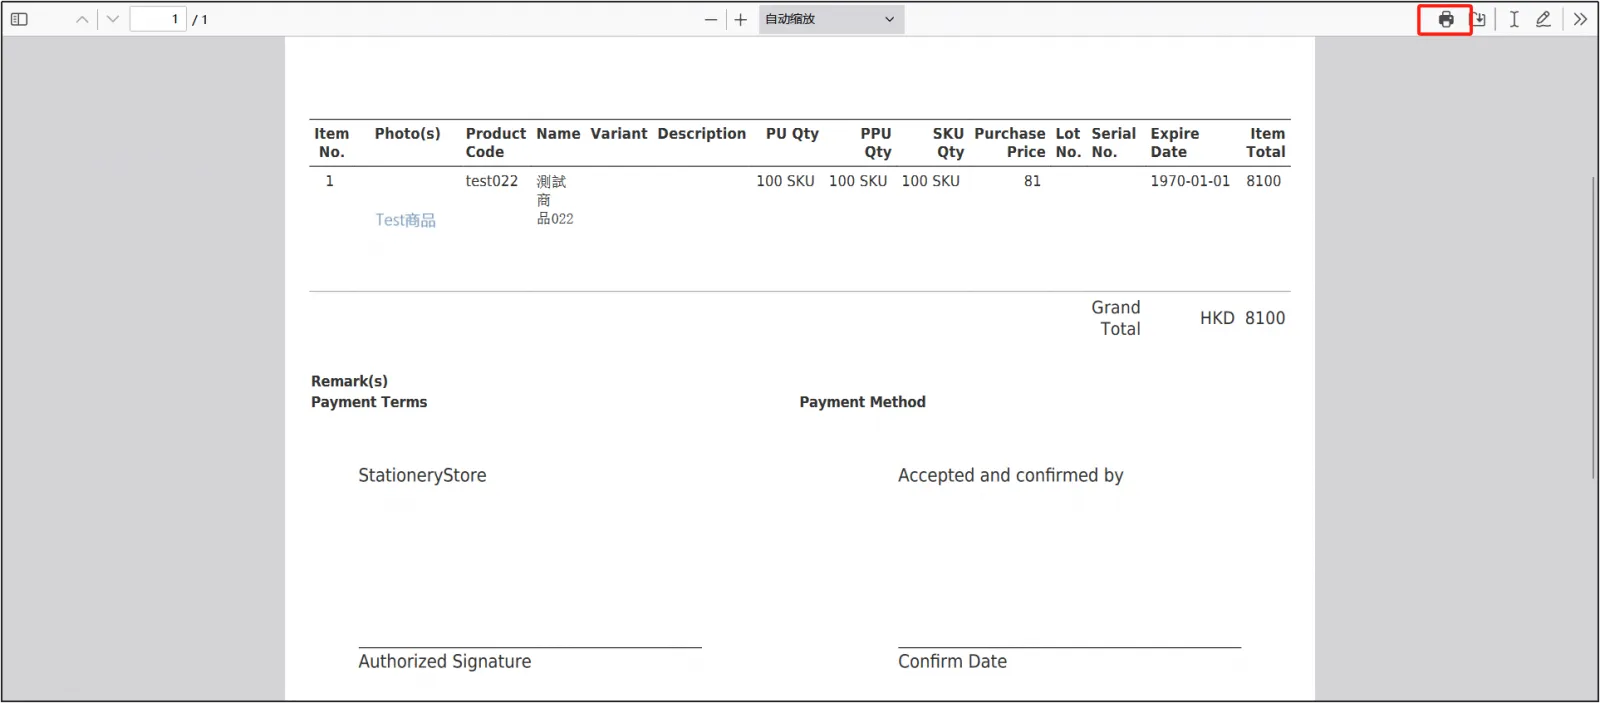
Click  in the upper right cornerset the parametersclick [Print].
Export purchase order records
Open CMSclick orderclick purchaseFind and check the purchase records that need to be exported.
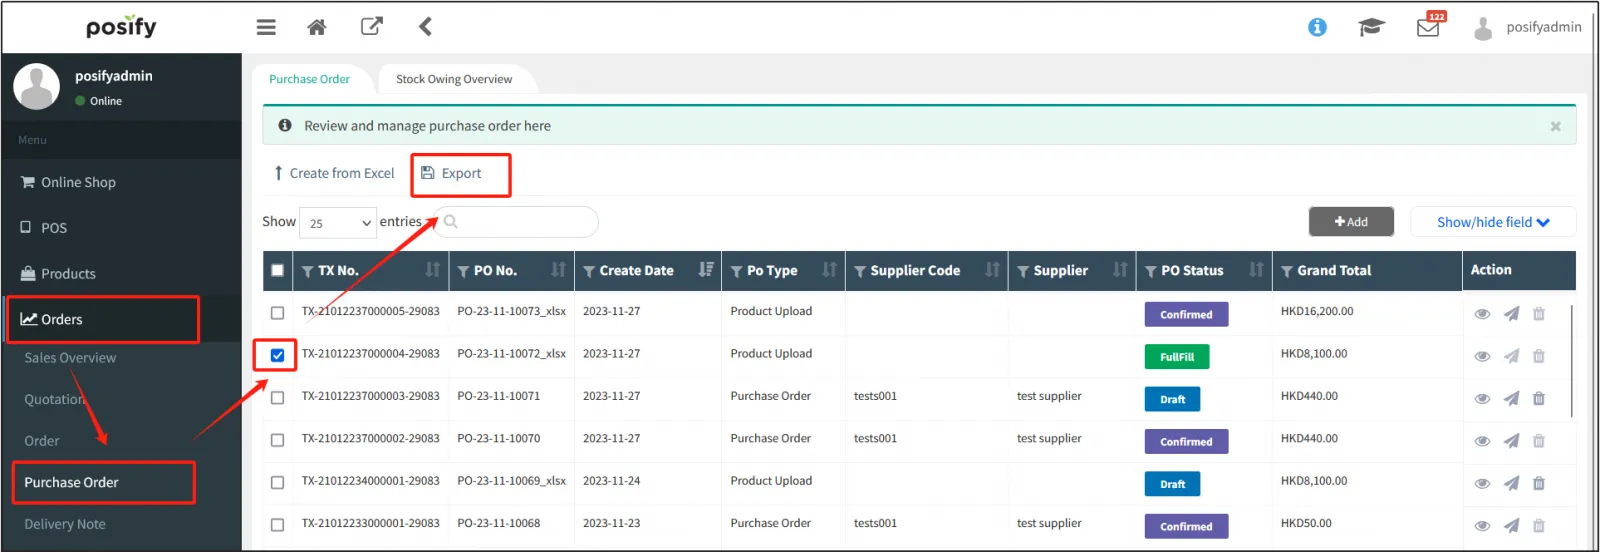
Click [Export]Click [By Transaction].
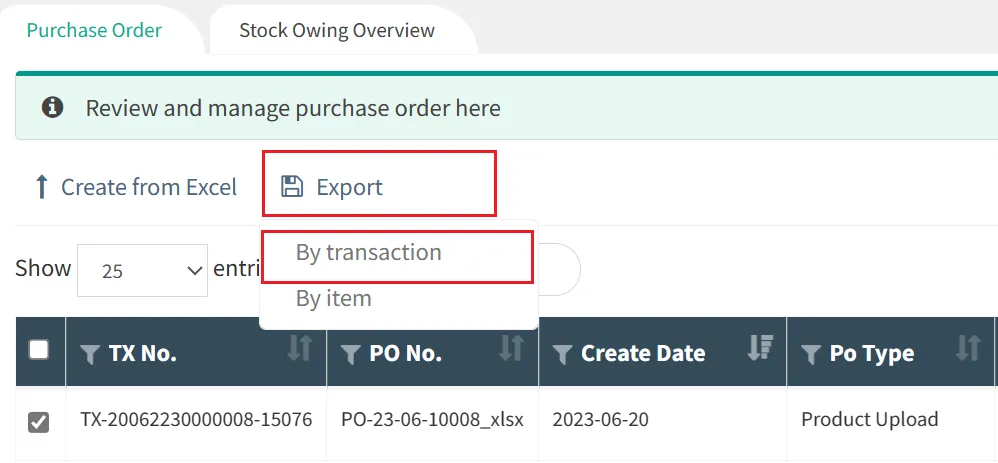
When exporting, select [Selected records] and [Export display rows only].
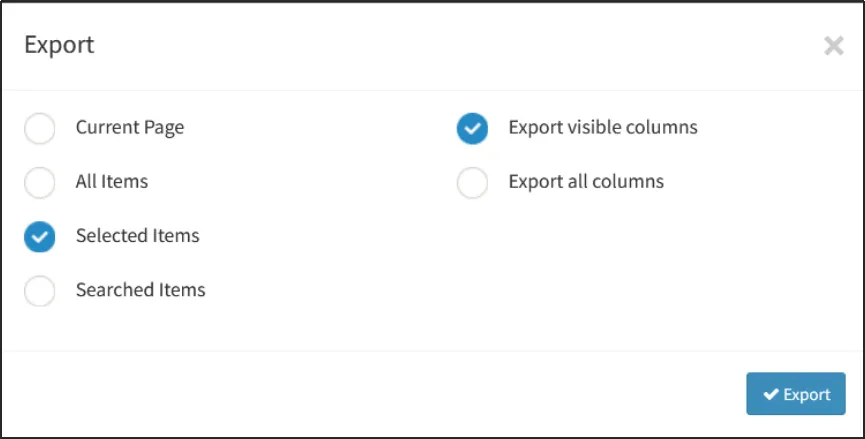
Open the exported Excel to see the exported purchase information.

Open CMSclick orderclick purchaseFind and check the purchase records that need to be exported.
Click [Export]Select [By Product]. The exported Excel table is as follows. The exported Excel table is as follows, and the information on purchased products is displayed in addition to transaction information compared to by transaction.

Delete Purchase Records
Open CMSclick orderclick purchaseFind the purchase record you want to deleteClick  on the right.
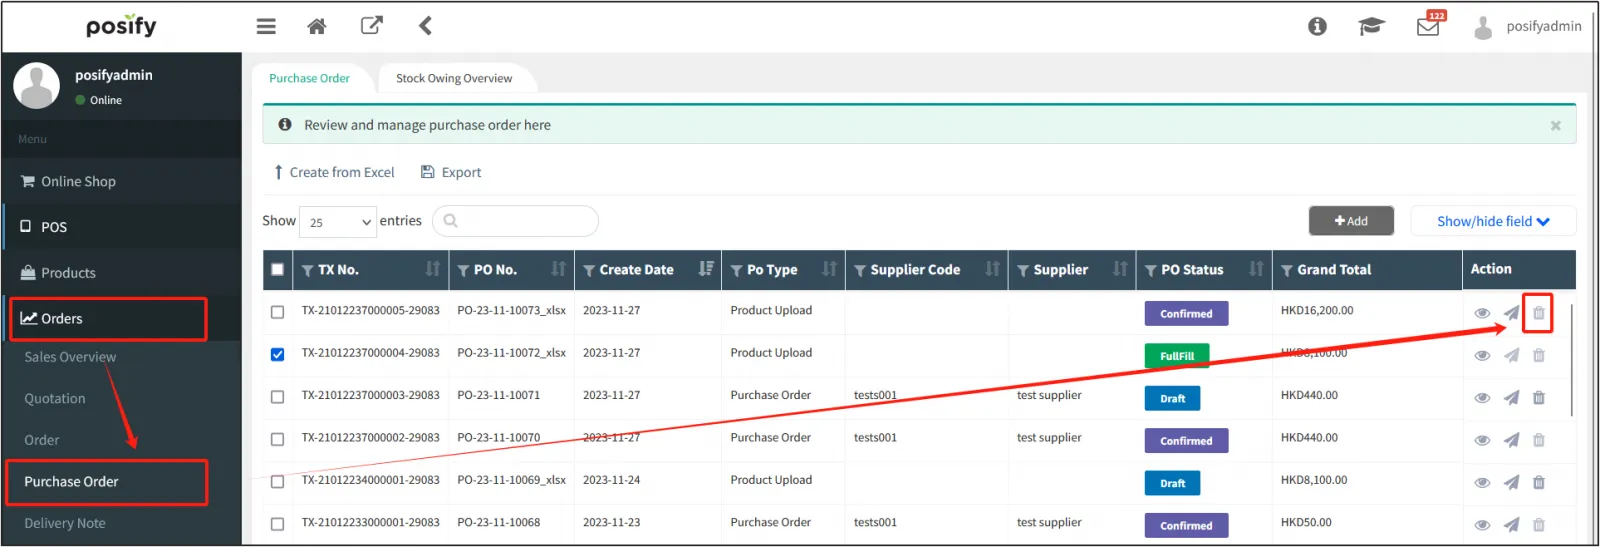
remark:
Only purchase orders that have a Draft status can be deleted, and no purchase orders in other orders statuses can be deleted.